Introduction
Is there anything more mesmerizing than a pattern you can eat? I still remember the first time I saw a batch of checkerboard cookies recipe sitting on a bakery counter in downtown Austin. I must have been about seven years old. I stood on my tiptoes, nose pressed against the glass, trying to figure out the engineering marvel behind those perfect little squares. How did they get the chocolate inside the vanilla? Was it magic? It certainly tasted like it. Fast forward a few decades, and now I’m the one in the kitchen, apron on, with flour on my nose, trying to recreate that same magic for my own kids, Adams and Jana.
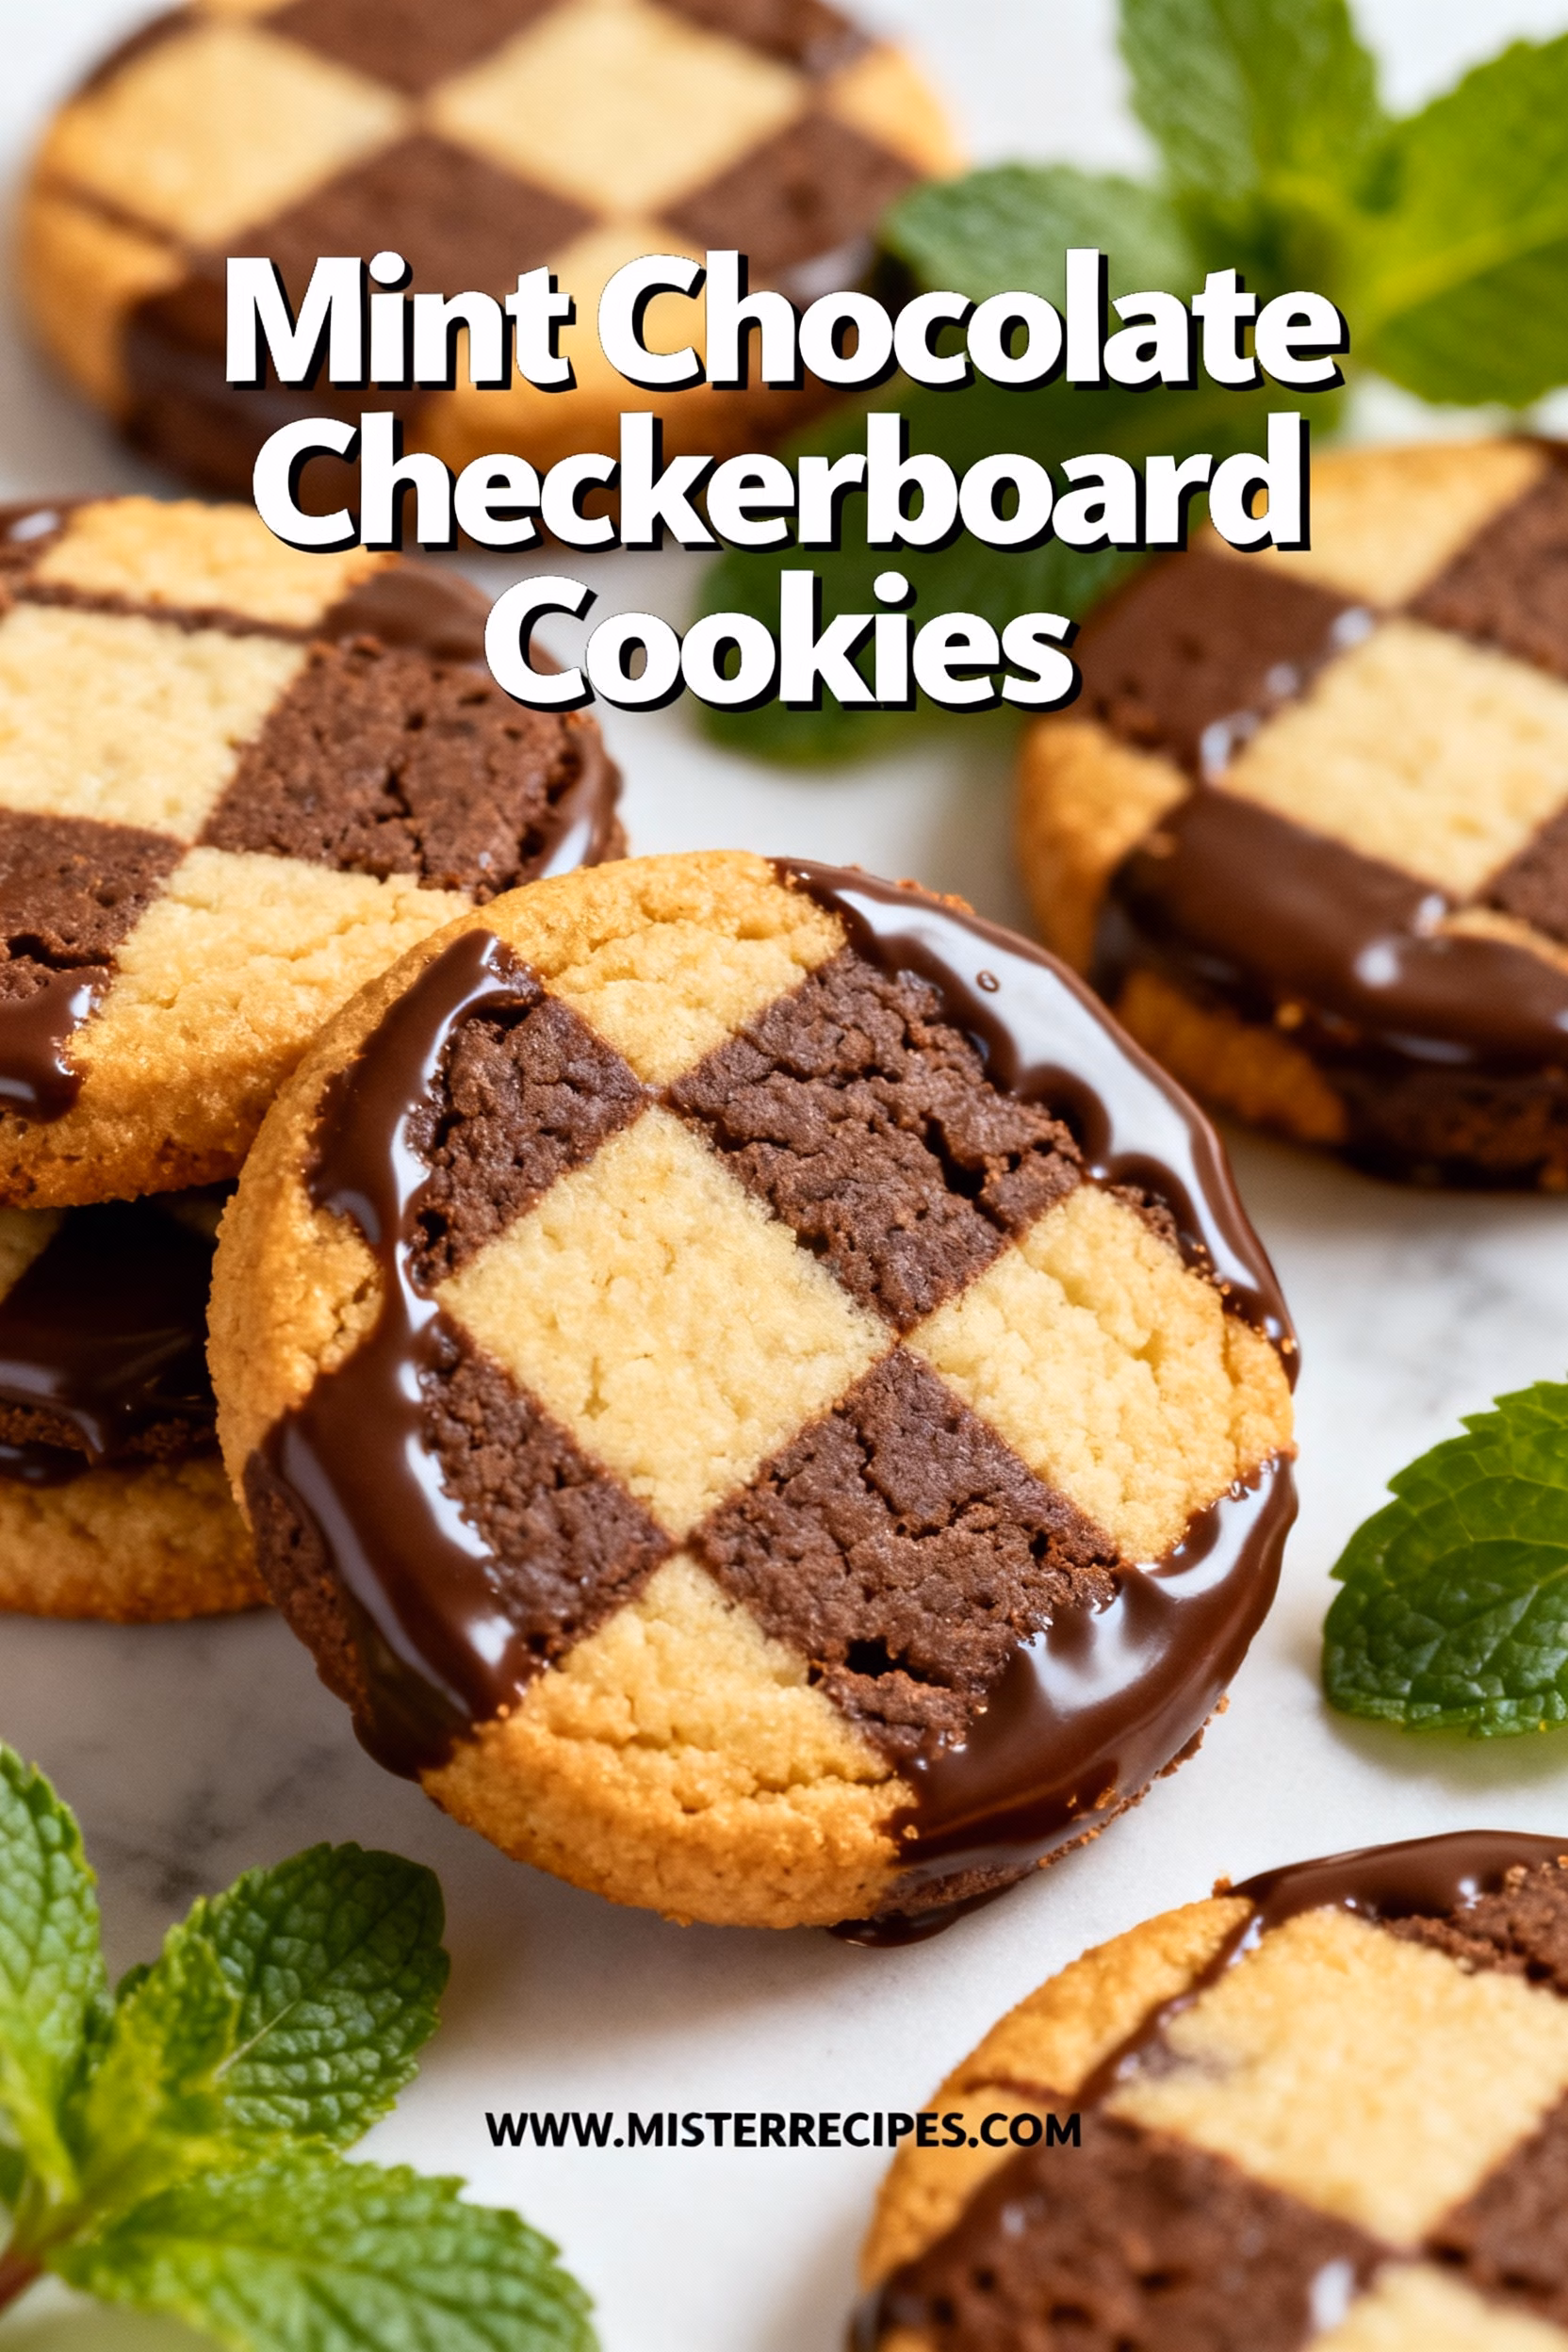
Cooking isn’t just about food; it’s about making people happy. And let me tell you, few things make folks respect your baking game quite like setting down a platter of perfectly geometric Mint Chocolate Checkerboard Cookies. While they look incredibly technical like something you’d see on a competitive baking show they are deceptively simple once you understand the technique. It’s just a matter of stacking, slicing, and a little bit of patience. These cookies combine the rich, deep flavor of chocolate with the refreshing bite of peppermint, making them the ultimate holiday cookies. Whenever I make these, the smell of cocoa and peppermint wafts through the house, and suddenly, it feels like Christmas, no matter what the calendar says.
Why You’ll Love This Mint Chocolate Checkerboard Cookies Recipe
If you have been following my baking adventures here at MisterRecipes, you know I am all about recipes that deliver maximum impact with manageable effort. These peppermint checkerboard cookies fit that description perfectly. Here is why this recipe has become a staple in the Sharif household:
- Visual Wow Factor: There is something deeply satisfying about the contrast between the dark chocolate and the vibrant green mint dough. These are true two-tone cookies that instantly upgrade any holiday cookie exchange platter. They look professional, and you get all the bragging rights.
- Nostalgic Flavor Combination: Mint and chocolate is a timeless duo. It reminds me of thin mints or peppermint patties, but wrapped up in a buttery, tender shortbread texture. If you are a fan of this combo, you should also check out my Andes Mint Chocolate Cookies Recipe for another variation on this theme.
- Make-Ahead Friendly: One of the secrets to stress-free holiday baking is finding recipes where the dough needs to chill. You can make the dough blocks for these Christmas checkerboard cookies days in advance, keep them in the fridge (or freezer), and just slice and bake when guests arrive.
- A Fun Family Project: While the slicing requires a steady hand, the dough making and assembly is like playing with edible building blocks. Jana loves helping me stack the strips of dough to create the pattern. It’s a great way to get kids involved in the kitchen, teaching them gently about geometry while we bake.
- Versatile Texture: These aren’t rock-hard biscuits. They crumble delicately in your mouth, similar to a spritz or a shortbread. Speaking of spritz, if you enjoy buttery textures, you might also love my Easy Christmas Spritz Butter Cookies Recipe.
Ingredients for Mint Chocolate Checkerboard Cookies
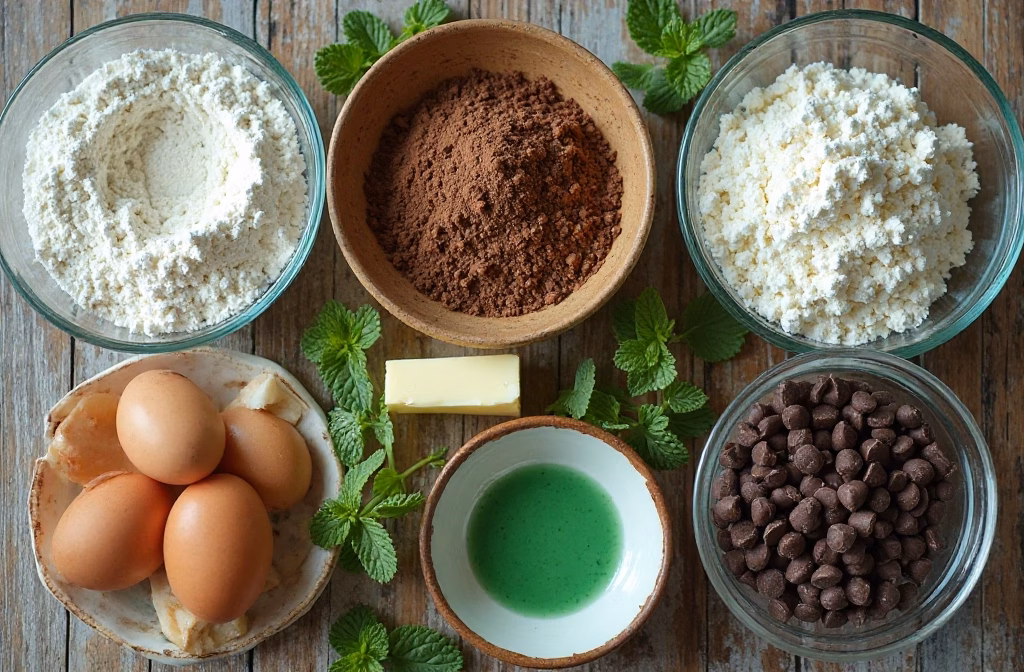
To make the best checkerboard cookie recipe, you need to start with the right foundation. We are essentially making two doughs from one base batch. Here is what you need to grab from your pantry:
- Unsalted Butter: You want this softened to room temperature. It gives us complete control over the salt content and ensures a creamy, tender crumb.
- Granulated Sugar: Provides the sweetness and helps the cookies spread just enough without losing their shape.
- Large Eggs: Acts as the binder. Make sure they are at room temperature so they emulsify properly with the butter.
- Vanilla Extract: The background flavor note that rounds everything out.
- All-Purpose Flour: The structure of the cookie. Measure this carefully (spoon and level method) so the dough isn’t too dry.
- Baking Powder & Salt: Just a pinch of each for lift and flavor balance.
- Dutch-Processed Cocoa Powder: This is crucial for the chocolate half. It provides a darker color and a smoother, less acidic flavor than natural cocoa.
- Peppermint Extract: For the mint half. Be careful not to overdo it; peppermint is potent!
- Green Gel Food Coloring: I prefer gel over liquid because it doesn’t alter the dough consistency. A few drops give that festive green hue.
How to Make Mint Chocolate Checkerboard Cookies
Step-by-Step Instructions
Ready to bake? Tie on that apron! We are going to break this down into manageable steps so you can master how to make mint chocolate checkerboard cookies on your first try.
- Cream the Butter and Sugar: In a large bowl (or stand mixer fitted with the paddle attachment), beat the softened butter and granulated sugar together until the mixture is pale and fluffy. This usually takes about 3 to 4 minutes on medium-high speed. You want to incorporate air here it’s the secret to a tender bite.
- Add Eggs and Vanilla: Scrape down the sides of the bowl. Add the eggs one at a time, beating well after each addition. Stir in the vanilla extract. The mixture might look slightly curdled for a moment that is okay. Keep mixing until it smooths out.
- Dry Ingredients Base: In a separate bowl, whisk together the flour, baking powder, and salt. Gradually add this to the wet ingredients, mixing on low speed just until the flour begins to disappear. Do not overmix, or you will end up with tough cookies!
- Divide the Dough: Here is where the magic happens. Weigh your dough and divide it into two equal halves. Remove half the dough from the bowl and set it aside.
- Create the Chocolate Dough: To the dough remaining in the mixer, add the cocoa powder. Mix on low until fully combined and the dough is a rich, dark chocolate color. If the dough seems too dry, you can add a teaspoon of milk.
- Create the Mint Dough: Wipe out your mixer bowl (or use a clean one). Place the reserved plain dough back in. Add the peppermint extract and a few drops of green food coloring. Mix until the color is an even, lovely pastel green.
- Chilling Phase 1: Wrap both dough balls individually in plastic wrap. Pat them into flat rectangles rather than balls this helps them chill faster and makes rolling easier later. Refrigerate for at least 30 minutes. You need the butter to firm up for the checkerboard cookie dough handling.
- Rolling and Shaping: Remove the doughs from the fridge. On a lightly floured surface, roll out the chocolate dough into a rectangle about 1/2 inch thick. Do the same with the green mint dough, trying to get them to the roughly same dimensions.
- Cutting Strips: Using a sharp knife or a pizza cutter (my secret weapon), cut the dough into long strips, each about 1/2 inch wide. You want them as straight as possible.
- The Checkerboard Assembly: This is the fun part! Lay down a strip of chocolate, then place a strip of mint next to it, then another chocolate. That is your bottom layer. Gently brush the top with a little egg white (optional, acts as glue). On top of the chocolate strip, place a mint strip. On top of the mint, place a chocolate. Repeat this pattern to create a log that looks like a checkerboard from the end.
- Chilling Phase 2: Wrap your assembled checkerboard logs tightly in plastic wrap. Chill them for at least 2 hours, or overnight. This step is non-negotiable! If you slice warm dough, the captivating square pattern will smudge and smear.
- Slicing and Baking: Preheat your oven to 350°F (175°C). Line baking sheets with parchment paper. Take a sharp knife and slice the cold log into 1/4-inch thick squares. Rotate the log every few cuts to keep it square. Place them on the baking sheet—they won’t spread much. Bake for 10-12 minutes, or until the edges are just set. Do not let them brown too much, or you lose the vibrant green color.
- Cooling: Let them cool on the baking sheet for 5 minutes before transferring to a wire rack. This helps them firm up without breaking.
While you are waiting for these to chill, if you are looking for something quicker to satisfy a chocolate craving, you could whip up a batch of Easy Creamy Pinwheel Cookies which use a similar rolling technique!
Pro Tips & Variations
Over the years, I have learned a few tricks to ensure these mint chocolate checkerboard cookies from scratch come out perfect every time. I have also experimented with some dietary tweaks for friends and family.
Tips for Perfect Lines
The key to sharp, geometric lines is temperature. If your dough starts to get sticky or soft while you are assembling the strips, stop immediately and put everything back in the fridge for 15 minutes. Warm dough leads to wavy lines. Also, when slicing the final log, wipe your knife clean with a warm cloth between every few cuts to prevent dragging the chocolate color into the mint.
Gluten-Free Checkerboard Cookies
We have plenty of friends who avoid gluten, and I never want them to miss out. You can substitute the all-purpose flour with a high-quality 1:1 Gluten-Free Flour blend (Look for one that contains xanthan gum). The texture will be slightly more fragile, so handle the baked cookies with care.
Vegan Mint Chocolate Checkerboard Cookies
For a dairy-free and egg-free version, use high-quality vegan butter sticks (not tub margarine) and replace the egg with a flax egg (1 tablespoon ground flaxseed meal mixed with 3 tablespoons warm water, let sit for 5 minutes). You might need to chill the dough a bit longer, as vegan butter has a lower melting point.
Flavor Twists
Not a fan of mint? No problem! You can keep the vanilla base and dye it red for a Valentine’s vibe, swapping the peppermint extract for almond or strawberry. Or, for a pure chocolate-vanilla experience, skip the food coloring and mint entirely. The technique works with any flavor pairing. I once tried this with a spice blend similar to my Crisp Molasses Cookies, pairing a spiced dough with a vanilla one, and it was fantastic.
Mint Chocolate Checkerboard Cookies Serving Suggestions
These cookies are showstoppers, so they deserve to be served in a way that highlights their beauty. Here is how the Sharif family enjoys them:
- The Hot Cocoa dunk: There is nothing better than dunking a mint chocolate cookie into a steaming mug of hot chocolate. The heat melts the chocolate slightly, and the mint flavor pops. It is pure comfort.
- Cookie Exchange Tins: Because these stack so neatly, they are perfect for holiday tins. Line the tin with parchment paper and stack them vertically to show off the pattern. Pair them with something round and dusted with sugar, like Easy Chocolate Crinkle Cookies, for a great visual contrast.
- Ice Cream Sandwiches: If you are feeling adventurous, take two of these cookies and sandwich a small scoop of vanilla or peppermint ice cream between them. It is a decadent dessert that kids go crazy for.
- After-Dinner Coffee: For the adults, these make an elegant accompaniment to an espresso or a dark roast coffee. The bitterness of the coffee balances the sweetness of the cookie beautifully.
If you are building a massive holiday spread, consider adding some Drop Style Christmas Cookies to the mix. They are faster to make, balancing out the time you spend on the checkerboards.
Mint Chocolate Checkerboard Cookies Storage & Reheating
One of the checkerboard cookie dough handling benefits is longevity. These cookies keep incredibly well, which is why they are my go-to for shipping to relatives.
Room Temperature: Store the baked cookies in an airtight container at room temperature for up to 1 week. I like to put a slice of white bread in the container with them it keeps the cookies soft by regulating the humidity (an old trick my grandmother taught me!).
Freezing: You can freeze these cookies baked or unbaked.
Baked: Let them cool completely, then stack them in a freezer-safe container with parchment paper between layers. They will last for up to 3 months.
Unbaked: Use the “slice and bake” method. Freeze the assembled dough logs wrapped in plastic and foil. When the craving hits, just slice off what you need and bake. You may need to add 1-2 minutes to the baking time if the dough is frozen solid.
Reheating: While they are delicious at room temperature, popping a cookie in the microwave for just 5–10 seconds can refresh that “fresh out of the oven” texture.
FAQ about Mint Chocolate Checkerboard Cookies
How do I fix the dough if it cracks when rolling?
If your dough is cracking, it is likely too cold or a bit dry. Let it sit at room temperature for 5 minutes to soften slightly. If it is still crumbly, you can work in a teaspoon of milk with your hands. Cracks are common in checkerboard cookie troubleshooting, but they usually fuse back together when baked.
Can I make these without a stand mixer?
Absolutely! A hand mixer works perfectly fine. You can even mix by hand with a wooden spoon and some elbow grease, though creaming the butter and sugar manually takes a bit of effort. It is a good workout before the cookie eating begins!
Why did my checkerboard pattern disappear?
This usually happens if the dough was not chilled enough before baking or if there was too much leavening agent (baking powder). Ensure your oven is fully preheated so the outside sets before the inside spreads. For more tips on precise baking, I found some great advice on Saving Dessert’s guide to checkerboard cookies that helped me refine my technique.
Can I use liquid food coloring instead of gel?
You can, but be careful. Liquid coloring adds moisture to the dough, which can alter the texture and cause spreading. If you must use liquid, add a teaspoon of extra flour to the mint dough to compensate.
Final Thoughts
There is a quiet rhythm to making these Mint Chocolate Checkerboard Cookies that I have come to love. The measuring, the dividing, the stacking—it forces you to slow down in a world that is usually rushing by. When I am in the kitchen assembling these logs, I am not thinking about emails or errands. I am just thinking about created something beautiful for the people I love. And when Emily walks in and steals a raw corner of dough, or Jana asks if she can paint the egg wash, those are the moments that make the floury mess worth it.
I hope you give these a try this season. Do not be intimidated by the pattern; embrace the process! If your squares are a little wonky, just call them “rustic” or “abstract art” they will still taste delicious.
If you enjoyed this recipe, please leave a comment below and let me know how they turned out! Did you stick with mint, or did you try a different flavor combo? I would love to see your photos, so tag MisterRecipes on social media. And don’t forget to subscribe to our newsletter for more family-favorite recipes delivered straight to your inbox. Happy baking, friends!
Mint Chocolate Checkerboard Cookies
Ingredients
Equipment
Method
- Cream the Butter and Sugar: In a large bowl (or stand mixer fitted with the paddle attachment), beat the softened butter and granulated sugar together until the mixture is pale and fluffy, about 3-4 minutes on medium-high speed.
- Add Eggs and Vanilla: Scrape down the sides of the bowl. Add the eggs one at a time, beating well after each addition. Stir in the vanilla extract. The mixture might look slightly curdled for a moment—that is okay. Keep mixing until it smooths out.
- Dry Ingredients Base: In a separate bowl, whisk together the flour, baking powder, and salt. Gradually add this to the wet ingredients, mixing on low speed just until the flour begins to disappear. Do not overmix, or you will end up with tough cookies!
- Divide the Dough: Weigh your dough and divide it into two equal halves. Remove half the dough from the bowl and set it aside.
- Create the Chocolate Dough: To the dough remaining in the mixer, add the cocoa powder. Mix on low until fully combined and the dough is a rich, dark chocolate color. If the dough seems too dry, add a teaspoon of milk.
- Create the Mint Dough: Wipe out your mixer bowl (or use a clean one). Place the reserved plain dough back in. Add the peppermint extract and a few drops of green food coloring. Mix until the color is an even, lovely pastel green.
- Chilling Phase 1: Wrap both dough balls individually in plastic wrap. Pat them into flat rectangles rather than balls—this helps them chill faster and makes rolling easier later. Refrigerate for at least 30 minutes.
- Rolling and Shaping: Remove the doughs from the fridge. On a lightly floured surface, roll out the chocolate dough into a rectangle about 1/2 inch thick. Do the same with the green mint dough, trying to get them to the roughly same dimensions.
- Cutting Strips: Using a sharp knife or a pizza cutter, cut the dough into long strips, each about 1/2 inch wide. You want them as straight as possible.
- The Checkerboard Assembly: Lay down a strip of chocolate, then place a strip of mint next to it, then another chocolate. That is your bottom layer. Gently brush the top with a little egg white (optional, acts as glue). On top of the chocolate strip, place a mint strip. On top of the mint, place a chocolate. Repeat this pattern to create a log that looks like a checkerboard from the end.
- Chilling Phase 2: Wrap your assembled checkerboard logs tightly in plastic wrap. Chill them for at least 2 hours, or overnight. This step is non-negotiable!
- Slicing and Baking: Preheat your oven to 350°F (175°C). Line baking sheets with parchment paper. Take a sharp knife and slice the cold log into 1/4-inch thick squares. Rotate the log every few cuts to keep it square. Place them on the baking sheet—they won’t spread much. Bake for 10-12 minutes, or until the edges are just set.
- Cooling: Let them cool on the baking sheet for 5 minutes before transferring to a wire rack. This helps them firm up without breaking.