Introduction
Have you ever noticed how a single scent can instantly transport you back twenty years? For me, the sharp, sweet aroma of peppermint mixed with buttery vanilla does exactly that. It is not just about the ingredients. It is about the feeling of home. When the holidays roll around, my kitchen transforms. It becomes a bustling headquarters for what I like to call Christmas cookie magic. Today, I am sharing a recipe that holds a very special place in the Sharif household: my Magical Candy Cane Cookies Recipe.
I remember the first time I tried to make these with my kids, Adams and Jana. Adams was about eight then, and Jana was just a toddler sitting on the counter with flour on her nose. We were aiming for perfection, but we ended up with a lot of laughter and a few crooked cookies that tasted absolutely delicious. That is the beauty of this easy candy cane cookies recipe. It invites you to be imperfect. It invites you to get your hands messy. It is a Tactile experience that my wife, Emily, looks forward to every single year because it signals the official start of our holiday baking marathon.
If you have been searching for the ultimate addition to your cookie exchange platter, or simply want to create a new tradition with your little ones, you have arrived at the right place. These are not just sugar cookies in disguise. They are tender, melt-in-your-mouth, twisted cookie dough creations that look as festive as they taste. Grab your apron, preheat that oven, and let us make something beautiful together.
Why You’ll Love This Magical Candy Cane Cookies Recipe
In the world of holiday cookies, it is easy to get overwhelmed by complex techniques and obscure ingredients. I believe cooking should make people happy, not stressed. Here is why this specific recipe is going to become a staple in your recipe box.
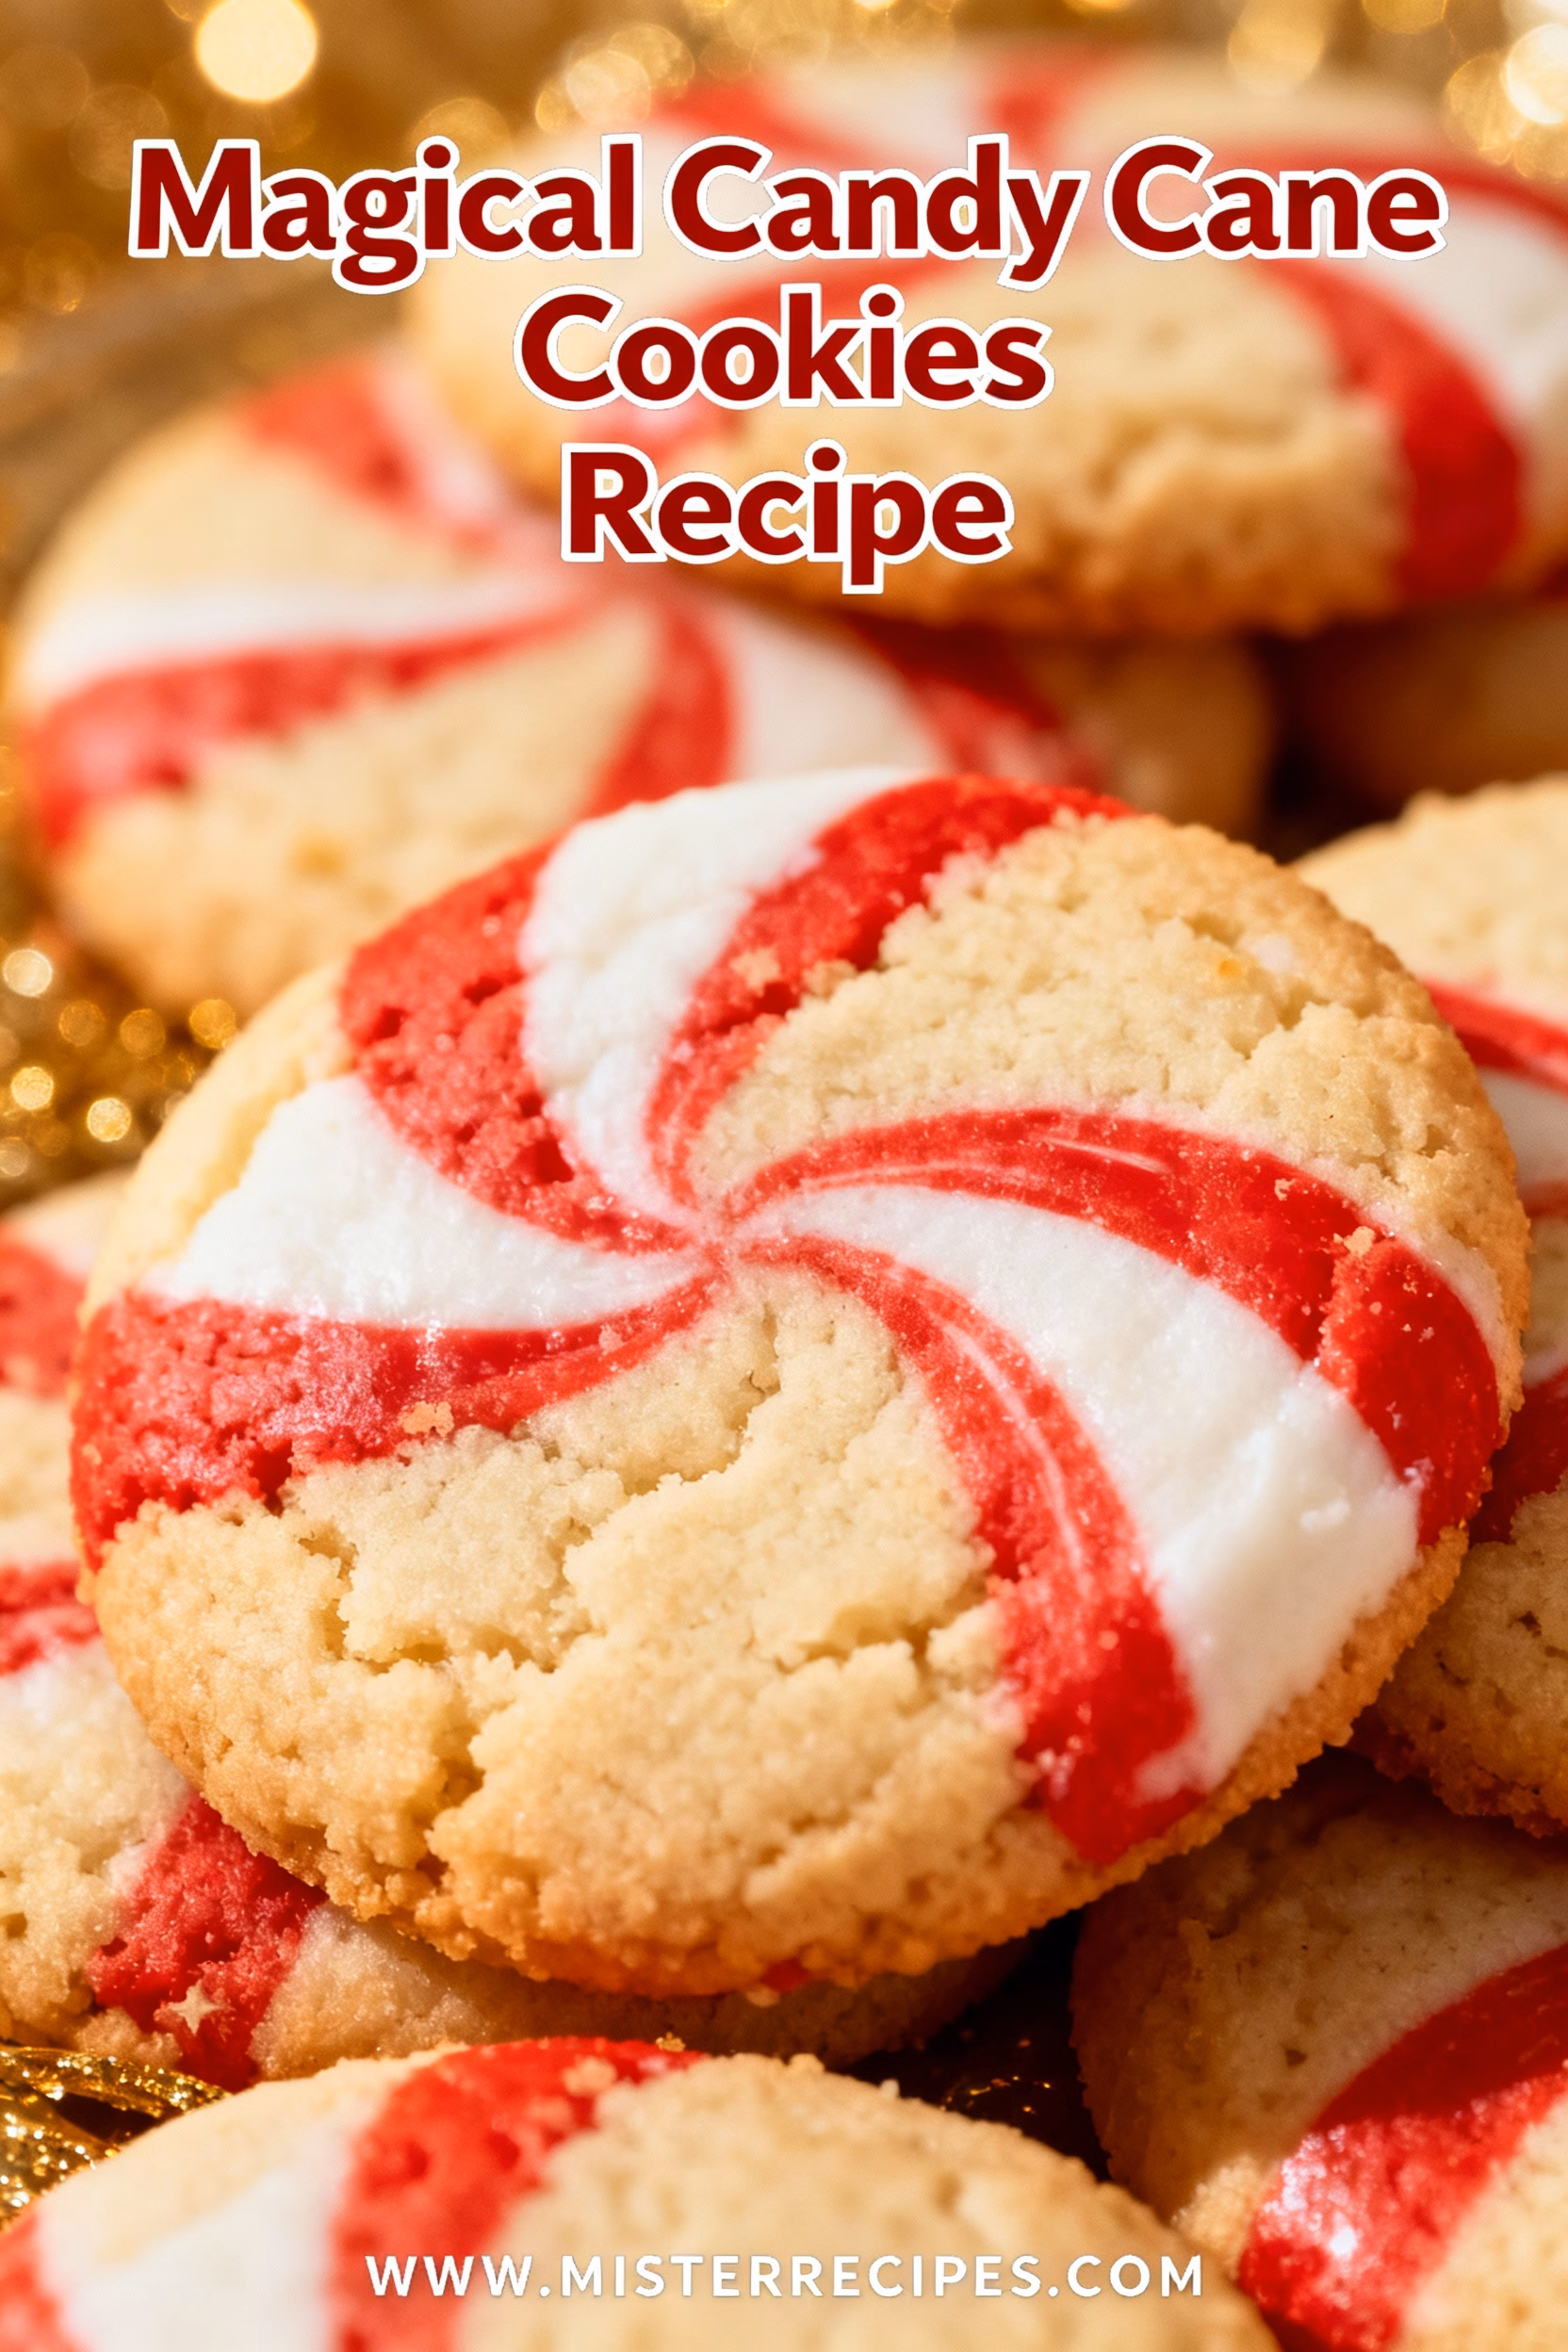
- Visual Nostalgia: There is something iconic about red and white cookies shaped like shepherd’s hooks. They immediately scream Christmas. They look impressive on a plate, yet they rely on a very simple method that anyone can master with a little patience.
- Texture Heaven: These are distinct from your standard crisp biscuit. They are buttery cookies with a delicate crumb, similar to a shortbread or a spritz, but with a slight chew that makes them addictive.
- Aromatic Bliss: The addition of peppermint extract cookies creates a flavor profile that cuts through the richness of heavy holiday meals. It is refreshing and sweet all at once.
- Kid-Friendly Fun: While shaping the ropes takes a gentle touch, it is a fantastic motor-skill activity for older kids. My daughter Jana, now 9, has become the official “twister” in our house. We turn on holiday jazz, and we just roll and twist for an hour. It is quality time disguised as baking.
- Pantry Staples: You likely have all-purpose flour, unsalted butter, and granulated sugar in your pantry right now. The only specialty item is the extract and some food coloring. Simplicity is key here.
If you are a fan of minty treats, you might also want to check out my candy cane kiss cookies which offer a different spin on these flavors. But for now, let us stick to the classic twisted beauty.
Ingredients for Magical Candy Cane Cookies Recipe
The secret to the best Magical Candy Cane Cookies Recipe lies in the quality of your ingredients and the temperature of your dough. We are working with a short dough here, meaning a high ratio of fat to flour, which yields that tender bite.
- Unsalted Butter (1 cup, softened): This is the backbone of the cookie. I always use unsalted butter so I can control the salt level myself. It needs to be soft enough to cream but not melted. If it is oily, your cookies will spread.
- Powdered Sugar (1 cup): Unlike granulated sugar, powdered sugar contains a tiny bit of cornstarch and dissolves instantly. This gives the cookie a melt-in-your-mouth texture rather than a gritty crunch.
- Egg (1 large): This acts as the binder. Make sure it is at room temperature so it emulsifies properly with the butter.
- Peppermint Extract (1 teaspoon): This is where the peppermint dessert flavor comes from. Be careful not to use mint extract, which can taste like toothpaste. Stick to pure peppermint.
- Vanilla Extract (1/2 teaspoon): A touch of vanilla rounds out the harshness of the peppermint and adds warmth.
- All-Purpose Flour (2 1/2 to 3 cups): The structure. We will discuss measuring flour later, but fluffing it up before scooping is vital.
- Salt (1/2 teaspoon): Essential to balance the sugar.
- Red Gel Food Coloring: I highly recommend gel over liquid drops. Liquid adds water to the dough, which can mess up the consistency. Gel provides vibrant color without changing the texture.
- Optional Toppings: Crushed candy canes or finely crushed peppermint candies mixed with a little sugar can be sprinkled on top for extra sparkle and crunch.
If you find yourself out of peppermint extract, you can certainly make these plain vanilla, or use almond extract for a different but equally delicious profile. Cooking is about adaptation.

How to Make Magical Candy Cane Cookies Recipe
Step-by-Step Instructions
This process is a labor of love. Do not rush it. Treat the dough gently and it will reward you with beautiful cookies.
- Cream the Butter and Sugar: In a large mixing bowl, or the bowl of your stand mixer fitted with the paddle attachment, beat the unsalted butter and powdered sugar together. You want this to be smooth and creamy, but do not over-beat it like you would for a cake. We do not want too much air incorporation, or the cookies will puff up and lose their shape. Just until well combined is perfect.
- Add the Egg and Extracts: Crack in your egg and pour in the peppermint extract and vanilla. Mix on medium speed until everything is incorporated. Scrape down the sides of the bowl. I cannot tell you how many times I have forgotten to scrape the bowl, only to find a lump of unmixed butter at the bottom later. Do not be like me. Scrape the bowl.
- Incorporate Dry Ingredients: In a separate small bowl, whisk together the flour and salt. Turn your mixer to low and slowly add the flour mixture. Mix just until the dough pulls away from the sides of the bowl. The dough should be soft but not sticky. If it is sticking to your finger, add another tablespoon of flour.
- The Color Split: Now comes the fun part. Take the dough out and divide it into two equal halves. I actually use my kitchen scale for this to be precise, but eyeing it works too. Wrap one half (the white half) in plastic wrap. Return the other half to the mixer. add about 1/2 teaspoon of red gel food coloring. Mix on low until the color is evenly distributed and you have a vibrant red dough. Wrap this red dough in plastic wrap as well.
- The Essential Chill: This is the most critical step for how to make candy cane cookies that actually keep their shape. Place both discs of dough in the refrigerator for at least 2 hours. Overnight is even better. If the dough is warm, the ropes will break when you try to twist them.
- Shaping the Candy Canes: Preheat your oven to 375°F (190°C). Line two baking sheets with parchment paper. Take a small amount of dough from the fridge (keep the rest cold). Pinch off a walnut-sized piece of white dough and roll it into a 4-inch rope on a lightly floured surface. Do the same with a piece of red dough.
- The Twist: Place the red rope and white rope side-by-side. Gently press them together, then twist them around each other to create that barber-pole look. Curve the top to form a cane handle. Place gently on the baking sheet. Repeat until the tray is full. If the dough gets too soft, pop it back in the fridge for 10 minutes.
- Bake to Perfection: Bake for 8 to 10 minutes. You want them set, but not browned. If they brown, the white part turns yellow and ruins the look. Let them cool on the baking sheet for 5 minutes before transferring to a wire rack. They are fragile when hot!
Pro Tips & Variations
Over the years, I have learned a few tricks to ensure these Magical Candy Cane Cookies Recipe turn out perfect every time. The environment in your kitchen matters. If you are baking in a hot kitchen, the dough will be tricky.
- Keep it Cold: I cannot stress this enough. Between batches, put your dough back in the fridge. If the ropes are breaking as you roll them, the dough might be too dry (add a drop of water) or too cold (warm it slightly with your hands). If they are sticking, it is too warm. It is a balancing act, but you will find the rhythm.
- Crushed Candy Cane Topping: For extra texture, brush the baked cookies with a tiny bit of egg white or melted butter right out of the oven and sprinkle with crushed candy canes. This adds a lovely crunch.
- Chocolate Dipped: Want to take it to the next level? Melt some dark chocolate or white chocolate. Dip the bottom (straight end) of the cooled cookie into the chocolate. This turns them into a decadent peppermint dessert. You can find inspiration from my peppermint mocha cookies if you are a chocolate lover.
- Flavor Swaps: Not everyone loves peppermint. You can use almond extract for the red dough and vanilla for the white. Or, try orange extract for a citrus twist.
- Gluten-Free Option: I have had success swapping the all-purpose flour with a high-quality 1-to-1 Gluten-Free baking flour blend. The texture is slightly sandier, but still delicious.
For those who struggle with the twisting technique, do not worry. You can simply marble the two doughs together and make slice-and-bake cookies. It creates a similar visual effect with less labor. If you prefer a simpler method, check out my buttery cookies which use a cookie press instead.
Magical Candy Cane Cookies Recipe Serving Suggestions
These cookies are the stars of the show, but they play well with others. When I am hosting a holiday gathering, I like to create a diverse spread. The refreshing mint of these cookies pairs beautifully with rich, chocolatey treats.
Imagine a platter featuring these red and white beauties alongside some festive cookies like chocolate crinkles. The contrast in colors is stunning. They are also the perfect companion to a hot mug of cocoa or a strong coffee. The sturdy texture of the cookie holds up well to dunking, which is my son Adams’ favorite way to eat them.
If you are putting together a gift box for neighbors or teachers, these are ideal because they are sturdy enough to travel. Stack them carefully with parchment paper between layers. I often pair them with Christmas cookie sparkles for a box that looks like a jewelry case of treats.
For a truly impressive dessert table, you might consider building a gingerbread house as a centerpiece and arranging the candy cane cookies around the perimeter like a little fence. It is these small touches that create the magic I always talk about.
Magical Candy Cane Cookies Recipe Storage & Reheating
One of the best things about this recipe is its longevity. Because these are essentially shortbreads with no leavening agents like baking soda, they stay fresh longer than soft drop cookies.
Room Temperature: Store the fully cooled cookies in an airtight container at room temperature. Place wax paper between the layers to prevent breaking. They will stay fresh for up to 2 weeks. In fact, I find the peppermint flavor melds and improves after day two.
Freezing the Dough: This is a huge time-saver. You can prepare the dough types, wrap them tightly, and freeze them for up to a month. Thaw them in the refrigerator overnight before rolling and shaping. You can also freeze the shaped, unbaked cookies on a baking sheet until solid, then transfer to a bag. Bake them from frozen, just adding an extra minute or two to the baking time.
Freezing Baked Cookies: You can freeze the baked cookies for up to 3 months. Thaw them on the counter for an hour before serving. They taste just as fresh as the day they were baked.
FAQ about Magical Candy Cane Cookies Recipe
Why did my candy cane cookies spread and lose their shape?
This is the most common issue with kid-friendly candy cane cookies. It usually happens because the butter was too warm when it went into the oven. Ensure you chill the dough thoroughly. If your kitchen is hot, chill the shaped cookies on the baking sheet for 15 minutes *before* putting them in the oven.
Can I use crushed candy canes inside the dough?
I do not recommend mixing crushed candy chunks *into* the dough. They tend to melt and burn during baking, creating sticky, hard spots. It is much better to use the crushed candy cane topping method after baking or use peppermint extract for the flavor.
How do I get the ropes to stay together?
If your red and white ropes are separating during baking, try gently pressing them together as you twist. You can also lightly brush a tiny amount of water between them, though this is rarely necessary if the dough is at the right consistency.
Can I make these vegan?
Yes. You can substitute the butter with a high-quality vegan butter stick (not tub margarine) and use a flax egg or a commercial egg replacer. The texture might be slightly more brittle, so handle with care.
What if I want a sharper peppermint flavor?
The recipe calls for 1 teaspoon, which is a pleasant, family-friendly amount. for a serious peppermint dessert kick, you can increase this to 1.5 teaspoons, but be careful not to overpower the buttery taste.
Final Thoughts
There is a quiet moment that happens late at night in my kitchen. The flour has been wiped from the counter. The kids are asleep, their faces probably still sticky from sampling the icing. The house smells like vanilla and mint. I look at the cooling rack stacked high with these red and white twists, and I feel an immense sense of gratitude.
This Magical Candy Cane Cookies Recipe is more than just instructions on a screen. It is a vehicle for connection. It is the patience required to twist the dough. It is the joy of sharing with neighbors. It is the memory your children will have when they grow up and smell peppermint in December. I hope this recipe brings as much warmth to your home as it has to ours. Cooking isn’t just about food; it’s about making people happy. And these cookies? They are pure happiness.
If you try this recipe, I would love to hear about it. Did you stick to the classic red and white, or did you try a fun color variation? Leave a comment below, share your photos on Pinterest, and do not forget to tag MisterRecipes. Happy baking, friends!
Inspired by classic holiday baking traditions and adapted from techniques found on Delish.
Magical Candy Cane Cookies
Ingredients
Equipment
Method
- In a large mixing bowl or stand mixer with paddle attachment, beat softened unsalted butter and powdered sugar until smooth and creamy. Avoid over-beating to prevent excess air incorporation.
- Add the room temperature egg, peppermint extract, and vanilla extract. Mix on medium speed until fully combined. Scrape down the sides of the bowl to ensure even mixing.
- In a separate bowl, whisk together flour and salt. On low speed, gradually add the flour mixture to the butter mixture. Mix just until the dough pulls away from the bowl sides and forms a soft, non-sticky dough.
- Divide the dough into two equal halves. Wrap one half in plastic wrap (white). Return the other half to the mixer and add red gel food coloring. Mix on low until color is evenly distributed. Wrap the red dough as well.
- Refrigerate both dough portions for at least 2 hours, preferably overnight. This chilling step is essential for maintaining shape during baking and twisting.
- Preheat oven to 375°F (190°C). Line baking sheets with parchment paper. Working with cold dough, roll walnut-sized pieces of white and red dough into 4-inch ropes on a lightly floured surface.
- Place red and white ropes side-by-side. Gently press together and twist to create a barber-pole effect. Curve the top to form a candy cane hook. Place on baking sheet. Return dough to fridge if it becomes too soft.
- Bake for 8–10 minutes, or until set but not browned. Over-baking will yellow the white dough. Cool on baking sheet for 5 minutes, then transfer to wire rack to cool completely.