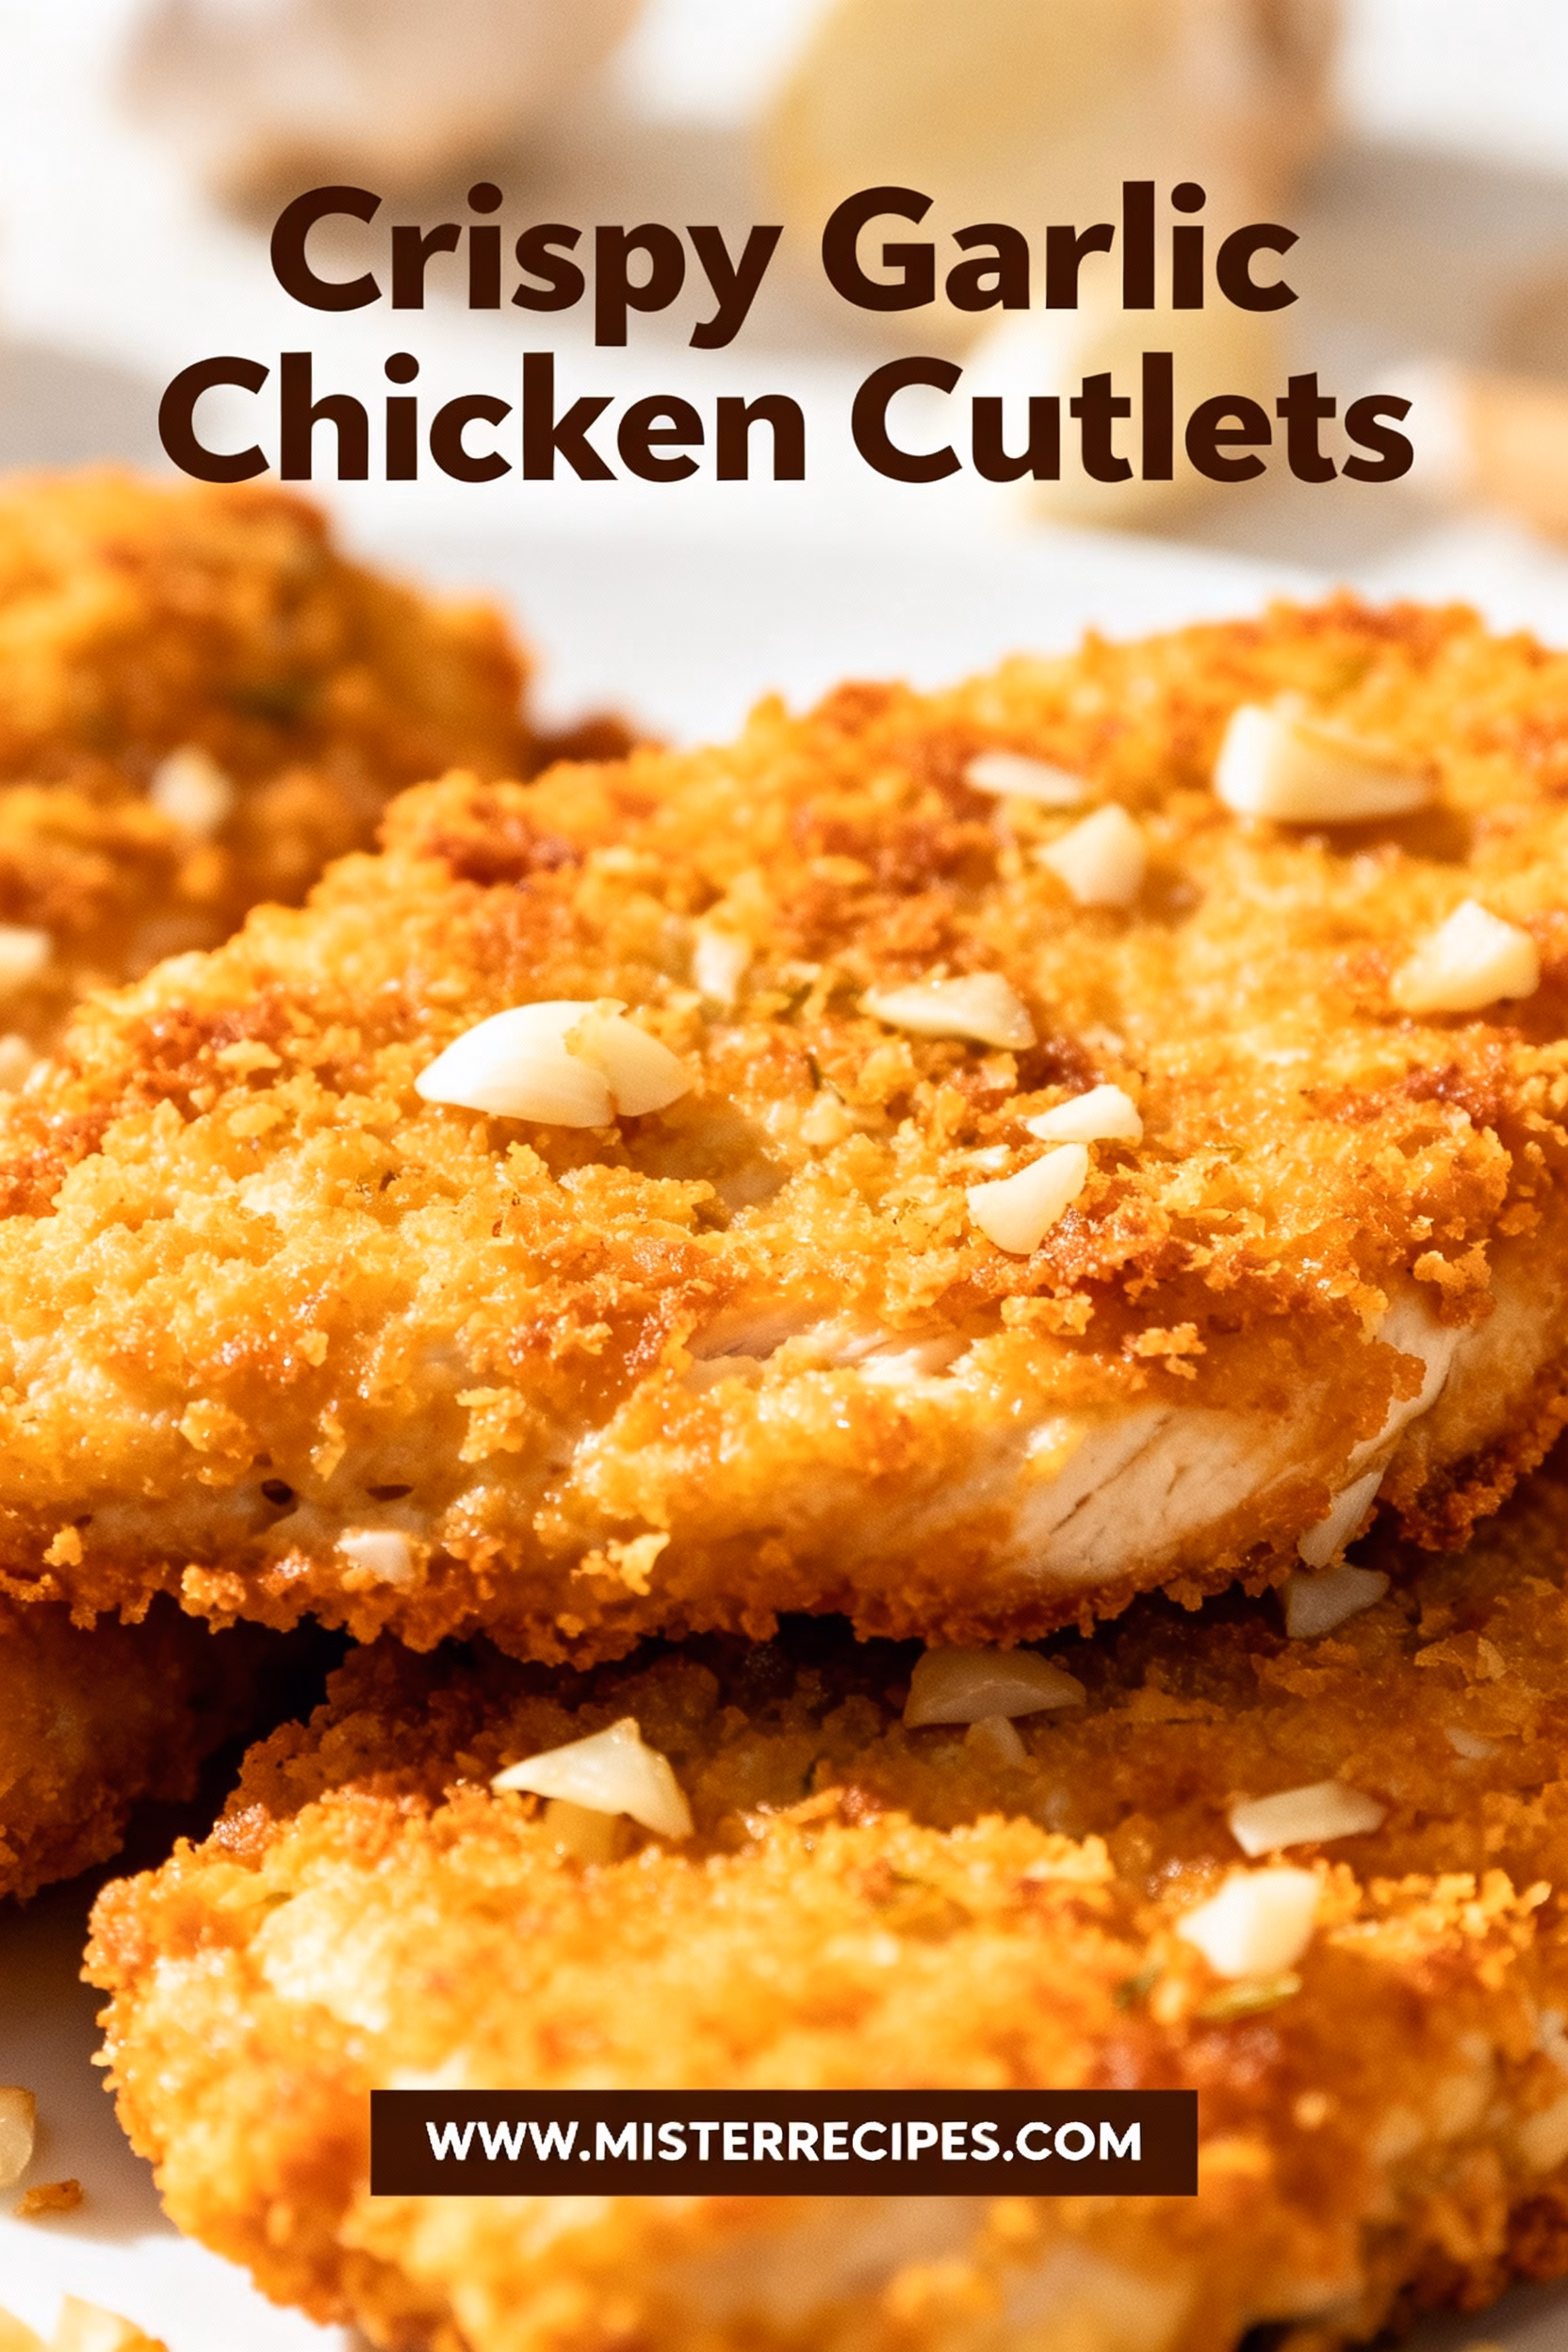
There are certain smells that instantly transport you back to childhood, and for me, it’s the sizzle of thinly sliced chicken hitting hot oil. It’s the sound of a golden, crispy crust forming, promising that perfect crunch. Tonight, we’re talking about one of the most reliable, comforting, and fast meals in my entire rotation, the kind of food that gets two excited thumbs up from Adams (12) and Jana (9) before they even take a bite: the Crispy Garlic Chicken Cutlets.
If you’re wondering how to make crispy chicken cutlets that are juicy on the inside, perfectly golden on the outside, and absolutely bursting with savory flavor, you are in the right place. This isn’t gourmet fussiness, this is easy crispy chicken cutlets 30 minutes style. It’s the kind of meal I whip up after a long day when Emily just needs something reliable and delicious on the table. It’s what I call family-friendly chicken dinner perfection. We’re taking thin slices of chicken breast, coating them in a seasoned mix that maximizes that precious surface area, and pan-fried chicken cutlets until they achieve a crust so magnificent, you’ll hear the crunch from the next room. This recipe truly is the best crispy chicken cutlets recipe because it delivers on texture and flavor every single time. Grab your apron, friends. We’re cooking comfort!
Why You’ll Love These Crispy Garlic Chicken Cutlets (The Ultimate Easy Weeknight Dinner)
When I was researching this recipe, I looked at what the experts were doing, including chefs like Veronika’s Kitchen who champion a killer lemon garlic butter chicken cutlets version. What I learned, and what I want to pass on to you, is that the key to the ultimate Italian breaded chicken cutlets lies in a simple, heavily-seasoned coating and the right frying technique. This recipe incorporates all those competitive aspects, ensuring your chicken is always golden and never dry.
- 30-Minute Meal Mastery: Much like our favorite creamy garlic parmesan chicken pasta, this is lightning fast. Since we are using thin chicken cutlets, they cook incredibly fast, making this a genuine easy crispy chicken cutlets 30 minutes solution perfect for busy weeknights.
- The Perfect Texture: We use a specific blend of panko breadcrumbs and Italian seasoned breadcrumbs to achieve that coveted, ultra-crispy, almost shrapnel-like exterior. This isn’t just breaded chicken, this is pan-fried chicken cutlets with an attitude.
- Flavor Bomb Status: We heavily rely on garlic powder seasoning and grated Parmesan cheese right in the coating. This means every single crunch delivers a salty, nutty, garlicky punch. It scratches the itch for parmesan crusted chicken without all the baking fuss.
- Family Approval Guarantee: This is a mild, savory flavor that kids, even picky ones, adore. Adams loves them solo, and Jana dips hers into marinara sauce. It’s a true quick weeknight chicken superhero that appeals to everyone.
- Pantry Friendly: No exotic ingredients here. If you keep stock of boneless, skinless chicken breasts, eggs, and breadcrumbs, you are ready to go. The method is simple, relying on the classic dredging technique (flour, egg, breadcrumbs).
- Versatility is Key: These cutlets are wonderful served plain, but they also serve as the perfect base for so many meals, from a quick chicken sandwich to the foundation of a speedy Chicken Parm. It’s a great dish to master for a make-ahead friendly approach to meal prep.
Whenever I make these, they disappear almost instantly. It reminds me of the simple comfort food my Grandmother used to make in Texas, although hers involved a lot more hickory smoke for that Texas BBQ flavor. These breaded chicken breast recipe are the weeknight equivalent, fast-paced and efficient, designed to bring a little bit of joy and a lot of crunch to your dinner table.
Ingredients for Crispy Garlic Chicken Cutlets
We’re keeping the ingredients list tight and focused. The secret to the flavor is not just in the ingredients, but in the ratio, especially when it comes to the different types of breadcrumbs and the salt content. Don’t skip the **Italian seasoning**, it adds an authentic depth!
The Chicken and Prep
- 2 large boneless skinless chicken breasts: Sliced horizontally to create 4-6 thin cutlets.
- Salt and Black Pepper: For pre-seasoning the meat.
The Dredging Station
- First Plate (Flour): 1/2 cup all-purpose flour (or gluten-free blend).
- Second Bowl (Egg): 2 large eggs, lightly beaten with a splash of water or milk.
- Third Plate (The Golden Crust Mix):
- 1 cup panko breadcrumbs: The architect of the crunch.
- 1/2 cup Italian seasoned breadcrumbs: For flavor and binding.
- 1/4 cup finely grated Parmesan cheese: Crucial for that nutty, salty crust, making them true crispy garlic parmesan chicken cutlets.
- 2 tablespoons garlic powder: Our star flavor.
- 1 teaspoon onion powder.
- 1 teaspoon Italian seasoning.
- 1/2 teaspoon paprika (optional, for color).
For Frying
- 1/2 cup olive oil (or vegetable oil/canola oil combination): Enough for shallow, pan-fried chicken technique.
Optional Finishers
- Fresh lemon wedges: A squeeze of lemon juice at the end brightens everything.
- Fresh parsley, chopped: For garnish and a pop of color, matching the classic Italian look.
How to Make Crispy Garlic Chicken Cutlets: A Memoir-Meets-Manual
Making crispy breaded chicken cutlets pan fried might sound intimidating, but it’s really just a three-step process, and getting that perfect finish is about heat control and seasoning. Let’s walk through this process, which is surprisingly meditative. I find setting up my dredging station helps me slow down and enjoy the kitchen ritual, a welcome contrast to the chaos of getting Adams and Jana ready for school in the mornings.
Step-by-Step Instructions: Creating the Perfect Crust
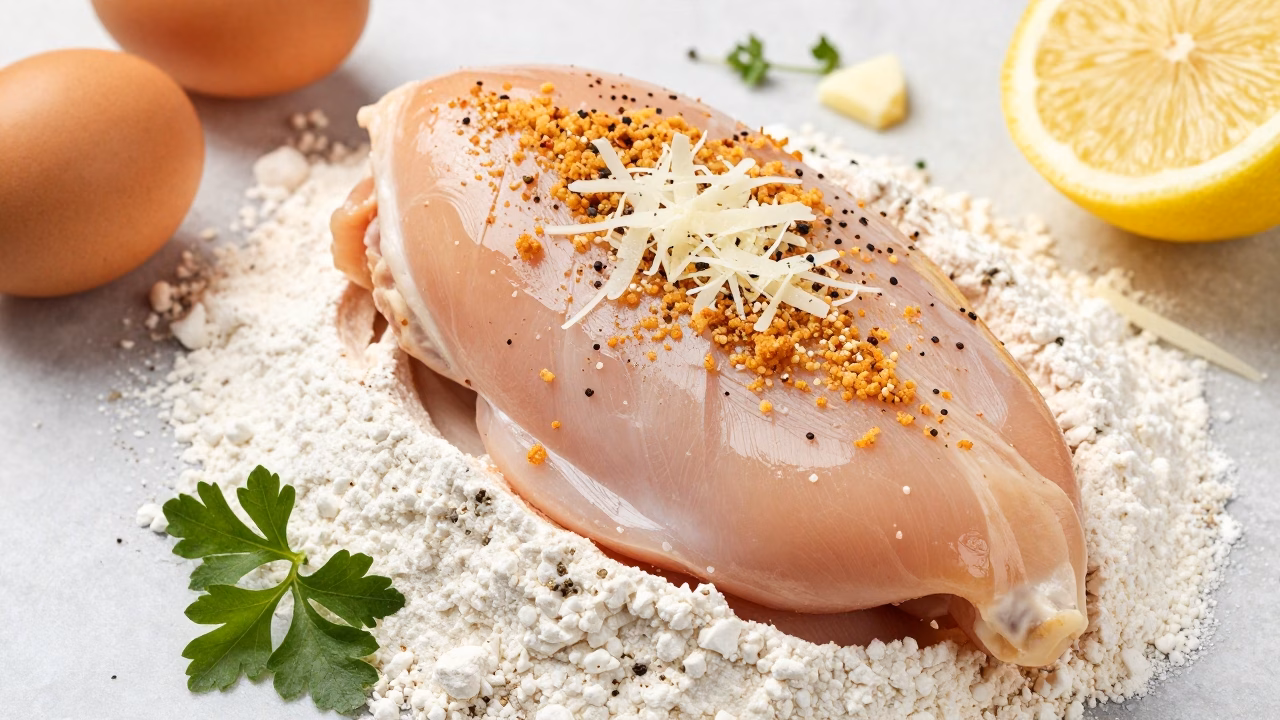
- Prep the Chicken (Pounding is Key): If you didn’t buy pre-sliced cutlets, slice the chicken breasts horizontally through the middle to create thinner pieces. Place each piece between two sheets of plastic wrap or parchment paper. Using the flat side of a meat mallet or a rolling pin, gently pound the chicken until it’s evenly about 1/4 inch thick. Thinness is non-negotiable for fast cooking and maximum crust surface. Season lightly with salt and pepper.
- Set Up the Dredging Station: Arrange three wide, shallow plates or dishes on your countertop. Plate 1: Flour. Plate 2: Whisked eggs. Plate 3: The magic mix of panko breadcrumbs, Italian seasoned breadcrumbs, Parmesan, garlic powder, onion powder, and Italian seasoning. Ensure you mix the dry ingredients thoroughly.
- Dredge for Maximum Crunch: Take one chicken cutlet at a time. First, dredge it fully in the flour, shaking off the excess (this helps the egg stick). Second, dip it completely into the egg mixture, allowing extra to drip off. Third, press the cutlet firmly into the breadcrumb mixture, ensuring every part, especially the edges, is fully coated. Pressing firmly helps the crust stay put during frying. Place the coated cutlets on a wire rack or baking sheet, not touching, while you finish the rest.
- Heat the Oil: Pour the olive oil into a large heavy-bottomed skillet (cast iron works great for even heat) until it’s about 1/4 inch deep. Heat over medium-high heat until the oil is shimmering but not smoking. A good trick: drop a tiny pinch of breadcrumbs in. If they sizzle immediately, the oil is ready. This ideal frying temperature guidance (350-375°F) prevents soggy chicken.
- Pan-Fry the Chicken: Carefully place 2-3 cutlets in the hot oil, ensuring you don’t overcrowd the pan. If the heat drops too quickly, the chicken will absorb the oil. Fry for about 3-4 minutes per side, until the outside is deeply golden brown and golden crispy chicken. The thin cutlets should reach an internal temperature of 165°F quickly.
- Drain and Finish: Remove the finished cutlets and place them immediately on a wire rack set over a baking sheet (not paper towels, which can steam the bottom and make it soggy). This is essential for maintaining that spectacular crunch. Season lightly with a pinch of salt immediately after frying. Serve hot, optionally garnished with fresh parsley garnish and that crucial squeeze of fresh lemon juice.
Pro Tips & Variations: Mastering the Golden Crispy Chicken Cutlet
Achieving the perfect golden crispy chicken texture is an art, but it’s an art anyone can master with a few simple tricks. I’m sharing the little secrets Emily and I have perfected over years of making this easy chicken dinner recipes favorite.
Benjamin’s Kitchen Secrets
- The Wire Rack Advantage: I mentioned it above, but it bears repeating. Never, ever place your freshly fried cutlets directly onto paper towels. The heat trapped between the chicken and the paper towels causes steam, which immediately softens the crust. A wire rack allows air to circulate, maintaining the crunch.
- The Double Breadcrumb Layer: The combination of panko breadcrumbs and Italian seasoned breadcrumbs is the secret weapon for texture. Panko gives you spikes of crunch, while the Italian crumbs provide flavor and bulk. Don’t skip combining these two.
- Chill Out for Crust Stick: After dredging the cutlets, let them rest on the wire rack in the fridge for 10-15 minutes or even up to an hour (this makes them make-ahead friendly). This simple step allows the coating to dry slightly and adhere firmly to the chicken, dramatically reducing the amount of breading that falls off during frying.
- Oil Management: If you notice dark breadcrumbs floating in the oil, remove them between batches using a slotted spoon. Burnt crumbs will ruin the flavor of the next batch. You may also need to add more oil between batches and allow it to come back up to temperature.
- Adding Lemon Butter Sauce: For a more decadent finish, you can quickly whip up a pan sauce, much like the competitors do with their lemon garlic butter sauce. After removing the chicken, drain all but 1 tablespoon of oil. Add a tablespoon of butter, 2 minced garlic cloves, a squeeze of lemon juice, and a splash of chicken stock. Cook until slightly thickened and pour over the cutlets.
Family & Dietary Variations
- Gluten-Free Version: Simple swaps make this accessible! Use gluten-free all-purpose flour and swap the regular breadcrumbs for gluten-free crispy chicken cutlets breadcrumbs (many brands offer Panko-style GF crumbs now).
- Air Fryer Adaptation: If you prefer the crispy chicken cutlets air fryer method, simply spray the coated cutlets very well with cooking spray (the oil helps the crust crisp up). Air fry at 375°F (a perfect temperature) for about 8-12 minutes, flipping halfway, until golden and cooked through.
- Parmesan Power Up: If you really want a parmesan crusted chicken flavor, double the Parmesan in the coating mix. You can also mix in some fresh herbs like chopped rosemary or thyme for an herbal twist.
- Not Just Chicken: While we focus on chicken cutlets, this breading and frying method works perfectly for crispy pork cutlets or crispy veal cutlets, essentially transforming this into a quick schnitzel recipe.
For those nights when we’re craving something completely different, but still want that comforting, savory hit, I sometimes go for our One-Pot Chicken Alfredo, but nothing beats the simplicity of these crispy cutlets.
Crispy Garlic Chicken Cutlets Serving Suggestions: What to Pair with This Star
These Crispy Garlic Chicken Cutlets are robust enough to stand on their own, but they are also versatile enough to pair with just about anything, making this a fantastic anchor for a variety of quick weeknight dinner menus. Since the flavor profile leans slightly toward the Mediterranean/Italian side due to the Italian seasoning and Parmesan, keep the sides relatively simple and fresh.
- The Classic Italian Pairing (Marinara Focused):
You simply cannot go wrong turning these cutlets into a super-fast version of Chicken Parmesan. Serve them over a bed of spaghetti or linguine tossed with a simple, good-quality marinara sauce. For a lighter touch, you can serve them alongside a crisp green salad or some zucchini noodles. Adams insists on dipping his entire cutlet into the sauce, essentially making them *deconstructed* Chicken Parm. They are also excellent served with our Chicken Pesto Pasta for an elevated weeknight plate.
- The Fresh, Bright Side (Salad Heavy):
To cut the richness of the fried coating, serve a bright, acidic salad. A simple Arugula salad dressed with olive oil and lemon juice is perfect. Or, try a lightened-up version of our Chicken Caesar Salad Bowl, using the cutlets sliced thinly on top of the romaine. The crunch of the chicken complements the crisp lettuce beautifully.
- The Comfort Carbohydrate (Potatoes and Rice):
Mashed potatoes are a no-brainer here, acting like a comforting cloud for the crispy chicken. You could also serve them alongside a simple lemon and herb rice pilaf. Occasionally, when I’m feeling nostalgic, I serve these with a side of creamy garlic-sautéed spinach or our One Pan Lemon Pepper Chicken and Potatoes, pairing the garlicky flavor of the chicken with the bright lemon potatoes.
- The Global Inspiration (Schnitzel/Katsu Style):
Because this technique is essentially a quick schnitzel recipe, you can use these cutlets in non-Italian ways too. Try serving them with a simple Japanese-inspired sesame glaze or a side of steamed rice and quick-pickled cucumbers. If you are feeling creative, this serves as a great base for a hot crispy chicken sandwich with spicy mayo.
One of the best resources for classic, foolproof recipes is Natasha’s Kitchen, specifically her approach to Crispy Breaded Chicken Cutlets, which heavily influenced my emphasis on the Panko blend!
Crispy Garlic Chicken Cutlets Storage & Reheating
These cutlets are best served immediately, but rest assured, they are incredibly freezer-friendly and reheat much better than typical fried chicken.
Storage
- In the Fridge (Cooked): Store leftovers in an airtight container in the refrigerator for up to 3-4 days. Separate layers with parchment paper if stacking to prevent sticking.
- Freezing (Cooked): Once cooled completely, flash freeze the cutlets on a baking sheet until solid (about 2 hours). Transfer the frozen cutlets to a freezer-safe bag or container, separating them with parchment paper. They will last for up to 3 months. This is perfect for make ahead crispy chicken cutlets meal prep!
- Freezing (Uncooked, Breaded): You can also freeze the cutlets after the dredging step. Place the fully breaded, uncooked cutlets on a baking sheet and freeze until solid. Transfer to a freezer bag. When ready to cook, fry directly from frozen, adding an extra 3-5 minutes to the cooking time per side.
Reheating
Avoid the microwave at all costs, unless you enjoy a sad, rubbery, soggy cutlet. You want high heat and fast cooking to revive the crispness.
- Best Method (Air Fryer): The air fryer is the absolute best way to reheat these. Place cutlets in a single layer and air fry at 350°F for 4-6 minutes, or until piping hot and the crust is restored to maximum crispiness.
- Oven/Toaster Oven Method: Place cutlets on a wire rack over a baking sheet and bake at 375°F for 8-12 minutes, flipping halfway, until reheated through and crisp.
- Stovetop Method: Heat a small amount of oil in a skillet over medium heat. Reheat the cutlets for 2-3 minutes per side until they sizzle and the crust is crisp again. This yields excellent results.
FAQ about Crispy Garlic Chicken Cutlets
I get a lot of questions about how to ensure maximum crunch and how to keep the cutlets from drying out. Here are the most common questions, answered!
How do you get the breading to stick to the chicken?
This is a combination of things. First, shake off excess flour after the first dip. Too much flour prevents the egg from adhering properly. Second, after dipping in the egg, firmly press the cutlet into the breadcrumb mixture. The key secret, however, is letting the coated cutlets rest for 10-15 minutes in the refrigerator before frying. This allows the coating to ‘set’ and dry slightly, creating a much stronger bond, ensuring they stay put when you pan-fry them.
Can I make crispy chicken cutlets no flour?
Yes, you can follow a method that avoids the flour step, often achieved by soaking the chicken in buttermilk or yogurt first. However, the classic dredging sequence (flour, egg, breadcrumbs) provides the most reliable and even coating. If skipping the flour, ensure the chicken is very dry, or use an egg wash thickened slightly with mustard. For more ideas on how to adjust based on flavor, I highly recommend checking out Veronika’s Kitchen’s approach to Easy Lemon Chicken.
Is it better to use Panko or Italian breadcrumbs?
For the absolute crispiest chicken cutlets, panko breadcrumbs are non-negotiable. Panko, a Japanese breadcrumb, is made from crustless bread and is lighter, flakier, and absorbs less oil than standard breadcrumbs. However, standard Italian seasoned breadcrumbs offer a superior depth of flavor. My recipe uses a power duo: a 2:1 ratio of Panko to Italian crumbs, giving you the best of both worlds, maximum crunch and savory flavor, creating the perfect crispy panko chicken cutlets.
Can I use chicken thighs instead of breasts?
Absolutely! This recipe works perfectly for breaded chicken thighs. Use boneless, skinless thighs and pound them thin like you would the breasts. Thighs are naturally juicier and more forgiving, offering an incredibly tender center with that same crispy crust. You’ll likely need to adjust the cooking time slightly, adding a minute or two per side due to the slightly denser nature of the meat.
Final Thoughts: The Sound of Home
For me, cooking isn’t just about food, it’s about making people happy. And nothing makes Emily and the kids happier than the sound of that first cutlet being sliced through, revealing a juicy white interior and an immediate, audible crunch. This Crispy Garlic Chicken Cutlets recipe is more than a 30-minute meal, it’s a dependable source of comfort and connection at the dinner table.
We all have those staple recipes that form the backbone of our family life, the ones we turn to when we need a guaranteed success. This is mine. It’s simple, it’s savory, and it satisfies the deepest craving for delicious, hearty food. I hope you and your family enjoy this recipe as much as mine does!
Happy cooking, and remember: The best memories are often made right here, in the kitchen.
Don’t forget to save this recipe! Share it with a friend, leave a review, and let me know how you served your homemade crispy chicken cutlets recipe in the comments below!
Crispy Garlic Chicken Cutlets
Ingredients
Equipment
Method
- Prep the Chicken (Pounding is Key): If you didn’t buy pre-sliced cutlets, slice the chicken breasts horizontally through the middle to create thinner pieces. Place each piece between two sheets of plastic wrap or parchment paper. Using the flat side of a meat mallet or a rolling pin, gently pound the chicken until it’s evenly about 1/4 inch thick. Thinness is non-negotiable for fast cooking and maximum crust surface. Season lightly with salt and pepper.
- Set Up the Dredging Station: Arrange three wide, shallow plates or dishes on your countertop. Plate 1: Flour. Plate 2: Whisked eggs. Plate 3: The magic mix of panko breadcrumbs, Italian seasoned breadcrumbs, Parmesan, garlic powder, onion powder, and Italian seasoning. Ensure you mix the dry ingredients thoroughly.
- Dredge for Maximum Crunch: Take one chicken cutlet at a time. First, dredge it fully in the flour, shaking off the excess (this helps the egg stick). Second, dip it completely into the egg mixture, allowing extra to drip off. Third, press the cutlet firmly into the breadcrumb mixture, ensuring every part, especially the edges, is fully coated. Pressing firmly helps the crust stay put during frying. Place the coated cutlets on a wire rack or baking sheet, not touching, while you finish the rest.
- Heat the Oil: Pour the olive oil into a large heavy-bottomed skillet (cast iron works great for even heat) until it’s about 1/4 inch deep. Heat over medium-high heat until the oil is shimmering but not smoking. A good trick: drop a tiny pinch of breadcrumbs in. If they sizzle immediately, the oil is ready. This ideal frying temperature guidance (350-375°F) prevents soggy chicken.
- Pan-Fry the Chicken: Carefully place 2-3 cutlets in the hot oil, ensuring you don’t overcrowd the pan. If the heat drops too quickly, the chicken will absorb the oil. Fry for about 3-4 minutes per side, until the outside is deeply golden brown and golden crispy chicken. The thin cutlets should reach an internal temperature of 165°F quickly.
- Drain and Finish: Remove the finished cutlets and place them immediately on a wire rack set over a baking sheet (not paper towels, which can steam the bottom and make it soggy). This is essential for maintaining that spectacular crunch. Season lightly with a pinch of salt immediately after frying. Serve hot, optionally garnished with fresh parsley garnish and that crucial squeeze of fresh lemon juice.