
Introduction
Hi there! I’m Benjamin, the home cook and dad behind Mister Recipes. Did you know that searches for festive, colorful desserts skyrocket during holiday seasons? People aren’t just looking for something sweet; they’re searching for a centerpiece, a conversation starter, something that screams celebration. And what’s more celebratory than a dessert with a surprising twist? This recipe for Green Velvet Brownies with Cream Cheese Frosting is exactly that. It takes the classic, beloved brownie and gives it a vibrant, unforgettable makeover. I still remember the first time I made these for a family get together. The kids’ eyes went wide, and even the adults couldn’t resist the allure of that bold green hue. It’s more than just a brownie; it’s an experience. We’re talking about a super moist, chewy, and deeply flavorful brownie base with that signature subtle tang of velvet cake, all crowned with a rich, luscious, and perfectly sweet homemade cream cheese frosting. This isn’t just another recipe; it’s a showstopper for your next party, a perfect St. Patrick’s Day dessert, or just a fun way to bring a little magic to a regular Tuesday afternoon. It’s about creating those core memories in the kitchen, and trust me, these brownies are truly memorable.
Why You’ll Love This Green Velvet Brownies with Cream Cheese Frosting
- Visually Stunning and Festive: Let’s be honest, we eat with our eyes first! The vibrant green color of these brownies makes them an absolute showstopper. They are perfect for holiday baking, especially for St. Patrick’s Day, Christmas, or even a fun superhero themed birthday party. You don’t need to be a professional baker to create something that looks spectacular. This easy dessert recipe guarantees you’ll have the most eye catching treat on the dessert table, sparking joy and curiosity before anyone even takes a bite. They stand out beautifully alongside other festive treats, like my Vanilla Bean Shamrock Cookies, creating a truly impressive spread.
- Incredibly Moist and Chewy Texture: If you are a fan of chewy brownies with a dense, fudgy texture, you are in for a treat. These are the absolute opposite of dry or cakey brownies. The recipe is meticulously balanced with butter, oil, and just the right amount of flour to produce an unbelievably moist crumb that stays soft for days. Each bite delivers a rich, satisfying chewiness that brownie purists dream of. It’s the kind of texture that makes you close your eyes and savor the moment, a perfect companion to a cold glass of milk or a hot cup of coffee.
- Perfect Balance of Flavors: This isn’t just a regular brownie dyed green. The “velvet” in the name promises a unique flavor profile, and this recipe delivers. It has a subtle hint of tang from the vinegar and buttermilk (or a substitute), which is characteristic of classic red velvet cake. This complexity beautifully cuts through the richness of the chocolate and butter. Then, you have the frosting. The homemade cream cheese frosting is tangy, sweet, and luxuriously creamy, providing the perfect counterpoint to the brownie base. It’s a sophisticated flavor combination that feels both indulgent and perfectly balanced.
- Surprisingly Simple to Make: Despite their gourmet appearance, these brownies are incredibly beginner friendly. The instructions are straightforward, using common ingredients and standard kitchen equipment. There are no complicated techniques here. It’s a simple melt, mix, and bake process for the brownie batter. The frosting comes together in minutes with just a hand mixer or stand mixer. It’s the perfect recipe for when you want to impress your family and friends without spending hours in the kitchen. Even novice bakers can achieve flawless results, just like our friends over at The Soccer Mom Blog have shown.
Ingredients for Green Velvet Brownies with Cream Cheese Frosting
For the Green Velvet Brownies:
- 1/2 cup (113g) unsalted butter, melted
- 1 cup (200g) granulated sugar
- 1/4 cup vegetable oil
- 2 large eggs, at room temperature
- 1 tablespoon buttermilk (or see substitution)
- 1 teaspoon vanilla extract
- 1 teaspoon white vinegar
- 1-2 teaspoons green food coloring (gel preferred for vibrant color)
- 1 cup (120g) all purpose flour
- 2 tablespoons unsweetened cocoa powder
- 1/2 teaspoon baking soda
- 1/4 teaspoon salt
For the Cream Cheese Frosting:
- 8 oz (226g) full fat block cream cheese, softened
- 1/4 cup (57g) unsalted butter, softened
- 2-3 cups (240-360g) powdered sugar, sifted
- 1 teaspoon vanilla extract
- A pinch of salt
- Optional: Sprinkles for decoration
Substitutions: No buttermilk? No problem! Simply add 1/2 teaspoon of lemon juice or white vinegar to 1 tablespoon of regular milk and let it sit for 5 minutes.
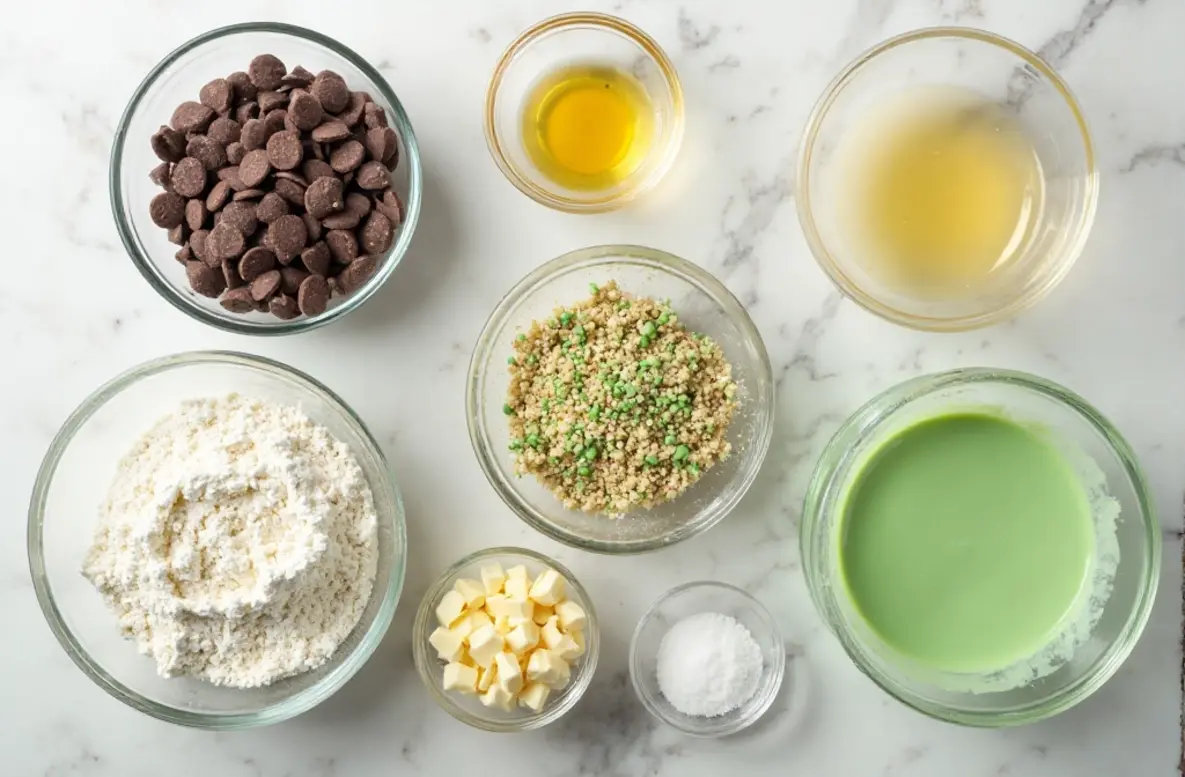
How to Make Green Velvet Brownies with Cream Cheese Frosting
Step by Step Instructions
- Preparation is Key: First things first, let’s get the oven ready. Preheat it to 350°F (175°C). Take an 8×8 inch baking pan and grease it thoroughly with butter or non stick spray. For super easy removal later, I highly recommend lining it with parchment paper, leaving some overhang on two sides to use as handles. This little trick is a game changer!
- Combine Wet Ingredients: In a large mixing bowl, combine the melted butter and granulated sugar. Whisk them together until they are well incorporated. You don’t need to cream them for a long time, just mix until smooth. Now, add the vegetable oil and whisk again. The oil is our secret weapon for an ultra moist brownie.
- Add Eggs and Flavors: Add the room temperature eggs, one at a time, whisking well after each addition until the batter is glossy. This helps create that perfect chewy texture. Next, stir in the buttermilk, vanilla extract, and white vinegar. These are the key to that classic “velvet” tang.
- Get the Green On: Now for the fun part! Add your green food coloring. I strongly recommend using a gel based food coloring as it provides a much more vibrant green color without adding excess liquid to the batter. Start with one teaspoon, mix it in, and see how you like the shade. You can add a little more until you reach your desired level of green. Remember that the color will darken slightly as it bakes.
- Combine Dry Ingredients: In a separate, medium sized bowl, whisk together the all purpose flour, unsweetened cocoa powder, baking soda, and salt. Whisking them first ensures everything is evenly distributed, so you don’t get any surprise pockets of salt or baking soda in your finished brownies.
- Mix Batter and Bake: Gently fold the dry ingredient mixture into the wet ingredients. Be very careful not to overmix! Mix only until you no longer see streaks of flour. Overmixing develops the gluten in the flour, which can lead to tough, cakey brownies instead of fudgy ones. Pour the beautiful green batter into your prepared pan and use a spatula to spread it evenly. Bake for 25 to 30 minutes. You’ll know they’re done when a toothpick inserted into the center comes out with moist crumbs attached, but not wet batter.
- Cool Completely: This is probably the hardest step because you’ll be so tempted to dig in! You must let the brownies cool completely in the pan on a wire rack. If you try to frost them while they are still warm, you will have a melty, soupy mess. Patience is a virtue in baking!
- Whip Up the Frosting: While the brownies are cooling, let’s make the heavenly homemade cream cheese frosting. In a large bowl, using a hand mixer or a stand mixer with the paddle attachment, beat the softened cream cheese and softened butter together on medium speed until smooth and creamy, about 2 minutes.
- Finish the Frosting: Reduce the mixer speed to low and gradually add the sifted powdered sugar. Starting with 2 cups. Mix until it’s just combined, then add the vanilla and a pinch of salt. Increase the speed to medium high and beat for another 2 to 3 minutes until the frosting is light, fluffy, and smooth. If you prefer a stiffer frosting, add more powdered sugar, a quarter cup at a time.
- Frost and Serve: Once the brownies are completely cool, spread the cream cheese frosting evenly over the top. You can make lovely swirls with the back of a spoon or an offset spatula. If you’re feeling extra festive, add some sprinkles on top! Slice into squares and serve. Watch them disappear!
Pro Tips & Variations
- Achieving the Perfect Texture: The key to a truly fudgy brownie is to be mindful of your mixing and baking times. When you combine the wet and dry ingredients, mix just until they come together. A few small streaks of flour are okay. Overmixing will make them tough. Also, keep a close eye on them in the oven. The moment a toothpick comes out with moist, sticky crumbs is the moment to pull them out. A “clean” toothpick often means you’ve gone too far and the brownies will be dry. Underbaking slightly is always better than overbaking.
- Room Temperature is a Must: For the smoothest, creamiest frosting, your ingredients MUST be at room temperature. Cold cream cheese will result in a lumpy frosting, and no amount of mixing can fix it. Take your cream cheese and butter out of the fridge at least an hour before you plan to make the frosting. The same goes for the eggs in the brownie batter; room temperature eggs incorporate much better, creating a more uniform and stable batter.
- Get Creative with Mix Ins: While this recipe is fantastic as is, it also serves as a wonderful base for customization. Feel free to fold about 3/4 cup of your favorite mix ins into the batter just before pouring it into the pan. White chocolate chips are a classic pairing that provides a sweet contrast. Chopped nuts like pecans or walnuts add a delightful crunch. For a different but equally festive green, consider some inspiration from my Pistachio Pudding Cookies and add chopped pistachios!
Variations:
- Mint Green Velvet Brownies: For a delicious twist, add 1/2 teaspoon of peppermint extract to the brownie batter along with the vanilla. You can also add a 1/4 teaspoon to the frosting. This creates a wonderful green brownie with a refreshing mint flavor, similar to the idea in my Fudgy Mint Oreo Brownies.
- Gluten Free Green Velvet Brownies: To make this recipe gluten free, simply substitute the all purpose flour with a high quality 1 to 1 gluten free baking flour blend that contains xanthan gum. The results are just as moist and delicious!
- Extra Rich Brownies: For a deeper, richer chocolate flavor, you can add 1/2 cup of semisweet or white chocolate chips to the batter. This adds another layer of decadent texture and taste.
Serving Suggestions
These Green Velvet Brownies are an absolute star on their own, but pairing them with the right companion can elevate the experience from delicious to unforgettable. Think about contrast in temperature, texture, and flavor.
First, imagine serving a slightly warmed brownie alongside a scoop of premium vanilla bean ice cream. As the cold, creamy ice cream slowly melts over the warm, fudgy brownie, it creates an irresistible pool of sweet, creamy goodness. The clean, aromatic flavor of the vanilla bean perfectly complements the tangy cream cheese frosting and the rich brownie without overpowering them. It’s a classic pairing for a reason and turns this simple brownie into a decadent dessert worthy of a restaurant menu. For a truly festive occasion, you could even make it a full dessert platter with other treats, similar in spirit to a Shamrock Swirl Pie.
Another fantastic option is to lean into the rich flavors with a hot beverage. A freshly brewed cup of dark roast coffee or a strong espresso is the perfect adult pairing. The slightly bitter, robust notes of the coffee cut through the sweetness of the frosting and the richness of the brownie, cleansing the palate and making each bite taste just as good as the first. For the kids, or for a cozy evening treat, a tall glass of cold milk is non negotiable. It’s the ultimate comfort pairing that will transport everyone right back to the simple joys of childhood.
Finally, for a touch of elegance and freshness, serve these brownies with a side of fresh berries. A small bowl of tart raspberries, sliced strawberries, or even a mix of berries provides a beautiful color contrast and a burst of bright, fruity acidity. This freshness lightens up the richness of the dessert, making it feel both indulgent and refreshing at the same time. The tartness of the raspberries, in particular, is a wonderful echo of the subtle tang in the cream cheese frosting.
Storage & Reheating for Green Velvet Brownies with Cream Cheese Frosting
Because of the homemade cream cheese frosting, these brownies must be stored in the refrigerator. Place them in an airtight container, either as a whole slab or cut into individual squares. Using wax paper or parchment paper between layers can prevent them from sticking together. They will stay fresh and delicious in the fridge for up to 5 days. The brownies will firm up when chilled, so for the best texture, I recommend letting them sit at room temperature for about 15 to 20 minutes before serving. This allows the brownie to soften and the frosting to become creamier.
For longer term storage, these brownies freeze beautifully! You can freeze the entire uncut slab or individual brownies. First, place the brownies on a baking sheet and “flash freeze” them for about an hour until the frosting is firm. Then, wrap them tightly in plastic wrap and then in aluminum foil, or place them in a freezer safe airtight container. This double wrapping method prevents freezer burn. They can be frozen for up to 3 months. To thaw, simply transfer them to the refrigerator overnight. Again, let them come to room temperature before enjoying for the best taste and texture.
FAQ about Green Velvet Brownies with Cream Cheese Frosting
- What makes a brownie “velvet”?
- The “velvet” in recipes like red velvet or green velvet cake traditionally comes from a chemical reaction between acidic ingredients like buttermilk and vinegar, and baking soda. This creates a very fine, smooth, and tender crumb. While modern recipes also rely on this for a subtle tang, the name also refers to the soft, velvety texture we create with the perfect balance of ingredients.
- Can I make these brownies without food coloring?
- Absolutely! If you omit the green food coloring, you will have a delicious “blond” velvet brownie with a hint of chocolate from the cocoa powder. The flavor will be the same, just without the festive color. They will still be incredibly moist and topped with that wonderful cream cheese frosting. Another great source for this kind of recipe is Plain Chicken, which shows a similar approach.
- Why is my cream cheese frosting runny?
- There are two common culprits for runny frosting. First, your cream cheese or butter might have been too soft or even slightly melted. They should be at room temperature but still hold their shape. Second, you might be using a “spreadable” cream cheese from a tub. For frosting, you must use the full fat, brick style cream cheese for the best structure and firmest set.
- Can I bake this in a 9×13 inch pan?
- You can, but the brownies will be much thinner and will require a significantly shorter baking time. If you use a 9×13 inch pan, I would recommend checking for doneness starting around 18-20 minutes. For a thicker brownie in a larger pan, you should double the recipe.
Final Thoughts on Green Velvet Brownies with Cream Cheese Frosting
There you have it, a recipe for a truly special festive treat that’s as fun to make as it is to eat. These Green Velvet Brownies with Cream Cheese Frosting are more than just a dessert; they are a conversation piece, a centerpiece, and a memory maker. I hope you and your family enjoy every last crumb. If you bake these, I would absolutely love to hear about it! Drop a comment below and let me know how they turned out. And don’t forget to save this recipe to your favorite dessert board on Pinterest so you can find it easily for your next celebration. For more family friendly recipes that bring everyone together, be sure to subscribe to my newsletter. Happy baking!
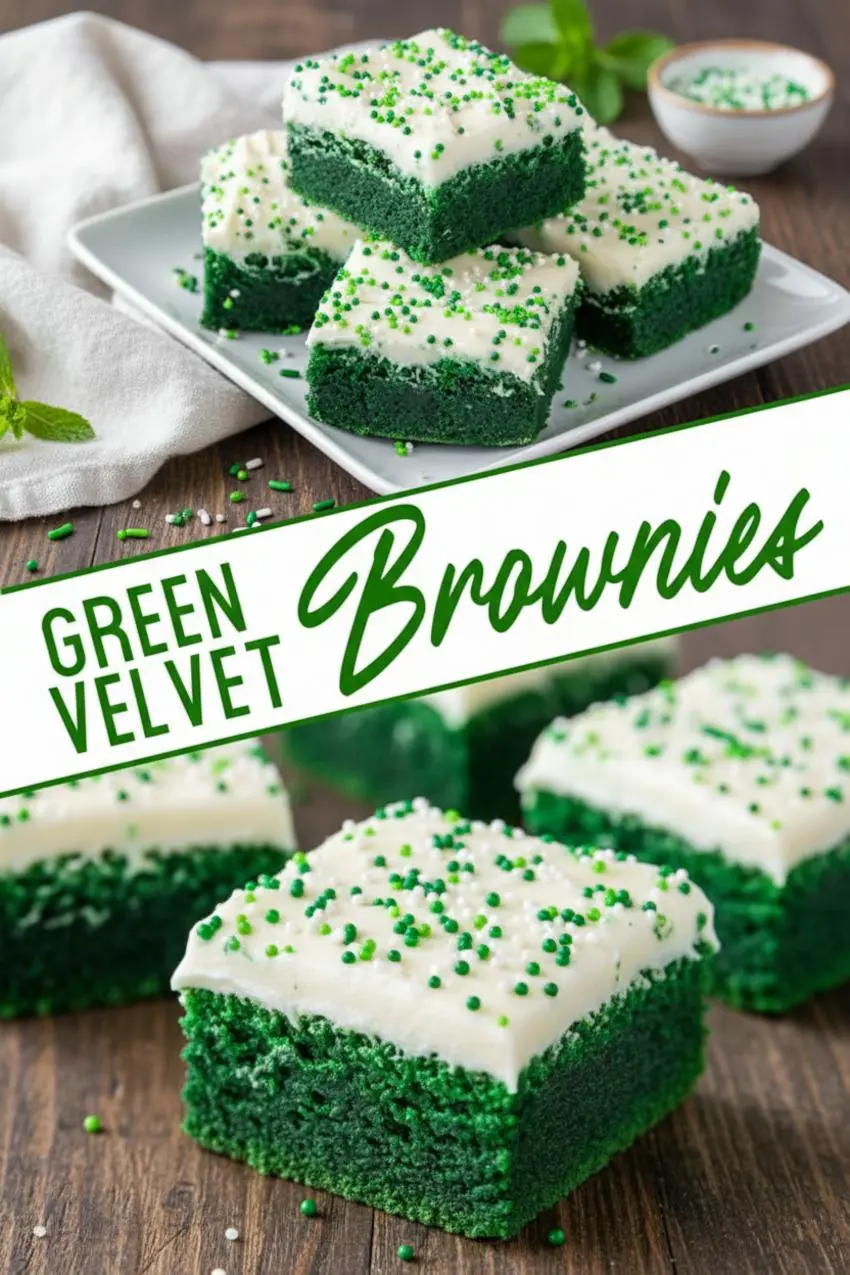

Green Velvet Brownies with Cream Cheese Frosting
Ingredients
Equipment
Method
- Preheat oven to 350°F (175°C). Grease an 8x8 inch baking pan with butter or non-stick spray. Line with parchment paper, leaving overhang on two sides.
- In a large mixing bowl, combine melted butter and granulated sugar. Whisk until well incorporated.
- Add vegetable oil and whisk again.
- Add eggs one at a time, whisking well after each.
- Stir in buttermilk, vanilla extract, and white vinegar.
- Add green food coloring and mix until desired color is achieved.
- In a separate bowl, whisk together flour, cocoa powder, baking soda, and salt.
- Fold dry ingredients into wet ingredients gently, until just combined.
- Pour batter into prepared pan and spread evenly. Bake for 25-30 minutes, until toothpick comes out with moist crumbs.
- Cool completely in pan on wire rack.
- Beat cream cheese and butter until smooth.
- Add powdered sugar gradually, mixing on low.
- Add vanilla and salt, then mix on medium-high until light and fluffy.
- Spread frosting over cooled brownies.
- Add sprinkles if desired. Slice into squares and serve.