The Little Magic of a Flaky Pastry Hat: A Halloween Kitchen Story
Have you ever wondered if you could capture the feeling of Halloween that crisp, electric hum in the air, the rustle of dry leaves, the giggling anticipation of little ghosts and goblins in a single bite? It’s a question that whispers to me every October, usually on an afternoon when the Oregon sky turns a moody gray and the pine trees outside my window seem to hold their breath. It’s on days like these that I find my answers not in complex spells or bubbling cauldrons, but in the humble, quiet magic of my own kitchen. The kind of magic that unfolds with a dusting of flour and the warmth of the oven. And for me, that feeling is perfectly embodied in these enchanting Witch Hat Puff Pastries.
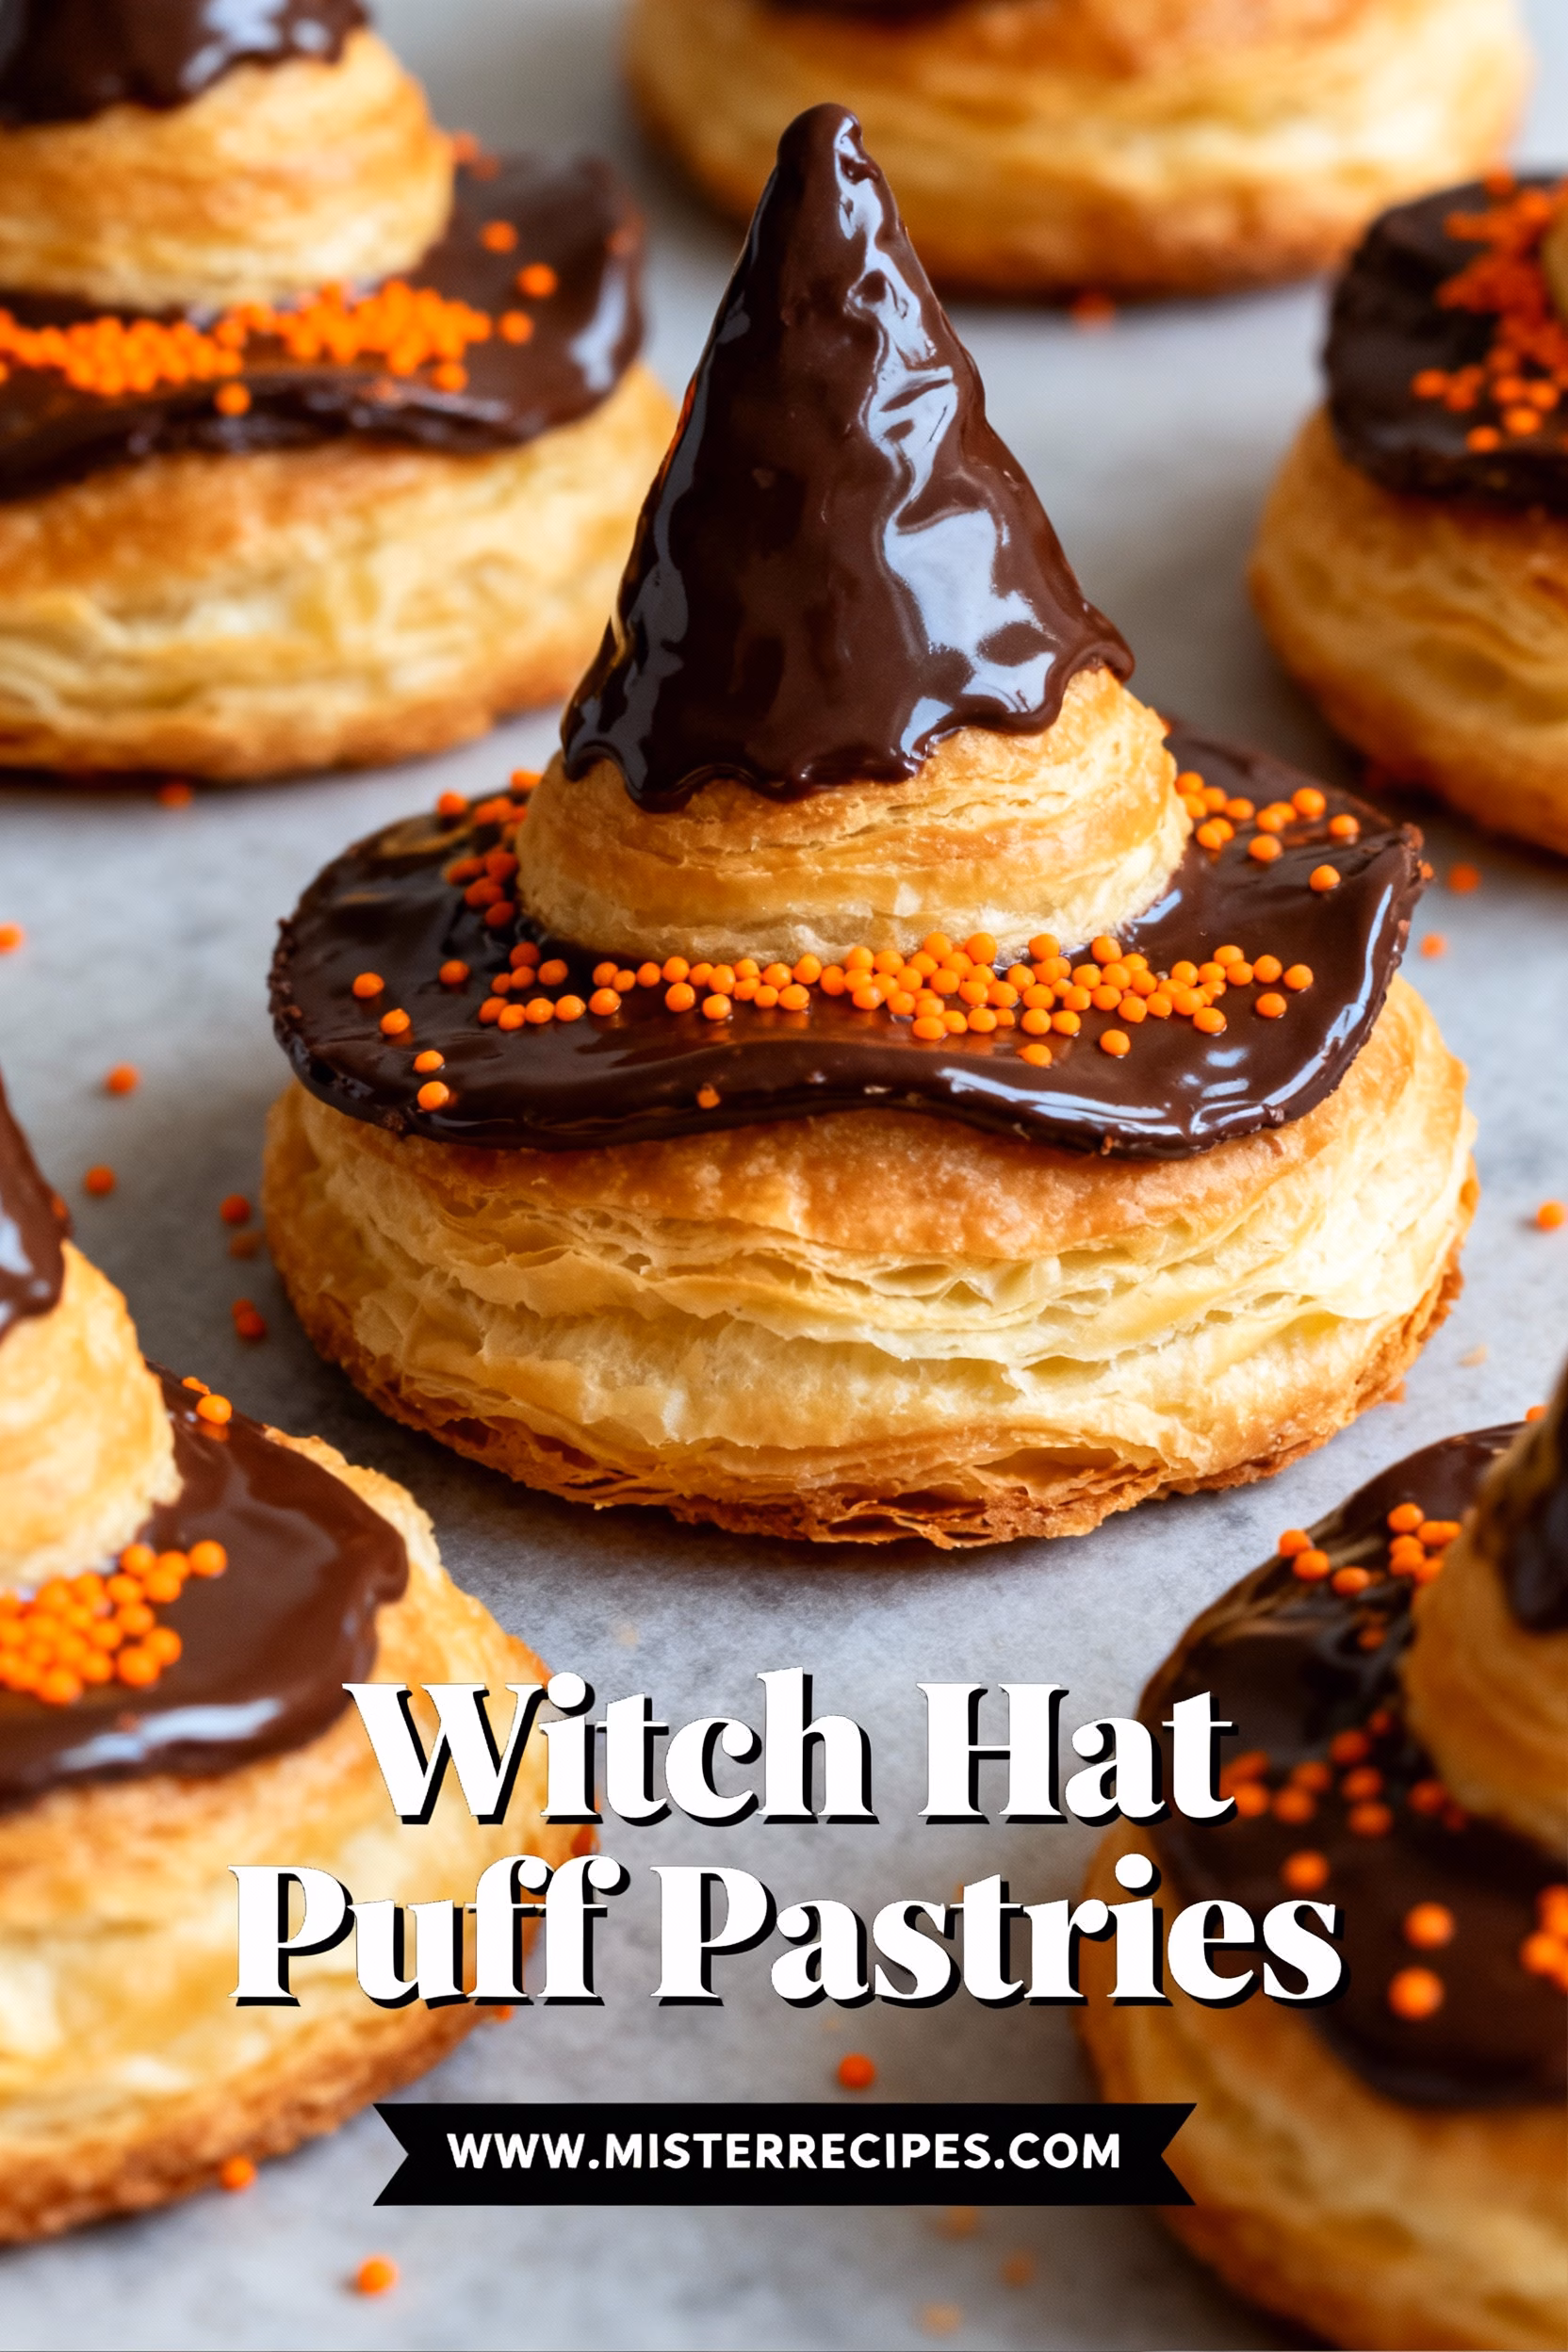
The first time I made these, it was almost by accident. The kids, Olivia and James, were vibrating with Halloween excitement, their costume plans changing by the hour. I had a sheet of puff pastry thawing on the counter, originally destined for something far more sensible. But as I watched them run through the yard, their laughter echoing like little bells, a different idea began to form. I thought about my own childhood, the thrill of dressing up, and the simple joy of a special treat made just for that one magical night. I wanted to create something that wasn’t just food, but a memory in the making. So, I grabbed a couple of round cookie cutters and started to play. What emerged from the oven that day was more than just a snack; it was a story. A flaky, buttery, chocolate-filled story in the shape of a crooked little hat. These puff pastry witch hats became an instant tradition, a signal that the most wonderful, spooky time of the year had truly begun. They are one of my favorite Halloween desserts to make, a perfect blend of whimsy and warmth that proves you don’t need a spellbook to create something truly magical.
Why You’ll Love This Witch Hat Puff Pastries Recipe
There’s a special kind of joy that comes from creating spooky snacks that are as delightful to make as they are to eat. These Witch Hat Puff Pastries are at the very top of that list in our house. They are more than just a recipe; they are an invitation to slow down, get a little creative, and share a moment of sweet, flaky goodness with the people you love. If you’re looking for the perfect Halloween party treats, here’s why you’ll fall completely under their spell:
- Effortlessly Simple and Incredibly Quick: Let’s be honest, Halloween is a wonderfully chaotic time. Between costume preparations and party planning, you need treats that are impressive without being complicated. This recipe is your secret weapon. Using store bought puff pastry, these hats come together in a snap, making this an easy witch hat puff pastries recipe that even beginners can master. It’s the kind of quick witch hat puff pastry halloween snack that leaves you more time for the fun stuff, like watching scary movies or greeting trick or treaters.
- A Perfect Canvas for Creativity: This is where the real fun begins! Think of the pastry as your blank slate. While I adore a simple, rich chocolate filling, the possibilities are endless. You can explore a world of the best witch hat puff pastry filling ideas, from sweet to savory. Imagine them filled with cinnamon spiced apple butter, a dollop of pumpkin cream cheese, or even a savory blend of herbs and mozzarella. You can truly make them your own, which is why they are one of my favorite creepy halloween party finger foods to customize.
- Wonderfully Whimsical and Delicious: There’s an undeniable charm to these little hats. They are one of those cute witch hat treats that bring an instant smile to everyone’s face. But their appeal isn’t just visual. The magic is in the texture and taste. The puff pastry bakes up into dozens of light, buttery, shatteringly crisp layers. Paired with a warm, melted filling and a sweet chocolate glaze, each bite is a perfect balance of flaky, rich, and sweet. It’s a sophisticated flavor profile wrapped in a playful package.
- A Fun, Kid-Friendly Halloween Activity: Some of my most treasured memories are made in the kitchen with my children, their hands dusted with flour. This is the perfect witch hat puff pastry recipe for kids. They can help press out the circles, dab on the egg wash, and, of course, take charge of the decorating. Letting them dip the cooled hats in chocolate and add a shower of edible glitter or sprinkles is where their creativity can truly shine. It turns baking into a cherished family ritual and makes them proud of the homemade witch hat puff pastries they helped create. It’s a wonderful activity to pair with other simple projects like making easy mummy hot dogs.
Ingredients for Witch Hat Puff Pastries
The beauty of this recipe lies in its simplicity. You only need a few pantry staples to conjure these magical treats. Here’s what you’ll need to get started:
- Puff Pastry: One sheet of all butter, store bought puff pastry, thawed according to package directions. This is the foundation of our puff pastry sheet recipes halloween.
- Large Egg: You’ll need one egg, lightly beaten with a splash of water, to create an egg wash. This is the secret to that beautiful golden brown, glossy finish.
- Filling: About 1/2 cup of your chosen filling. My go to is chocolate hazelnut spread (like Nutella), but chocolate chips, fruit jam, or even a savory cheese filling works wonderfully. This is a great place to use your favorite hazelnut spread halloween treats.
- Semi Sweet Chocolate Chips: One cup for melting. This will become the “paint” for our witch hats.
- Coconut Oil or Vegetable Shortening: Just a teaspoon helps the melted chocolate become smooth and perfect for dipping.
- Sprinkles: Orange, black, purple, or any festive Halloween sprinkles you like! Edible glitter also adds a wonderful, magical sparkle.
Substitutions:
- For the Puff Pastry: If you’re in a pinch, you can experiment with crescent roll dough, though the texture will be softer and less flaky. For a gluten free version, use your favorite brand of gluten free puff pastry.
- For the Filling: Don’t have chocolate hazelnut spread? A small square of good quality baking chocolate, a dollop of cream cheese mixed with a little sugar, or even a thick pumpkin butter are all fantastic alternatives for these sweet witch hat puff pastries.
How to Make Witch Hat Puff Pastries
Alright, let’s roll up our sleeves. This is where the quiet kitchen magic really begins. I love the faint rustle of the parchment paper and the cool, smooth feel of the pastry dough. It feels like a promise of something delicious to come. Making these hats is a gentle, mindful process that’s more about playful assembly than difficult technique. Just follow along, and you’ll see how to make witch hat puff pastries that look like they came from a charming little goblin bakery. This simple witch hat puff pastry step by step guide will make the process a breeze.
Step-by-Step Instructions
- Prepare Your Workspace: First things first, preheat your oven to 400°F (200°C). Line a large baking sheet with parchment paper. This little step will save you so much cleanup later, and I am all about saving time for more moments of joy. Unfold your thawed puff pastry sheet onto a lightly floured surface. Gently roll it out just a tiny bit to smooth any creases.
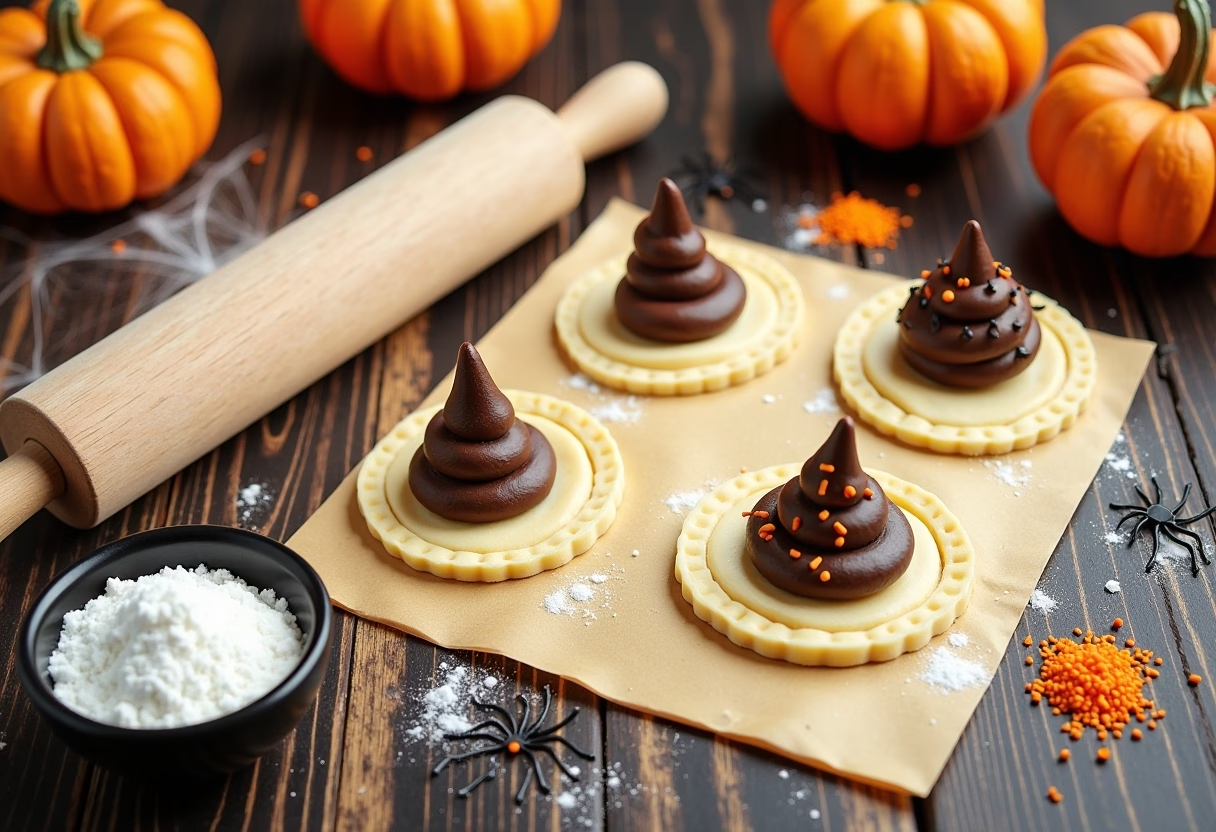
- Cut the Hat Brims and Cones: Now for the fun part. Using a 2.5 inch round cookie cutter, cut out as many circles as you can from the puff pastry. These will be the brims of your hats. Arrange them on your prepared baking sheet, giving them a little space to puff up. Now, take the remaining dough and, using a 1.5 inch round cookie cutter, cut out more circles. These smaller circles will become the cones.
- Shape the Cones: This is the clever trick for shaping puff pastry for witch hats. Take one of the small circles and gently stretch it into a slight oval. Using your fingers, pinch one end together and roll it carefully into a cone shape, making sure the seam is sealed well. It doesn’t have to be perfect; a little bit of a crooked point just adds to the character!
- Fill and Assemble: Place a small dollop of your chosen filling (about 1/2 teaspoon) in the center of each large circle (the brim). A little goes a long way here; overfilling will cause it to bubble out during baking. Now, place one of your pastry cones upright over the filling, pressing it gently onto the brim to seal it. The goal is to create that iconic witch hat shape.
- Apply the Egg Wash: In a small bowl, whisk your egg with a teaspoon of water. Using a pastry brush, gently brush this egg wash over the entire surface of each hat. This is what gives the puff pastry witch hats that gorgeous, deep golden color and a lovely sheen. It’s like adding a little bit of sunshine before they go into the oven.
- Bake to Golden Perfection: Slide the baking sheet into your preheated oven. Bake for 15 to 18 minutes, or until the pastries are beautifully puffed up, golden brown, and cooked through. The kitchen will start to fill with the most incredible buttery aroma—the first reward for your efforts.
- Cool and Prepare for Decorating: Once baked, carefully transfer the witch hats to a wire rack to cool completely. This is an important step! If you try to decorate them while they’re still warm, the chocolate will just melt into a puddle. Patience here is key.
- Decorate Your Masterpieces: While the hats are cooling, melt your semi sweet chocolate chips with the coconut oil in a microwave safe bowl. Heat in 30 second intervals, stirring in between, until smooth. This is the centerpiece of decorating witch hat pastries. Once the hats are cool, dip the top cone part of each one into the melted chocolate, letting any excess drip off. Immediately add your festive sprinkles or edible glitter before the chocolate sets. For a final touch, you can use a small amount of yellow or orange icing to create a little “buckle” around the base of the cone. Let them sit until the chocolate is completely firm.
Pro Tips & Variations
Over the years of making these witch hat puff pastries, I’ve gathered a few little secrets that help ensure they turn out perfectly every time. Think of these as friendly whispers from my kitchen to yours, along with some ideas to spark your own creative magic. This is where a good recipe becomes a great one, allowing you to adapt it to your taste and what you have on hand. It’s how cooking becomes a conversation.
Pro Tips for Perfect Pastries:
- Keep Your Puff Pastry Cold: This is the golden rule of working with puff pastry. The butter needs to stay in solid little layers within the dough. When the cold butter hits the hot oven, it creates steam, which is what “puffs” the pastry into those irresistible flaky layers. If the dough gets too warm and sticky while you’re working, don’t hesitate to pop it back in the fridge for 10-15 minutes to chill.
- Don’t Skip the Egg Wash: I know it can feel like an extra step, but the egg wash does more than just add color. It helps to create a beautiful, shiny crust and a slightly richer flavor. It also acts as a great “glue” for sealing the cone to the brim. It’s what makes them look professionally made, even though they’re so simple.
- Seal the Edges Well: When placing the cone on top of the brim, press down gently but firmly all around the base. This helps to contain the filling as it gets hot and bubbly in the oven, preventing it from leaking out and making a mess on your baking sheet.
- Parchment Paper is Your Best Friend: Not only does it prevent the pastries from sticking, but it also promotes even browning on the bottom. It makes cleanup an absolute dream, which is always a bonus, especially when you’ve got a kitchen full of helpers for your Halloween baking.
Variations to Spark Your Imagination:
- Savory Witch Hat Puff Pastries: Who says witch hats have to be sweet? For a more grown up or appetizer friendly version, try filling them with a mixture of crumbled goat cheese, chopped chives, and a pinch of black pepper. A blend of shredded Gruyère and finely chopped prosciutto is also divine. These make for incredible savory halloween appetizers.
- Fall Fruit Fillings: Embrace the flavors of the season! Fill the hats with a thick apple butter, a dollop of pumpkin pie filling, or even a spoonful of cranberry sauce. These versions pair wonderfully with a light dusting of cinnamon sugar instead of a chocolate glaze. This is a great way to explore fruit filling puff pastry halloween ideas.
- Vegan Witch Hat Puff Pastries: This is an easy swap! Many store bought puff pastry brands (like Pepperidge Farm) are accidentally vegan. Just be sure to check the ingredients. Use a vegan chocolate hazelnut spread or a fruit based filling, and brush the pastries with a little unsweetened plant based milk instead of an egg wash to help with browning. Now you have a treat that everyone at the Halloween potluck can enjoy.
- Gluten Free Witch Hat Pastries: With the excellent gluten free puff pastry available in most grocery stores now, no one has to miss out. Simply substitute your favorite brand and follow the recipe as written. The baking time might vary slightly, so keep an eye on them. They are just as perfect for your fall desserts table. For another fun gluten free option, you could try making monster Rice Krispie treats.
Serving Suggestions
For me, the way food is presented is part of its story. These Witch Hat Puff Pastries are such little showstoppers, they deserve to be the star of your Halloween spread. I love arranging them on a rustic wooden board or a simple white platter, where their dark, glossy chocolate and whimsical shapes can truly pop. They look like they’ve just been gathered from a magical forest floor. Ethan, my husband, always says his favorite part is capturing them with his camera before they disappear, the light catching the little sprinkles like scattered jewels.
Here are a few ways we love to serve them in our home, turning them from a simple treat into a full fledged experience:
- On a Halloween Dessert Board: Create an abundant, inviting platter full of other sweet and spooky Halloween dessert recipes. Pair the witch hats with things that offer a different texture or flavor. Think of chewy witch hat cookies, creamy pumpkin dip with graham crackers, or a bowl of colorful candy corn mocktail. The variety makes the board feel like a treasure chest of treats for your Halloween party.
- With a Warm, Cozy Drink: There is nothing better on a chilly October evening than a warm pastry and a comforting drink. Serve these hats alongside mugs of spiced apple cider, rich hot chocolate, or for the adults, a creamy pumpkin spice white russian. The warmth of the drink is the perfect complement to the flaky, buttery pastry.
- As a Spooky Movie Night Snack: Planning a night of classic monster movies? These are the ultimate spooky movie night snacks. Arrange them on a tray with some freshly popped popcorn (maybe even our zombie popcorn mix) and a few other easy finger foods. They’re easy to eat while curled up on the couch and feel so much more special than a simple bag of candy.
- For a Halloween School Party: If you’re tasked with bringing treats for a classroom party, these are a guaranteed hit. They are nut free (if you use a nut free filling), easy for little hands to hold, and visually exciting. They are one of the most requested Halloween school party treats among my kids’ friends. Just be sure to check for any classroom allergies first!
- Alongside Savory Bites: Balance the sweetness by serving them alongside some savory spooky snacks. Things like our easy spider-web pizza or some spooky deviled eggs create a well rounded menu for any get together, making sure there’s a little something for everyone.
Storage & Reheating
These pastries are definitely at their magical best when fresh from the oven, with those flaky layers at their peak. But life is busy, and sometimes you need to make things ahead. Here’s how to store and bring them back to life:
- Storing: Once completely cooled, you can store the witch hat puff pastries in a single layer in an airtight container at room temperature for up to 2 days. The pastry will soften slightly over time, but they will still be delicious. Avoid storing them in the refrigerator, as the moisture can make the pastry soggy.
- Freezing: For longer storage, it’s best to freeze them unbaked. Assemble the hats completely but do not apply the egg wash. Place them on a baking sheet in a single layer and freeze until solid. Once frozen, you can transfer them to a freezer safe bag or container. They can be stored for up to 2 months. When ready to bake, there’s no need to thaw! Just place them on a parchment lined baking sheet, apply the egg wash, and bake from frozen, adding about 5-7 minutes to the original baking time.
- Reheating: To bring back some of that wonderful crispness, the oven is your best bet. Place the pastries on a baking sheet and pop them into a 350°F (175°C) oven for about 5 to 7 minutes. This will gently warm them through and re crisp the layers beautifully. I would avoid the microwave, as it will make the pastry tough and soggy.
FAQ about Witch Hat Puff Pastries
Can I use crescent roll dough instead of puff pastry?
Yes, you absolutely can use crescent roll dough as a substitute. The process is very similar! The final texture will be different softer, doughier, and more bread-like rather than light and flaky but they will still be incredibly delicious and fun to make. They will be a slightly different kind of magic!
What are the best fillings for Witch Hat Puff Pastries?
This is where you can get so creative! For sweet witch hat puff pastries, a thick chocolate-hazelnut spread, chocolate chips, or a fruit jam are classics. A dollop of sweetened cream cheese or pumpkin butter is also divine. For savory witch hat puff pastries, try a mix of shredded cheese and herbs, spinach and feta, or even a small scoop of a thick chili for a hearty bite. The key is to use a filling that isn’t too watery to prevent sogginess.
How do I keep my puff pastry from getting soggy?
There are a few key tricks! First, make sure your filling is thick and not too wet. Second, don’t overfill the pastries—a little goes a long way. Third, ensure the pastries are sealed well at the base. Finally, baking at a high temperature (400°F/200°C) helps the pastry to puff up and cook through quickly, which sets the crust before the filling has a chance to make it wet.
Can I make these ahead of time for a party?
Yes, these are great for making ahead, which is perfect for stress free Halloween party planning. Your best option is to assemble them completely (without the egg wash) and freeze them unbaked, as described in the storage section. You can then bake them fresh right before your guests arrive, filling your home with that amazing buttery aroma. If you need to bake them the day of, you can bake them in the morning and let them cool, then store them in an airtight container at room temperature until it’s time to serve.
Final Thoughts on Witch Hat Puff Pastries
In the end, I’ve come to believe that the best recipes are the ones that do more than just feed us. They connect us. They become part of our stories, our traditions, the very fabric of our family life. These Witch Hat Puff Pastries are exactly that for us. They are more than just a halloween treat; they are the crisp autumn air, the sound of my children’s laughter, and the quiet joy of creating something with my own two hands. They are a reminder that even in the busiest of seasons, we can find moments of simple, sweet magic.
As I’ve always said, “I don’t chase perfection in food I chase connection.” And there is so much connection to be found here in the shared activity of cutting the dough, in the excited anticipation as the pastries puff up in the oven, and in the shared smiles as everyone takes their first flaky, chocolatey bite. My work is about inspiring you to cook not just for nourishment, but for memory, emotion, and meaning.
So I hope you’ll take this recipe into your own kitchen. Let it be a starting point for your own Halloween traditions. Let your kids get their hands messy with sprinkles, try a new filling that feels like you, and most importantly, have fun with it. A a good story, like a good soup, needs time to simmer. Both are made with patience, honesty, and a touch of salt or in this case, a touch of sugar.
If you make these magical little hats, I would be so honored if you left a comment below to share your story. What memories did they conjure for you? And please, don’t forget to save this recipe on Pinterest to keep the magic alive for next year! Happy Halloween, from my kitchen to yours.
Witch Hat Puff Pastries
Ingredients
Equipment
Method
- Preheat your oven to 400°F (200°C). Line a large baking sheet with parchment paper.
- Unfold your thawed puff pastry sheet onto a lightly floured surface. Gently roll it out just a tiny bit to smooth any creases.
- Using a 2.5 inch round cookie cutter, cut out as many circles as you can from the puff pastry. These will be the brims of your hats. Arrange them on your prepared baking sheet.
- Take the remaining dough and cut out more circles using a 1.5 inch round cutter. These will become the cones.
- Take one of the small circles and gently stretch it into a slight oval. Pinch one end together and roll it carefully into a cone shape, sealing the seam well.
- Place a small dollop of filling (about 1/2 teaspoon) in the center of each large circle (the brim). Place one of your pastry cones upright over the filling, pressing it gently onto the brim to seal it.
- In a small bowl, whisk the egg with a teaspoon of water. Brush all over each hat with the egg wash.
- Bake for 15 to 18 minutes, or until golden brown and cooked through.
- Carefully transfer pastries to a wire rack to cool completely before decorating.
- Melt your semi-sweet chocolate chips with coconut oil in a microwave-safe bowl, heating in 30-second intervals and stirring in between until smooth.
- Once the hats are cool, dip the top cone part of each hat into the melted chocolate, letting any excess drip off.
- Immediately add your festive sprinkles or edible glitter before the chocolate sets.
- Optionally, use a small amount of yellow or orange icing to create a little “buckle” around the base of the cone.