Stories from the Skillet: The Tropical Escape We Needed
It was one of those classic Bend, Oregon, afternoons, where the high-desert air was crisp but the clouds were refusing to hold back the gray. Ethan was out in the garage, fiddling with his studio lighting, and the kids, Olivia and James, were wrestling over the last of a stale bag of pretzels. I stood by the kitchen window, watching the rain start to streak the glass, and found myself yearning for warmth, for color, for the unmistakable smell of sea salt and sunshine.
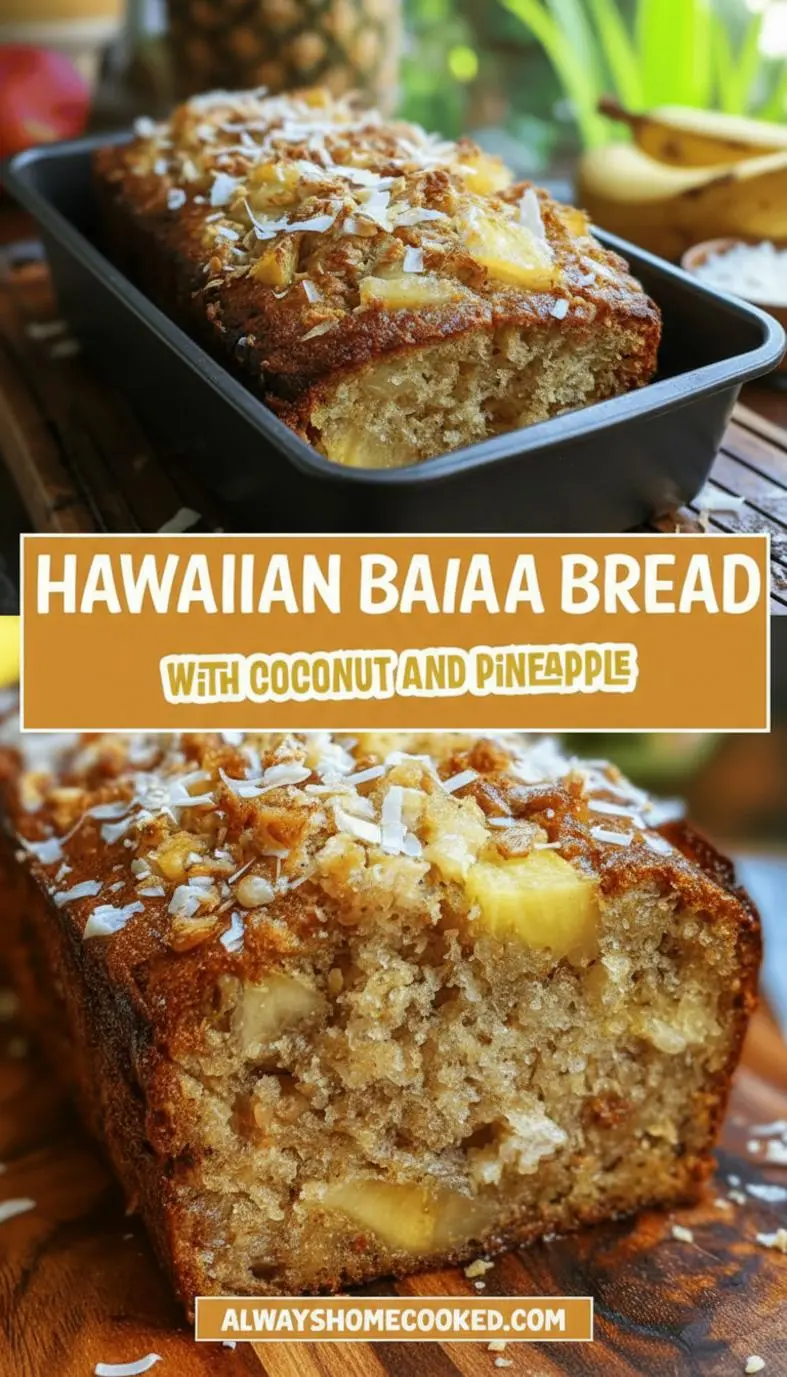
The solution, as it so often is, lay in the freezer, specifically in the lonely bag of over-ripened bananas I’d forgotten about last week. We make a lot of banana bread around here. We have recipes for every mood, from the worlds moistest banana bread to the speedy easy 5-ingredient banana bread, but on that dismal afternoon, the standard recipe felt inadequate. I needed something that transported us, something bright, chewy, and deeply comforting. I needed the Hawaiian Banana Bread.
This isn’t just another slice of quick bread, friends. This is an invitation to leave the gray behind. It’s what happens when the richness of classic banana nut bread meets the vibrant tropical flavors of the islands, complete with crushed pineapple, flakes of sweet coconut, and buttery macadamia nuts. This best Hawaiian banana bread recipe creates a loaf so incredibly moist, it feels like a dream. It instantly cuts through the Central Oregon chill, bringing the warmth of a Maui morning right to our countertop. We’re talking about the holy grail of tropical quick breads, truly the best Hawaiian banana bread you will ever taste, rivaled only perhaps by the famous Road to Hana banana bread. It is an incredibly easy Hawaiian banana bread with pineapple recipe, designed for maximum flavor with minimal fuss.
When the first loaf came out of the oven, Ethan’s camera was instantly forgotten. The smell, that heady mix of toasted coconut and dark spiced sugar, brought both kids running. James kept asking if we were going on vacation right now. And honestly, for thirty minutes, sitting around that kitchen island with butter melting into warm slices, we absolutely were. This recipe is your ticket to that escape.
Table of Contents
- Stories from the Skillet: The Tropical Escape We Needed
- Why You’ll Love This Hawaiian Banana Bread
- Ingredients for Hawaiian Banana Bread
- How to Make Hawaiian Banana Bread
- Pro Tips & Variations of Hawaiian Banana Bread
- Hawaiian Banana Bread Serving Suggestions
- Hawaiian Banana Bread Storage & Reheating
- FAQ about Hawaiian Banana Bread
- Final Thoughts
Why You’ll Love This Hawaiian Banana Bread
This isn’t just a simple banana bread recipe, it’s a flavor composition that will quickly become a favorite in your home. Here is why this tropical take elevates the classic loaf:
- Unmatched Moistness: The addition of crushed pineapple, along with its juice, creates an almost custard-like texture within the loaf. This is the secret to getting a moist Hawaiian banana bread like Aunt Sandy makes.
- Vibrant Tropical Flavor: We move beyond simple cinnamon and vanilla by incorporating toasted coconut and tangy pineapple, giving you a true tropical banana bread experience.
- Crunchy Macadamia Goodness: Using macadamia nuts instead of walnuts adds a buttery, elegant crunch that makes this recipe feel extra special, reminiscent of the famous Kona Inn banana bread.
- Easy One-Bowl Prep: Just like my standard one-bowl banana bread, we keep the dishes to a minimum. The batter comes together quickly before baking into pure paradise.
- Generously Spiced: A hint of allspice or nutmeg deepens the flavor of the fruit and nuts, making this the very best Hawaiian banana bread for breakfast or dessert.
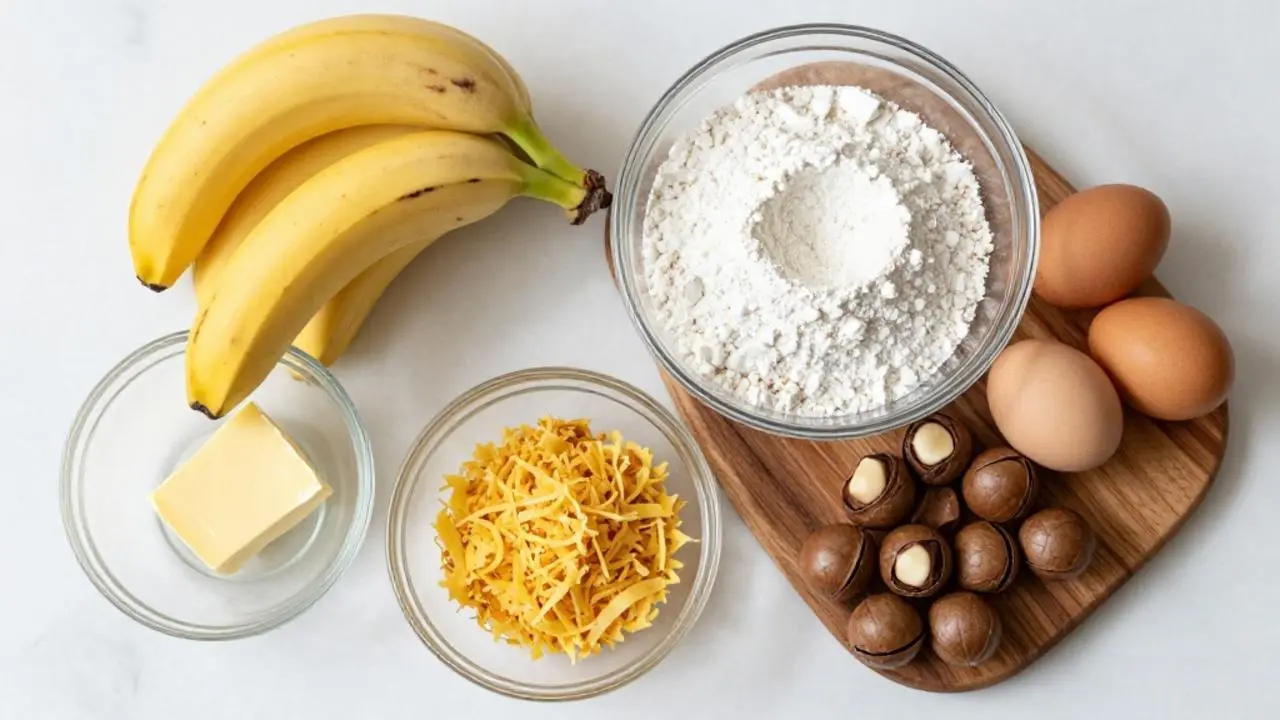
Ingredients for Hawaiian Banana Bread
To capture that authentic island flavor, we need the basics plus a few star ingredients. Remember, quality dry ingredients make all the difference in quick breads!
- The Bananas: 3 very ripe, mashed bananas. They should be spotted, almost black for maximum sweetness.
- The Fat: 1/2 cup melted unsalted butter or coconut oil. Coconut oil enhances the tropical profile beautifully.
- The Sugars: 1/2 cup granulated sugar and 1/2 cup packed light brown sugar (adds moisture and deeper molasses flavor).
- The Eggs: 2 large eggs, lightly beaten.
- The Wet Gold: 1/3 cup reserved crushed pineapple juice (don’t skip this!).
- The Dry Mix: 1 3/4 cups all-purpose flour, 1 teaspoon baking soda, 1/2 teaspoon salt, 1 teaspoon vanilla extract.
- The Tropical Trio: 1/2 cup well-drained crushed pineapple (canned is fine), 1/2 cup shredded unsweetened coconut (toasted, if you have time!), and 1/2 cup chopped macadamia nuts (lightly toasted for extra flavor). You could substitute walnuts for a classic banana nut bread hybrid, but the macadamia nuts really seal the deal.
- Spice Hint: 1/2 teaspoon ground cinnamon or a pinch of allspice.
How to Make Hawaiian Banana Bread
The beauty of quick bread is its simplicity. There is no kneading, no rising, just mixing and baking. This easy Hawaiian banana bread process is designed to prevent a dry loaf and promote maximum caramelization inside.
Step-by-Step Instructions for Hawaiian Banana Bread
- Prep the Oven and Pan: Preheat your oven to 350°F (175°C). Grease and flour a standard 9×5-inch loaf pan, or line it with parchment paper, leaving an overhang to easily lift the loaf out later.
- Mix the Wet Ingredients: In a large mixing bowl, thoroughly mash your ripe bananas. Add the melted butter (or coconut oil), sugars, beaten eggs, vanilla, and the reserved pineapple juice. Mix until just combined. Don’t overmix here, we just want to wake up those flavors.
- Whisk the Dry Ingredients (Optional but Recommended): In a separate smaller bowl, whisk together the flour, baking soda, salt, and cinnamon/allspice. This ensures even distribution of the leavening agent.
- Combine Wet and Dry: Pour the dry mixture into the wet mixture. Gently fold until *just* combined. A few streaks of flour are acceptable; overmixing develops gluten and can lead to a tougher, less moist Hawaiian banana bread.
- Fold in the Tropical Trio: Gently fold in the well-drained crushed pineapple, shredded coconut, and chopped macadamia nuts. Remember, if your pineapple isn’t drained well, the batter will be too wet. If you are aiming for a classic Maui banana bread taste, make sure your nuts are fresh and crunchy!
- Pour and Bake: Pour the batter evenly into the prepared loaf pan. Bake for 55–65 minutes, or until a wooden skewer inserted into the center comes out clean or with a few moist crumbs attached.
- Cool and Serve: Let the loaf cool in the pan for 10–15 minutes before carefully lifting it out onto a wire rack to cool completely. Allowing it to cool in the pan helps lock in that crucial moisture.
Pro Tips & Variations of Hawaiian Banana Bread
A great recipe offers a foundation, but the best recipes, the ones that become traditions, are the ones you can tweak to make your own. Here are a few tricks I’ve learned while baking this tropical Hawaiian banana bread with coconut pineapple over the years:
- The Brown Butter Trick: For a deeper, nuttier flavor, brown your butter before mixing it into the wet ingredients. It adds a caramel depth that pairs beautifully with the coconut and macadamia.
- Toast Your Nuts and Coconut: Tossing the macadamia nuts and coconut on a sheet pan for 5 minutes at 350°F before adding them to the batter significantly boosts their flavor. This small step makes the difference between good banana bread and the best Hawaiian banana bread.
- Vegan Variation: You can easily make a vegan Hawaiian banana bread by substituting the butter with coconut oil and using a flax egg or plant-based yogurt (like Greek almond yogurt) for the eggs.
- Gluten-Free Option: Swap the all-purpose flour for a high-quality 1:1 gluten-free baking blend. I usually add about 1/2 teaspoon of xanthan gum to help bind the structure, especially since the pineapple adds so much moisture.
- Try the Citrus Drizzle: A simple glaze of powdered sugar mixed with a tablespoon of lime or passion fruit juice adds a necessary zing and shiny finish.
If you’re looking for other equally comforting and moist recipes, you might enjoy my take on never-dry sour cream banana bread, which uses similar techniques for guaranteed plush texture. And for those who love the quickie comfort dessert, check out these soft baked banana bread cookies!
Hawaiian Banana Bread Serving Suggestions
While this loaf is perfectly heavenly on its own, a few additions can elevate it from a simple snack to a showstopping dessert:
- Vanilla Bean Cream Cheese Frosting: Nothing complements the tangy pineapple and sweet banana better than a light slather of vanilla bean cream cheese frosting.
- Toasted Coconut Flakes & Honey: Serve slices warmed, lightly drizzled with high-quality local honey and topped with extra toasted coconut flakes.
- A Scoop of Sorbet: Serve a slice warm with a dollop of mango or passion fruit sorbet. The contrast between warm bread and cold, tangy fruit is delightful.
- Coffee Pairing: Ethan insists this bread is best with a strong cup of cold brew, or as Olivia prefers, a hot cup of spiced chai latte.
My kitchen philosophy dictates that serving food is about creating a moment. This Hawaiian banana bread deserves a centerpiece moment.
Hawaiian Banana Bread Storage & Reheating
The high moisture content of this bread is a blessing, but it means storage needs to be handled properly to prevent premature spoilage.
Countertop Storage (Short Term): If stored at room temperature, this loaf will stay fresh and soft for 2 to 3 days. Wrap it tightly in plastic wrap or keep it in an airtight container. The moisture from the pineapple keeps it incredibly tender.
Refrigeration (Medium Term): If you plan to keep leftovers for longer than 3 days, refrigerate the loaf, still tightly wrapped. It will last about a week. I always recommend slicing it before refrigerating so you can pull out individual pieces easily.
Freezing (Long Term): This bread freezes beautifully! Let the loaf cool completely, then wrap it tightly in plastic wrap, followed by a layer of aluminum foil, or place it in a freezer-safe bag. It will last up to 3 months. Thaw overnight in the refrigerator or at room temperature. For a quick warm-up, microwave individual slices for 10-15 seconds.
FAQ about Hawaiian Banana Bread
What is the secret to making moist Hawaiian banana bread like Aunt Sandy?
The absolute secret is twofold: first, use truly overripe, almost black bananas, which maximize natural sugar and moisture. Second, the addition of crushed pineapple, especially with a portion of its juice (about 1/3 cup), naturally tenderizes the crumb. This combo ensures you avoid that dry, crumbly texture many inferior recipes possess. For guaranteed moisture, ensure you don’t overmix the batter. This is what also makes for the worlds moistest banana bread!
Can I substitute walnuts or pecans for macadamia nuts in this tropical banana bread?
Absolutely! While macadamia nuts give this specific Hawaiian banana bread a distinct, rich, and truly tropical island flavor profile, walnuts or pecans will work just fine. If using them, I highly suggest toasting them lightly before adding them to the batter. The toastiness helps elevate the nut flavor against the sweet pineapple and banana. For the most traditional experience, inspired by famous stops like the Kona Inn style banana bread, stick with macadamia.
Why does my easy Hawaiian banana bread with pineapple sink in the middle?
Sinking can happen for a few reasons, especially with high-moisture quick breads like this one. Check these common culprits: 1) Too much leavening (baking soda/powder); measure precisely. 2) Opening the oven door too early, causing the heat to drop rapidly before the structure is set. 3) Not draining the crushed pineapple enough, resulting in an overly heavy batter. If you see it sinking, try reducing the amount of pineapple juice slightly next time, or ensure you bake it low and slow for the full time.
Final Thoughts
The best recipes are those that offer more than just sustenance; they offer a memory. Standing here in the chill of a Bend winter, the aroma of toasted coconut and sweet butter is a potent form of escapism. This Hawaiian Banana Bread is that memory for us now, a slice of eternal summer we can pull out whenever James and Olivia start getting a little stir-crazy, or when Ethan needs a momentary break from his camera gear.
I don’t chase perfection in food, I chase connection, and this tropical loaf connects us all to a place far warmer than central Oregon. I hope it brings that same transportive magic to your kitchen. Happy baking, friends!
Pin this for later, and don’t forget to check out my Better Than Starbucks Banana Bread Copycat for another favorite quick bread!
Hawaiian Banana Bread
Ingredients
Equipment
Method
- Grease the insert of your slow cooker with butter or non-stick spray. If using, place a slow cooker liner for easy removal. Turn on the slow cooker to HIGH setting (or LOW for a longer cook).
- In a large mixing bowl, thoroughly mash the ripe bananas. Add the melted butter (or coconut oil), granulated sugar, brown sugar, beaten eggs, vanilla extract, and the reserved pineapple juice. Mix until just combined. Don't overmix here, we just want to wake up those flavors.
- In a separate smaller bowl, whisk together the flour, baking soda, salt, and cinnamon (or allspice). This ensures even distribution of the leavening agent.
- Pour the dry mixture into the wet mixture. Gently fold until *just* combined. A few streaks of flour are acceptable; overmixing develops gluten and can lead to a tougher loaf.
- Gently fold in the well-drained crushed pineapple, shredded coconut, and chopped macadamia nuts. Ensure the pineapple is well-drained to avoid excess moisture.
- Pour the batter evenly into the prepared slow cooker. Cover and cook on HIGH for 3-4 hours or LOW for 6-8 hours, or until a wooden skewer inserted into the center comes out clean or with a few moist crumbs attached. Start checking at the 3-hour mark on HIGH (or 6-hour on LOW) to avoid overcooking.
- Turn off the slow cooker and let the loaf cool in the insert for 15-20 minutes before carefully lifting it out onto a wire rack to cool completely. Allowing it to cool helps lock in that crucial moisture.