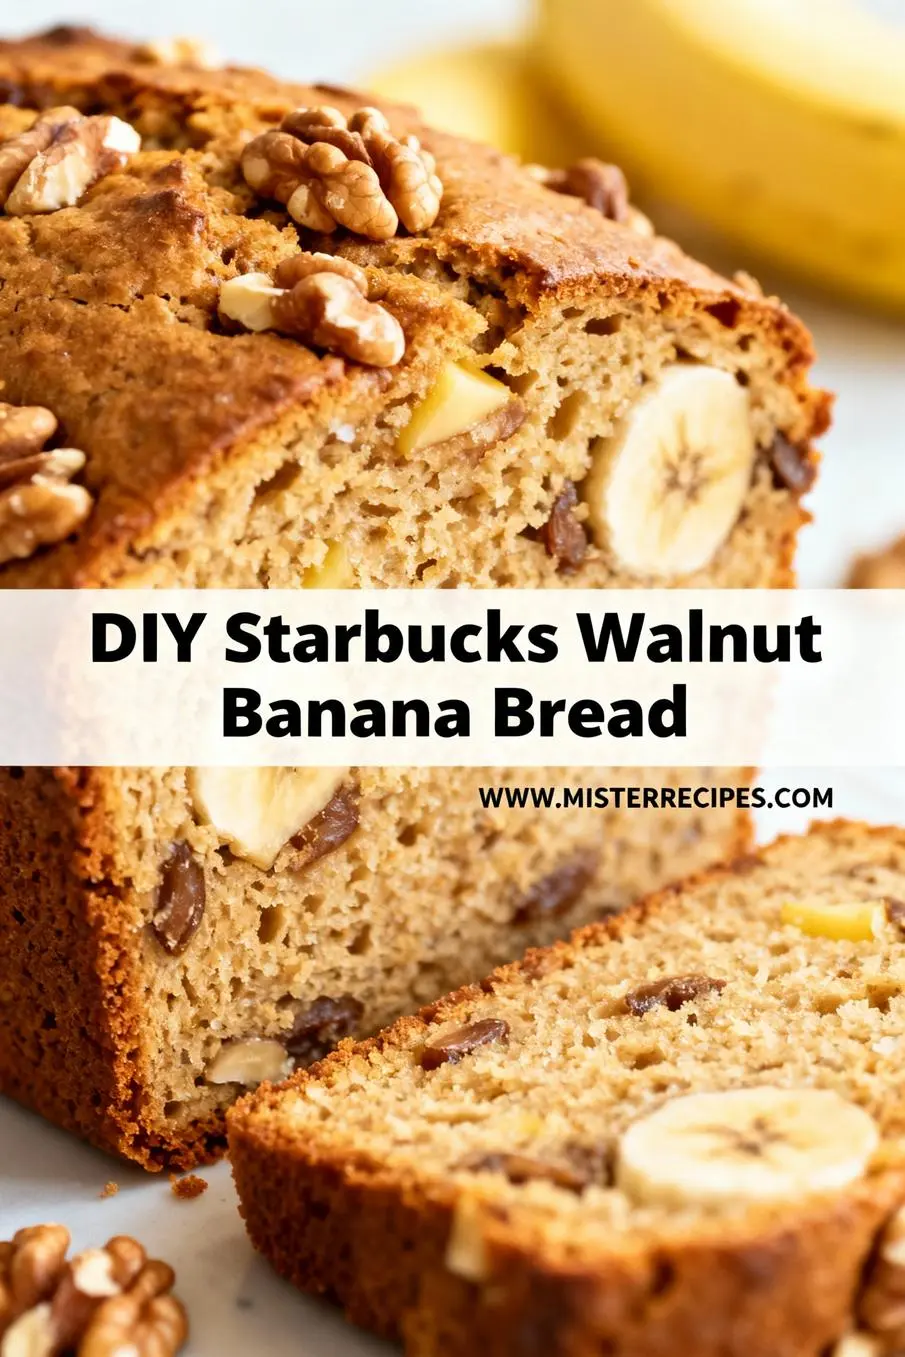
Stories from the Skillet: The Quest for Authentic Starbucks Banana Bread Recipe with Walnuts
There are certain smells that define a season, or a time of life. For me, living here in Bend, Oregon, it’s the damp, fresh scent that follows a crisp autumn bike ride, or the deep, sweet fragrance of something baking, something undeniably comforting. Lately, that smell has been the warm cinnamon, caramelized sugar, and rich, toasted nuttiness of Starbucks banana bread copycat efforts filling our kitchen.
You see, James (our youngest) is finally tall enough to manage the espresso machine at home, and Olivia, well, she’s decided her preferred afternoon snack must be the specific, dense, wonderfully moist slice of Starbucks banana nut bread they sell behind the glass counter. Ethan, bless his photographer heart, suggested simply buying it every time. I laughed. “Not if we can crack the code ourselves, darling.”
It sounds simple, right, a banana nut bread recipe? But the moment you try to replicate the precise crumb, the specific dark edge, and that almost oily moistness that makes the Starbucks version so addictive, you realize it’s a craft. It’s not just a basic loaf, it’s an institution. And frankly, bringing that kind of joy, convenience, and nostalgia home, without the $4 price tag, is a mission worth pursuing.
This journey led to dozens of over-browned loaves, loaves that crumbled, and loaves that, frankly, belonged in the compost. But then, armed with the wisdom of slightly more oil than butter, and a precise amount of buttermilk (a secret I’ll share further down), we finally achieved the perfect texture. The result is this incredibly easy DIY Starbucks Walnut Banana Bread recipe, a slice so true to the original, even James admitted, “Mom, this tastes like freedom and coffee.” That, my friends, is high praise.
This recipe answers the perennial question of how to make Starbucks banana walnut bread at home, delivering a truly authentic, bakery-style result. If you’re tired of dry, crumbly loaves and want that signature dense, incredibly moist banana walnut bread recipe, keep reading. We’ve cracked the code on their Starbucks banana loaf texture and flavor.
Table of Contents
- Why You’ll Love This DIY Starbucks Walnut Banana Bread
- Ingredients for DIY Starbucks Walnut Banana Bread
- How to Make DIY Starbucks Walnut Banana Bread
- Pro Tips & Variations of DIY Starbucks Walnut Banana Bread
- DIY Starbucks Walnut Banana Bread Serving Suggestions
- DIY Starbucks Walnut Banana Bread Storage & Reheating
- FAQ about DIY Starbucks Walnut Banana Bread
- Final Thoughts
Why You’ll Love This DIY Starbucks Walnut Banana Bread
- It’s Truly a Starbucks Banana Bread Copycat: This isn’t just ‘good’ banana bread, it captures the signature density and nearly savory sweetness that makes the drive-thru version legendary. Your search for the perfect copycat Starbucks banana nut bread ends here.
- Unbelievably Moist: Thanks to the precise ratio of vegetable oil and ripe bananas, this recipe locks in moisture, ensuring every slice is rich and velvety, unlike other drier recipes out there. You’ll understand why the specific Starbucks banana walnut bread recipe is so coveted.
- Simple, Pantry-Friendly Ingredients: Everything you need, from those overripe bananas to the walnuts, is likely already in your kitchen. It’s the ultimate comfort baking project.
- Freezer-Friendly: Bake a double batch and wrap up loaves for later. It freezes beautifully, perfect for meal prepping your week’s morning routine.
- The Perfect Walnut Crunch: We use just the right amount of toasted walnuts, providing that essential textural contrast that elevates this from a simple loaf to a delicious walnut pecan banana bread experience, even if you skip the pecans.
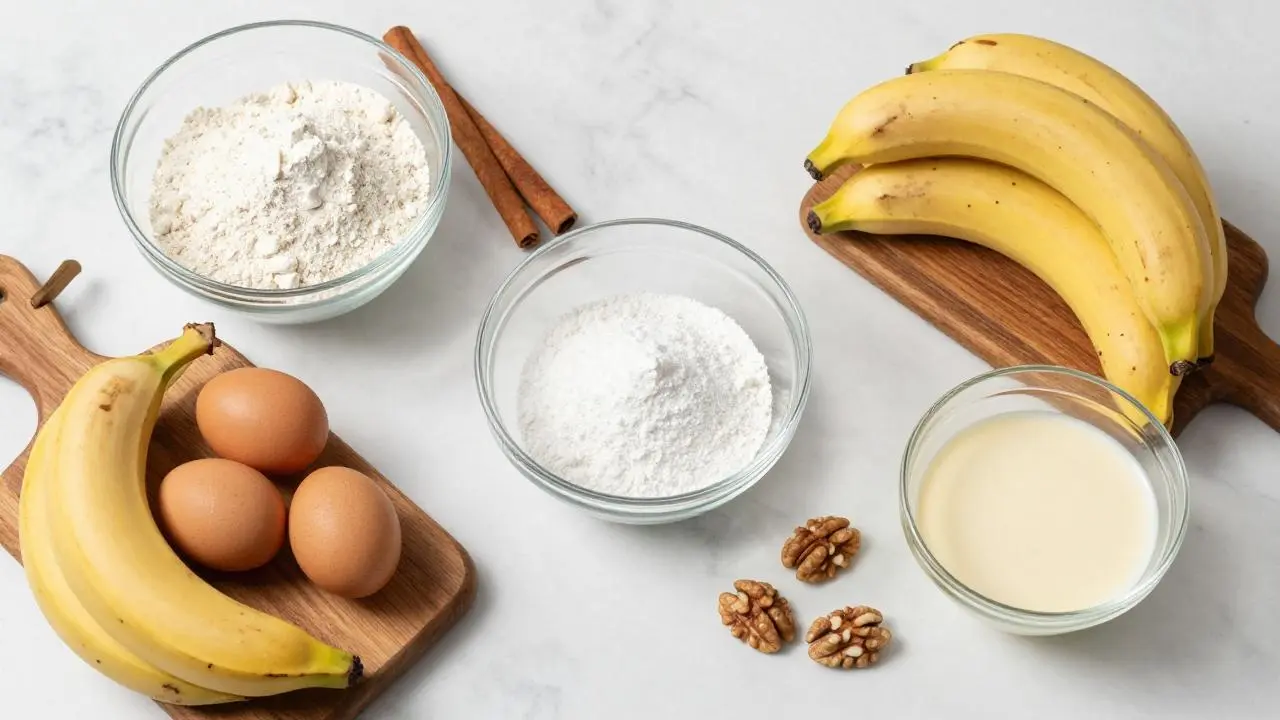
Ingredients for DIY Starbucks Walnut Banana Bread
The magic is in the measurement. We’re using a high ratio of banana and oil to guarantee that iconic density. Do not skimp on the ripeness of your bananas, they should be nearly black!
Wet Ingredients:
- 2 Cups Very Ripe Bananas: About 4-5 medium bananas, mashed well. The riper, the sweeter, the better.
- 2 Large Eggs: Room temperature helps them emulsify better with the oil.
- 3/4 Cup Vegetable Oil: This is the secret for that distinctly moist, slightly dense texture. While butter is lovely, oil gives the moistest banana bread.
- 1/2 Cup Buttermilk: This adds a crucial tang and reacts with the baking soda to grant a perfect rise without being crumbly. Use milk + 1 tsp vinegar if you don’t have buttermilk.
- 2 Teaspoons Pure Vanilla Extract: Use the good stuff!
Dry Ingredients:
- 2 Cups All-Purpose Flour: Sifted for the best results.
- 1 Cup Granulated Sugar: Or use a blend of granulated and brown sugar for a deeper molasses note.
- 1 Teaspoon Baking Soda: The primary leavening agent, activated by the buttermilk.
- 1/2 Teaspoon Salt: Essential for balancing the sweetness.
- 1/2 Teaspoon Ground Cinnamon: Just enough warmth, without overpowering the banana flavor.
The Nuts:
- 1 Cup Chopped Walnuts: Measure, then give them a quick toast (5 minutes in a dry skillet) before use. This truly brings out their flavor, which is key for the authentic Starbucks banana bread recipe with walnuts flavor profile.
How to Make DIY Starbucks Walnut Banana Bread
This recipe is forgiving, but the key is to gently incorporate the last stage of flour. Overmixing means tough bread, and we are striving for buttery, bakery softness.
Step-by-Step Instructions for DIY Starbucks Walnut Banana Bread
- Prep the Pantry and Preheat: Preheat your oven to 350°F (175°C). Grease and flour (or line with parchment paper) a standard 9×5 inch loaf pan. Lightly toast your walnuts in a dry skillet for about 5 minutes until you can smell them, which brings out the flavor for this perfect Starbucks walnut banana bread recipe. Set aside.
- Combine the Wet Ingredients: In a large mixing bowl (or the bowl of a stand mixer), mash your bananas until largely smooth, leaving some small chunks for texture. Whisk in the vegetable oil, eggs, buttermilk, and vanilla until well combined and slightly lightened. This foundational mix is what guarantees the moist crumb.
- Whisk the Dry Ingredients: In a separate medium bowl, whisk together the flour, granulated sugar, baking soda, salt, and cinnamon. Ensuring the leaveners and salt are evenly distributed prevents tunneling in the final product.
- Gently Combine: Pour the dry ingredients into the wet ingredients. Mix on low speed, or by hand with a spatula, only until just combined. A few streaks of flour remaining are acceptable; do not overmix, as this develops gluten and makes the bread tough. This gentle hand is secret to the perfect Starbucks banana bread copycat crumb.
- Fold in the Walnuts: Gently fold in the toasted walnuts. Reserve about 1/4 cup of the nuts to sprinkle on top before baking for visual appeal, a classic feature of the Starbucks walnut banana bread recipe.
- Bake to Golden Perfection: Pour the batter into your prepared loaf pan. Sprinkle the reserved walnuts over the top. Immediately place in the preheated oven. Bake for 60 to 75 minutes. Start checking at 60 minutes. The loaf is done when a wooden skewer inserted into the center comes out clean. If the top begins browning too quickly, loosely tent it with aluminum foil.
- Cool and Serve: Let the loaf cool in the pan for 15 minutes. This cooling time allows the structure to set dramatically. Then, carefully invert the loaf onto a wire rack to cool completely before slicing. Slicing too early results in a gummy texture.
Pro Tips & Variations of DIY Starbucks Walnut Banana Bread
Over the years, testing this for Ethan and the kids, I’ve learned a few tricks that make this already great recipe truly stellar. Whether your goal is a perfect worlds moistest banana bread or a specific allergy-friendly adaptation, these tips help.
- The Oil vs. Butter Debate: While many home recipes use butter, the distinct moistness and density of the commercial Starbucks banana loaf come from using oil (usually vegetable or canola). It remains liquid at room temperature, keeping the crumb softer, longer. Stick to oil for an authentic copycat.
- Sweet Cinnamon Dusting: Before placing the batter in the oven, take 1 tablespoon of sugar and mix it with 1/4 teaspoon of cinnamon. Sprinkle this mixture lightly over the top of the batter before scattering the walnuts. This gives that wonderful, darker, slightly caramelized crust edge you find on the purchased version.
- Gluten-Free Adaptation: For a gluten-free Starbucks banana bread adaptation, swap the all-purpose flour for a high-quality 1:1 gluten-free baking blend (like Bob’s Red Mill). Ensure the blend contains xanthan gum. The result is surprisingly similar!
- Vegan Version: Substitute the eggs with flax eggs (2 Tbsp ground flaxseed + 6 Tbsp water, let sit 5 mins) and replace the buttermilk with non-dairy milk (like almond or oat) mixed with 1 tsp apple cider vinegar.
- Try Pecans: If you prefer a walnut pecan banana bread, feel free to replace half the walnuts with pecans, or go 100% pecans. The structural role of the nut remains the same. I was particularly inspired by this Starbucks copycat banana bread inspiration which emphasized the nut mix.
DIY Starbucks Walnut Banana Bread Serving Suggestions
This dense, satisfying loaf needs very little to shine, but sometimes a small addition elevates it from a snack to a moment.
- Coffee Cream Cheese Frosting: Whisk together 4 oz cream cheese (softened), 1/4 cup powdered sugar, and 1 tsp espresso powder. Perfect for a decadent weekend brunch.
- The Classic Melt: Serve slightly warmed, smeared generously with softened butter (or ghee) for an added layer of richness.
- The Oregon Pairing: I love a slice alongside a strong dark roast coffee, perhaps a little drizzle of local honey, and a quick soft-baked banana bread cookie on the side for pure indulgence. The rich flavors mirror the perfect afternoon sun streaming into our Bend kitchen.
DIY Starbucks Walnut Banana Bread Storage & Reheating
One of the best things about this specific loaf is how well it keeps, maintaining its moisture for days.
- Counter Storage: Store the cooled loaf, tightly wrapped in plastic wrap or in an airtight container, at room temperature for up to 4 days. Do not refrigerate, as the cold can dry out the bread quickly, making a mockery of our quest for perfect moisture!
- Freezing for Long-Term: To freeze, ensure the loaf is completely cool. Wrap the entire loaf (or individual slices) tightly in plastic wrap, followed by a layer of aluminum foil. Freeze for up to 3 months. Thaw overnight at room temperature.
- The Perfect Reheat: To restore that freshly baked warmth, wrap a slice loosely in aluminum foil and warm it in a 300°F oven for about 10 minutes, or microwave for 10-15 seconds.
FAQ about DIY Starbucks Walnut Banana Bread
Every time I share a recipe, I get the same great, practical questions. Here are the answers concerning this lazy girls basic banana bread easy recipe twist.
Q: Why is my banana bread dry, and how does this recipe prevent that?
A: Most home banana nut bread recipes are dry because they use too much flour or too little fat. This recipe counteracts dryness by using vegetable oil (which stays liquid in the crumb) instead of solid butter, and a generous amount of liquid (buttermilk + mashed bananas). Ensuring you mash those ripe bananas correctly provides natural moisture and binding.
Q: Can I use less sugar in the authentic Starbucks banana bread recipe with walnuts?
A: You can slightly reduce the granulated sugar (down to 3/4 cup), but I don’t recommend it for two reasons: sugar isn’t just for sweetness, it also acts as a tenderizer and holds moisture. Significantly reducing it will alter the moist texture we are targeting. If you want less sweetness, ensure you’re using slightly less ripe bananas.
Q: Can I skip the buttermilk?
A: Buttermilk is one of the key ingredients to achieve the tender crumb and slight tang of the copycat Starbucks banana bread. If you don’t have it, you can make a sour milk substitute: mix 1/2 cup of regular milk with 1/2 tablespoon of white vinegar or lemon juice. Let it sit for 5 minutes before adding it to the wet ingredients. This simple acid boost is why many find my never dry sour cream banana bread recipe so effective.
Q: What is the secret ingredient for the best Starbucks moisture?
A: There are two secrets, truthfully. First, the use of oil, as mentioned. Second, slightly warming the mashed bananas before combining them with the oil helps them release maximum moisture and flavor, something I learned when researching this popular copycat recipe source. It truly makes the crumb phenomenal.
Final Thoughts
There’s a beautiful simplicity in replicating something specific. It’s less about invention and more about mastery, finding that exact balance of flavors that transport you instantly. This easy DIY Starbucks walnut banana bread isn’t just a simple baked good; it’s the quiet permission to stay home, to put on a good record, and to share something warm and real with the people you love. We’ve kept Starbucks in business, but now, we get to keep the deliciousness all to ourselves.
Baking is love made visible, and this loaf, rich with the smell of warm walnuts and sweet banana, proves it every time. Pin this recipe, grab those speckled bananas, and prepare to be fully converted. Happy baking, friends.
DIY Starbucks Walnut Banana Bread
Ingredients
Equipment
Method
- Lightly grease the bottom and sides of your slow cooker insert with vegetable oil or butter. Sprinkle a little flour or line with parchment paper for easy removal. In a dry skillet, toast the walnuts over medium heat for about 5 minutes until fragrant. Set aside to cool, reserving 1/4 cup for topping.
- In a large mixing bowl, mash the bananas until largely smooth, leaving some small chunks for texture. Whisk in the vegetable oil, eggs, buttermilk, and vanilla until well combined and slightly lightened.
- In a separate medium bowl, whisk together the flour, granulated sugar, baking soda, salt, and cinnamon.
- Pour the dry ingredients into the wet ingredients. Mix gently with a spatula until just combined. A few streaks of flour are fine; do not overmix.
- Fold in 3/4 cup of toasted walnuts. Sprinkle the reserved walnuts over the top.
- Pour the batter into the prepared slow cooker. Cover and cook on low for 3 hours, or until a wooden skewer inserted in the center comes out clean. If needed, check at 2.5 hours. Do not lift the lid frequently to maintain even cooking.
- Turn off the slow cooker and let the bread cool inside for 15 minutes. Carefully remove using parchment if lined, or invert onto a wire rack to cool completely before slicing.