

Introduction
Is it possible to bake one cookie that looks bakery worthy, holds its shape beautifully, slices cleanly, and still fits a busy holiday schedule without fuss or special tools? Meet Pinwheel Cookies. Each slice reveals a perfect swirl, yet the dough is simple to mix, easy to color or flavor, and designed for chilling so you can bake fresh batches on your timeline. Search interest for festive cookies spikes every December and cookie exchanges favor recipes that travel well, freeze well, and photograph like a dream. This recipe checks every box while staying friendly for new bakers and fun for kids to help roll and slice
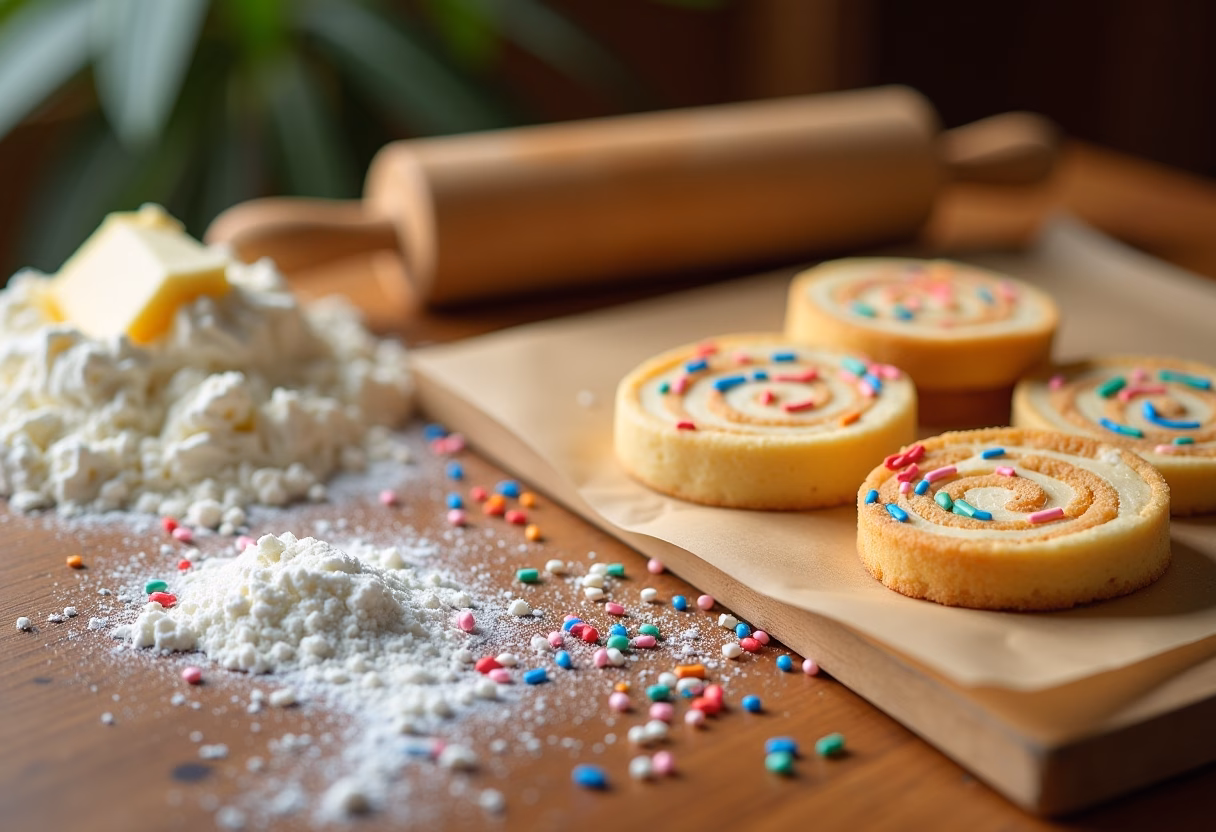
What makes these cookies unique is their smart dough strategy. You create one base dough, divide it, add cocoa or color to one half, stack, roll, chill, and slice. Because the dough is sturdy and low on leaveners, the shapes stay crisp and the spirals stay sharp. The result is a buttery, tender cookie with a slight snap at the edge and a soft center. Dress the edges in sanding sugar for sparkle or twist the flavor toward peppermint, orange, or almond to match your holiday theme
Pinwheel Cookies are ideal for a cozy family afternoon of baking, an impressive platter for a party, or an edible gift that packs and ships well. The dough logs freeze beautifully, letting you slice only what you need. You can scale the colors to your theme for Christmas baking with red and green, classic vanilla and chocolate for a timeless look, or go bold for a party. However you customize them, these cookies deliver dependable texture, clean layers, and plenty of joy in every swirl
Why You’ll Love These Pinwheel Cookies
- Make ahead friendly. Chill or freeze the dough logs so fresh cookies are minutes away any day of the season
- Kid friendly assembly. Little hands love stacking, rolling, and slicing with supervision
- Showstopping look with simple steps. The swirl design looks pro without special equipment
- Custom flavors and colors. Go vanilla and chocolate, peppermint and vanilla, or red and green for Christmas Sweets and Holiday Treats
- Perfect for gifting and shipping. Sturdy edges and a tender bite that holds up in transit
- Reliable texture. Low leavening keeps edges clean and prevents spreading
Ingredients for Pinwheel Cookies
- 1 cup unsalted butter, softened
- 1 cup granulated sugar
- 1 large egg, room temperature
- 2 teaspoons pure vanilla extract
- 3 cups all purpose flour, spooned and leveled
- 1 teaspoon fine sea salt
- 1 teaspoon cornstarch optional for extra clean edges
- 1 teaspoon baking powder a light touch to prevent spread
- 3 tablespoons unsweetened cocoa powder for the chocolate half
- 1 to 2 tablespoons milk as needed to loosen the cocoa half
- Gel food color optional for red and green swirl
- 1 teaspoon peppermint extract optional for a holiday twist
- Sanding sugar or sprinkles optional for coating the log
Substitutions
- Dairy free use plant based butter sticks and a flax egg 1 tablespoon ground flax plus 3 tablespoons water
- Gluten free use a measure for measure gluten free baking blend and add 1 extra tablespoon milk if the dough feels dry
- Sugar swap use superfine sugar for an even more tender bite
- Flavor swap replace 1 teaspoon vanilla with almond or orange extract
How to Make Pinwheel Cookies
Step by Step Instructions
- Cream butter and sugar. In a large bowl or stand mixer, beat butter and sugar on medium speed until pale and fluffy, about 2 to 3 minutes. Scrape the bowl
- Add egg and vanilla. Mix until smooth and glossy. Scrape the bowl again
- Whisk dry ingredients. In a separate bowl, whisk flour, salt, cornstarch, and baking powder
- Combine. Add dry ingredients to the mixer on low speed until a soft dough forms. Stop when no dry patches remain
- Divide dough. Split the dough into two equal halves by weight for precision
- Flavor and color. Knead cocoa powder into one half by hand. Add milk a teaspoon at a time until the cocoa half matches the vanilla half in softness. For a festive look, tint the vanilla half red or green with gel color
- Shape and chill. Press each half into a flat rectangle. Wrap and chill for 20 to 30 minutes until cool but still pliable
- Roll each half. Between two sheets of parchment, roll each portion into an even rectangle about 11 by 8 inches and quarter inch thick. Keep the edges straight by trimming with a knife, then patch trimmings where needed
- Stack. Peel the top parchment from each sheet. Flip the chocolate rectangle onto the vanilla rectangle so edges align. Gently press to remove air pockets
- Roll into a log. Starting from the long side for smaller swirls or the short side for larger swirls, use the parchment to help you roll the layers into a tight log. If using sanding sugar, brush the outside lightly with milk and roll the log in sugar
- Chill to set. Wrap the log snugly in parchment or plastic and chill at least 2 hours. For fastest results, freeze for 30 to 45 minutes until very firm
- Heat the oven. Preheat to 350 F and line baking sheets with parchment
- Slice. Using a very sharp or serrated knife, slice logs into quarter inch rounds, rotating the log every few cuts to keep it round
- Bake. Arrange on sheets with 2 inches between cookies. Bake 9 to 11 minutes until the edges look set and the centers look matte. Avoid browning to keep colors vibrant
- Cool. Rest on the sheet 5 minutes, then move to a rack to cool completely
Pro Tips & Variations
- Weigh ingredients for best consistency. Accurate flour measurement prevents dry dough and spreading
- Match dough textures. The cocoa half should feel as soft as the vanilla half so layers adhere and roll smoothly
- Chill twice. A short chill before rolling plus a longer chill after rolling guarantees sharp spirals
- Slice with confidence. A thin serrated knife and a gentle sawing motion keep rounds perfectly circular
- Color smart. Use gel color to avoid excess liquid, and tint only one half for bold contrast
Variations
- Classic red and green swirl add red gel color to one half and green to the other for Christmas Baking Ideas and an eye catching platter
- Peppermint chocolate add peppermint extract to the vanilla half and keep the chocolate half plain
- Chocolate orange replace vanilla with orange extract and add zest to the vanilla half
- Vegan use plant butter, a flax egg, and nondairy milk. Chill a little longer before slicing
- Gluten free use a 1 to 1 gluten free blend. Add 1 teaspoon milk if the dough cracks while rolling
Serving Suggestions
- Hot cocoa board serve Pinwheel Cookies with mugs of cocoa, marshmallows, crushed candy canes, and whipped cream for christmas desserts that delight all ages
- Cookie platter pair with Christmas Cookies Recipes and Holiday Baking for a colorful spread of Xmas Cookies
- Gift boxes nestle cookies in tissue lined tins with a card and ribbon for Holiday Cookies Christmas that travel well
- Ice cream sandwiches tuck a scoop of vanilla or peppermint ice cream between two cookies for playful Christmas Sweets
- Party snacks set out alongside a cheese board for a sweet contrast to savory Christmas appetizers
Storage & Reheating
- Room temperature store baked cookies in an airtight container up to 1 week with parchment between layers
- Fridge store dough logs up to 3 days. Slice and bake as needed
- Freezer wrap dough logs well and freeze up to 2 months. Freeze baked cookies up to 3 months
- Bake from frozen slice frozen logs, add 1 to 2 minutes to bake time
- Refresh day old cookies warm on a sheet at 300 F for 3 to 5 minutes for crisp edges. For softer texture, microwave one cookie for 5 to 8 seconds
FAQ about Pinwheel Cookies
- How do I keep the spirals sharp
Use a tight roll, chill until firm, and slice with a sharp or serrated knife. Trim uneven edges before rolling - Why did my cookies spread
Warm dough or too much leavening can cause spread. Chill the log well and measure baking powder carefully - Can I color both halves
Yes. Use gel color for both halves to match your theme for Unique Christmas Cookies. Avoid liquid color which softens the dough - Can I freeze the dough
Absolutely. Freeze logs tightly wrapped up to 2 months. Thaw in the fridge until sliceable - What if the dough cracks while rolling
Let it warm for a few minutes, then gently press cracks together. A light brush of milk helps layers adhere
Final Thoughts on Pinwheel Cookies
Pinwheel Cookies bring big holiday energy with minimal effort. The dough is forgiving for beginners, endlessly customizable for creatives, and reliably beautiful for parties and gifting. Bake a batch for your next cookie exchange, or keep logs in the freezer so you can slice a few whenever friends drop by for Holiday Treats or Christmas Snacks. For even more inspiration, check out Unique Christmas Cookies , Christmas Snacks , and Easy Christmas Treats to round out your menu
If you make this recipe, leave a comment with how you customized the swirl and a rating so others can find it. Save this post to Pinterest so you have it handy for your next round of christmas baking. Subscribe by email to get more Holiday Baking ideas, step by step photos, and time saving tips for your seasonal menu from christmas cake to cookies and more


