
Introduction
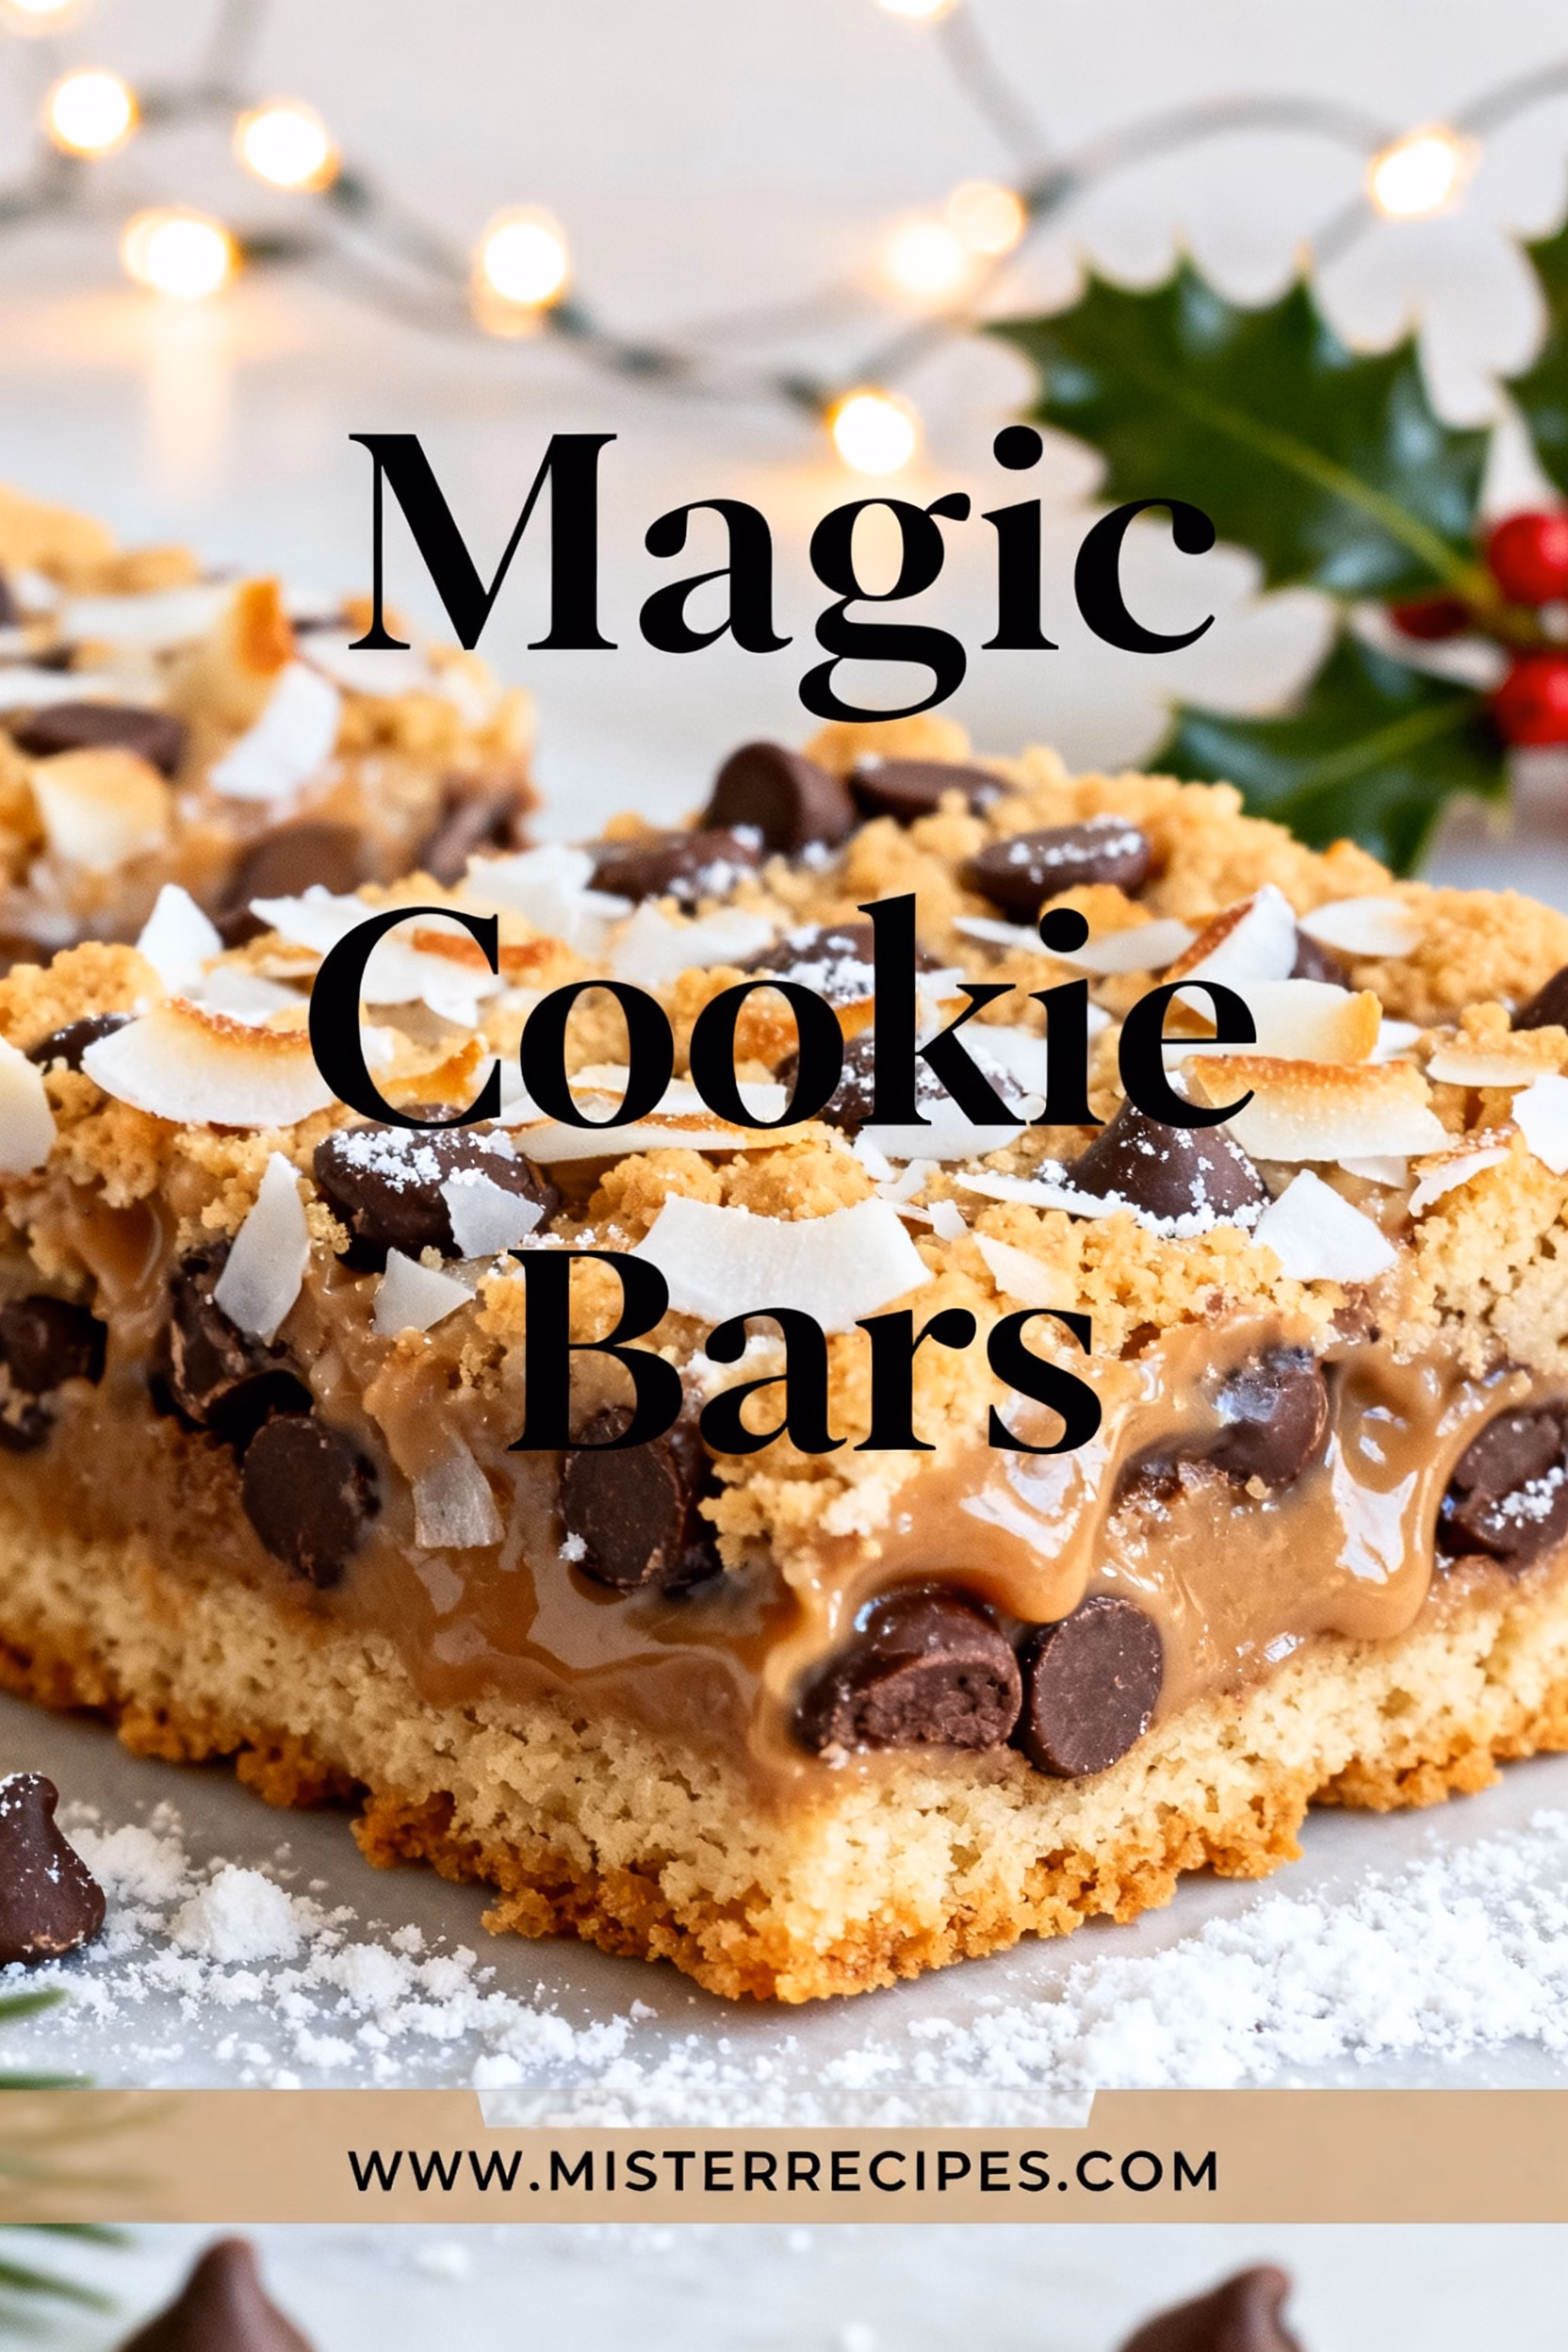
Have you ever wondered why some desserts feel like pure magic? The kind that brings everyone to the kitchen, fills the house with an irresistible aroma, and leaves your family begging for seconds? Well, let me introduce you to the ultimate crowd-pleaser: Magic Cookie Bars. These layered, gooey, and utterly indulgent treats are the secret weapon of busy parents, holiday hosts, and anyone who wants to whip up something extraordinary with minimal effort.
I still remember the first time I baked Magic Cookie Bars for my kids. It was a chilly December evening, and the house was already buzzing with holiday excitement. Adams, my 12-year-old, had invited a few friends over, and I wanted to surprise them with something special. As I pulled the pan out of the oven, the scent of toasted coconut and melted chocolate filled the air. The kids gathered around, eyes wide with anticipation. That moment watching their faces light up as they took their first bites was when I knew this recipe was something truly magical.
What makes Magic Cookie Bars so unique? For starters, they’re incredibly easy to make. No fancy techniques, no hard-to-find ingredients just layers of goodness that come together in one pan. Whether you’re a seasoned baker or a beginner, this recipe is foolproof. Plus, it’s versatile! You can customize it to fit dietary needs, like gluten-free or vegan, or add your favorite mix-ins, like extra chocolate chips or a sprinkle of sea salt for a gourmet touch.
But here’s the real magic: these bars are more than just a dessert. They’re a way to create memories. Imagine serving them at a holiday party, packing them in lunchboxes for a sweet surprise, or enjoying them with a cup of coffee after a long day. They’re the kind of treat that brings people together, sparking conversations and laughter around the table.
So, if you’re looking for a recipe that’s easy, indulgent, and guaranteed to impress, you’ve come to the right place. Let’s dive into the world of Magic Cookie Bars and discover why they’re a staple in my kitchen and soon to be in yours too!
Why You’ll Love This Magic Cookie Bars
There are countless reasons to fall in love with Magic Cookie Bars, but here are a few that make them a standout:
- Effortless to Make: With just 5 minutes of prep time, these bars are perfect for busy schedules. Simply layer the ingredients in a pan and let the oven do the rest. No mixing bowls, no complicated steps—just pure simplicity.
- Family-Friendly: Kids adore the gooey, chocolatey layers, and parents love how easy they are to make. They’re a hit at school bake sales, birthday parties, and family gatherings. Plus, they’re a great way to get little ones involved in the kitchen!
- Customizable: Whether you’re craving classic Magic Cookie Bars or want to experiment with variations like keto or vegan, this recipe is endlessly adaptable. Swap in your favorite ingredients or adjust for dietary needs without sacrificing flavor.
- Perfect for Any Occasion: Need a last-minute dessert for a potluck? A sweet treat for a holiday party? Or just a cozy night in with the family? Magic Cookie Bars fit the bill every time. They’re equally at home on a fancy dessert table or wrapped up as a homemade gift.
- Rich and Indulgent: Every bite is a symphony of textures and flavors crunchy graham cracker crumbs, chewy coconut, melted chocolate chips, and a buttery, caramelized layer of condensed milk. It’s like a party in your mouth!
- Great for Beginners: If you’re new to baking, this is the perfect recipe to start with. There’s no dough to chill, no finicky techniques just layer, bake, and enjoy. It’s a confidence booster for anyone who thinks they can’t bake.
Still not convinced? Imagine pulling a warm pan of Magic Cookie Bars out of the oven, the edges golden and bubbly, the chocolate glistening. The smell alone is enough to make your heart skip a beat. And the best part? You don’t have to be a professional baker to achieve this kind of magic.
Ingredients for Magic Cookie Bars
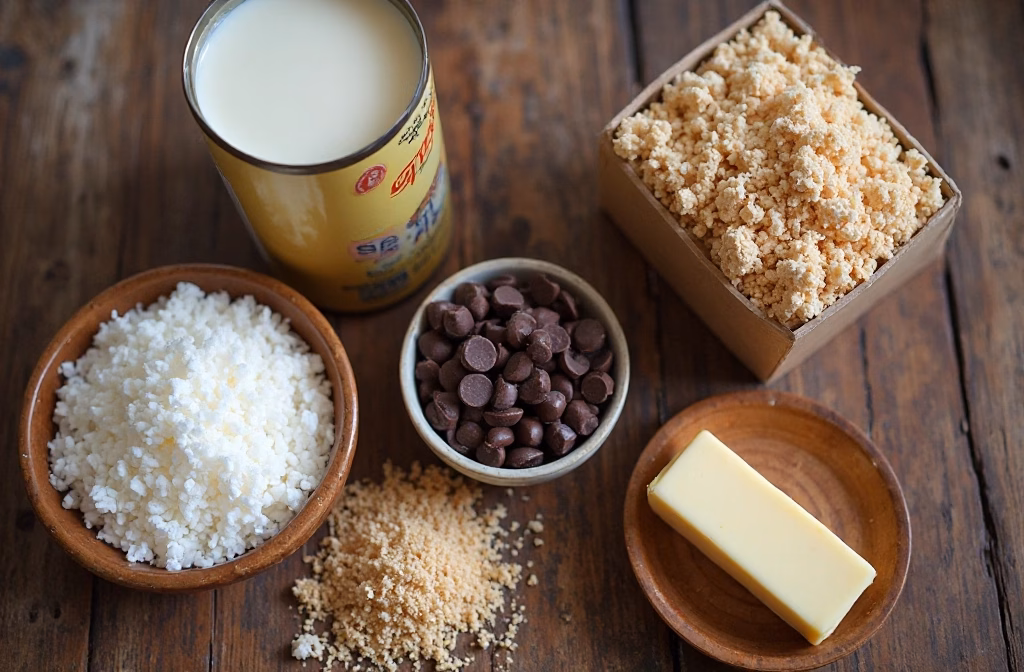
Here’s what you’ll need to create your own batch of Magic Cookie Bars. Don’t worry these are all pantry staples you probably already have on hand!
- 1/2 cup (1 stick) unsalted butter, melted
- 1 1/2 cups graham cracker crumbs (about 10-12 graham crackers, crushed)
- 1 (14 oz) can sweetened condensed milk
- 2 cups semi-sweet chocolate chips
- 1 1/3 cups flaked coconut (sweetened or unsweetened)
- 1 cup chopped nuts (pecans or walnuts work beautifully)
- 1 teaspoon vanilla extract (optional, but adds depth of flavor)
- 1/4 teaspoon sea salt (optional, for balancing sweetness)
Note: For dietary variations, see the tips section below for substitutions!
How to Make Magic Cookie Bars
Step-by-Step Instructions
Ready to create some magic? Follow these simple steps for perfect Magic Cookie Bars every time.
- Preheat Your Oven: Start by preheating your oven to 350°F (175°C). This ensures your bars bake evenly and develop that perfect golden crust.
- Prepare the Pan: Lightly grease a 9×13-inch baking dish or line it with parchment paper for easy removal. This step is crucial it prevents the bars from sticking and makes cleanup a breeze.
- Create the Crust: In a small bowl, mix the melted butter and graham cracker crumbs until the mixture resembles wet sand. Press this evenly into the bottom of your prepared pan, using a spoon or measuring cup to compact it. This forms the delicious, buttery base of your bars.
- Layer the Condensed Milk: Pour the sweetened condensed milk evenly over the crust. This is the “glue” that holds all the layers together and adds that signature caramel-like sweetness. Use a spatula to spread it out gently.
- Add the Chocolate Chips: Sprinkle the chocolate chips evenly over the condensed milk layer. Don’t skimp here the more chocolate, the better! For extra indulgence, mix in some white chocolate chips or butterscotch chips.
- Sprinkle the Coconut: Next, add the flaked coconut. Spread it out so it covers the chocolate chips completely. The coconut adds a delightful chewiness and toasty flavor that balances the richness of the chocolate.
- Top with Nuts: Sprinkle the chopped nuts over the coconut layer. If you’re not a fan of nuts, you can omit them or swap in something like toffee bits or crushed pretzels for a salty-sweet twist.
- Add Vanilla and Salt (Optional): Drizzle the vanilla extract over the top layer and sprinkle with a pinch of sea salt. These small touches enhance the flavors and make your bars taste even more decadent.
- Bake to Perfection: Place the pan in the preheated oven and bake for 25-30 minutes, or until the edges are golden brown and the coconut is lightly toasted. Keep an eye on it you want the bars to be set but not overbaked.
- Cool and Set: Remove the pan from the oven and let the bars cool completely in the pan. This step is essential it allows the layers to set and makes slicing easier. I recommend cooling for at least 2 hours, but if you’re in a hurry, pop them in the fridge for 30 minutes.
- Slice and Serve: Once fully cooled, use a sharp knife to cut the bars into squares. For clean cuts, wipe the knife with a warm, damp cloth between slices. Serve and enjoy the magic!
Pro Tips & Variations
Want to take your Magic Cookie Bars to the next level? Here are some pro tips and creative variations to try:
- Make Them Gluten-Free: Swap the graham cracker crumbs for gluten-free graham crackers or almond flour mixed with a bit of melted butter. This small change makes the recipe accessible to everyone, without sacrificing flavor or texture.
- Vegan Magic Cookie Bars: Use vegan butter, dairy-free chocolate chips, and coconut condensed milk (available at most health food stores). The result is just as rich and delicious as the original!
- Keto-Friendly Version: Replace the graham cracker crumbs with a mix of almond flour and crushed pork rinds, use sugar-free chocolate chips, and opt for a keto-friendly sweetened condensed milk alternative. This way, you can enjoy the magic without the carbs.
- Add a Crunch: For extra texture, sprinkle crushed pretzels or cereal (like Rice Krispies) over the top before baking. This adds a fun surprise in every bite and balances the sweetness.
- Holiday Twist: Make your bars festive by adding crushed candy canes, festive sprinkles, or a drizzle of white chocolate after baking. These Magic Cookie Bars for holidays are sure to be a hit at any gathering.
- No-Bake Option: If you’re short on time or don’t want to turn on the oven, try a no-bake version. Simply chill the layered bars in the fridge for 4 hours or overnight. The result is a cooler, creamier treat that’s perfect for summer.
- Double the Chocolate: For true chocolate lovers, add an extra layer of chocolate chips or a drizzle of melted chocolate on top after baking. You can never have too much chocolate, right?
- Storage Hack: To keep your bars fresh, store them in an airtight container at room temperature for up to 5 days. For longer storage, freeze them for up to 3 months. Just thaw at room temperature before serving.
Serving Suggestions
Magic Cookie Bars are delicious on their own, but pairing them with the right drinks or sides can elevate your dessert experience. Here are some serving ideas to inspire you:
- With Ice Cream: Serve warm bars with a scoop of vanilla ice cream for an over-the-top dessert. The contrast of warm, gooey bars and cold, creamy ice cream is simply divine. For a festive touch, add a drizzle of caramel or chocolate sauce.
- Coffee or Tea Pairing: Enjoy a bar with your morning coffee or afternoon tea. The rich flavors of the bars complement the bitterness of coffee or the floral notes of tea beautifully. It’s the perfect pick-me-up treat.
- Dessert Charcuterie Board: Create a dessert board with Magic Cookie Bars, fresh fruit, and other bite-sized sweets like chocolate crinkle cookies or peanut butter cookies. This is a great option for parties or gatherings, as it lets guests sample a variety of treats.
- Gift Them: Package the bars in cute boxes or cellophane bags tied with ribbon for a homemade gift. They’re perfect for teacher appreciation, holiday gifts, or just because. Add a handwritten note for a personal touch.
- With Whipped Cream: Top each bar with a dollop of whipped cream and a sprinkle of cocoa powder for an elegant finish. This is especially lovely when serving the bars as part of a dessert buffet.
Storage & Reheating for Magic Cookie Bars
Proper storage is key to keeping your Magic Cookie Bars fresh and delicious. Here’s how to store and reheat them for the best results:
- Room Temperature Storage: Place the bars in an airtight container or wrap them tightly with plastic wrap. They’ll stay fresh at room temperature for up to 5 days. This is ideal if you plan to enjoy them within a few days of baking.
- Refrigerator Storage: If your kitchen is warm or you prefer a firmer texture, store the bars in the fridge. They’ll keep for up to 2 weeks. Just let them sit at room temperature for 10-15 minutes before serving to soften slightly.
- Freezing for Long-Term Storage: For longer storage, freeze the bars in an airtight container or freezer bag for up to 3 months. To prevent sticking, separate layers with parchment paper. Thaw at room temperature when ready to enjoy.
- Reheating: To enjoy warm bars, reheat individual pieces in the microwave for 10-15 seconds. Alternatively, place the entire pan in a 300°F (150°C) oven for 10 minutes to warm through. This brings back that fresh-from-the-oven magic!
- Avoid Moisture: To prevent the bars from becoming soggy, ensure they’re completely cooled before storing. Adding a piece of bread to the container can help absorb excess moisture and keep the bars fresh longer.
FAQ about Magic Cookie Bars
Here are answers to some of the most common questions about Magic Cookie Bars:
- Can I make Magic Cookie Bars without condensed milk?
Yes! While condensed milk is traditional, you can substitute it with dulce de leche, caramel sauce, or a mixture of heavy cream and sugar. Keep in mind that the texture and sweetness may vary slightly.
- Why are my Magic Cookie Bars too soft?
If your bars are too soft, they may need more time to cool and set. Ensure you let them cool completely in the pan before slicing. If they’re still too soft after cooling, try baking them for an additional 5 minutes next time.
- Can I use different types of chocolate?
Absolutely! Feel free to mix and match chocolate chips—semi-sweet, milk, white, or even dark chocolate all work well. You can also add butterscotch chips or peanut butter chips for a fun twist.
- How do I make Magic Cookie Bars for a crowd?
Simply double the recipe and use a larger baking dish, such as a 10×15-inch pan. Keep an eye on the baking time, as it may need to be adjusted slightly. These bars are perfect for Magic Cookie Bars for parties and gatherings!
- Are Magic Cookie Bars kid-friendly?
Yes! Kids love the sweet, gooey layers, and they’re easy to make with little helpers. Let them sprinkle the chocolate chips or coconut for a fun, hands-on activity. Just be mindful of nut allergies if you’re sharing them at school or events.
Final Thoughts on Magic Cookie Bars
There’s something truly special about Magic Cookie Bars. They’re more than just a dessert they’re a way to create moments of joy, connection, and indulgence. Whether you’re baking them for a holiday party, a family gathering, or just because, these bars are guaranteed to bring smiles to everyone’s faces.
What I love most about this recipe is how adaptable it is. From gluten-free to vegan, from classic to creative variations, there’s a version for everyone. And with just a few simple ingredients and minimal effort, you can create a treat that tastes like it came from a bakery.
So, what are you waiting for? Grab your ingredients, preheat that oven, and get ready to make some magic. And when you do, I’d love to hear how it went! Leave a comment below with your favorite variations or tips. Don’t forget to save this recipe to Pinterest for later and subscribe to my blog for more family-friendly recipes and baking inspiration.
Happy baking, and remember: every meal and every dessert is made with love.
Magic Cookie Bars
Ingredients
Equipment
Method
- Preheat your oven to 350°F (175°C). This ensures your bars bake evenly and develop that perfect golden crust.
- Lightly grease a 9×13-inch baking dish or line it with parchment paper for easy removal. This step is crucial—it prevents the bars from sticking and makes cleanup a breeze.
- In a small bowl, mix the melted butter and graham cracker crumbs until the mixture resembles wet sand. Press this evenly into the bottom of your prepared pan, using a spoon or measuring cup to compact it. This forms the delicious, buttery base of your bars.
- Pour the sweetened condensed milk evenly over the crust. This is the “glue” that holds all the layers together and adds that signature caramel-like sweetness. Use a spatula to spread it out gently.
- Sprinkle the chocolate chips evenly over the condensed milk layer. Don’t skimp here—the more chocolate, the better! For extra indulgence, mix in some white chocolate chips or butterscotch chips.
- Spread the flaked coconut over the chocolate chips completely. The coconut adds a delightful chewiness and toasty flavor that balances the richness of the chocolate.
- Sprinkle the chopped nuts over the coconut layer. If you’re not a fan of nuts, you can omit them or swap in something like toffee bits or crushed pretzels for a salty-sweet twist.
- Drizzle the vanilla extract over the top layer and sprinkle with a pinch of sea salt. These small touches enhance the flavors and make your bars taste even more decadent.
- Place the pan in the preheated oven and bake for 25-30 minutes, or until the edges are golden brown and the coconut is lightly toasted. Keep an eye on it—you want the bars to be set but not overbaked.
- Remove the pan from the oven and let the bars cool completely in the pan. This step is essential—it allows the layers to set and makes slicing easier. I recommend cooling for at least 2 hours, but if you’re in a hurry, pop them in the fridge for 30 minutes.
- Once fully cooled, use a sharp knife to cut the bars into squares. For clean cuts, wipe the knife with a warm, damp cloth between slices. Serve and enjoy the magic!


