
Introduction
Have you ever wondered if the secret to a truly memorable holiday celebration lies not in complex, day long cooking projects, but in a simple, joyfully green dessert that everyone loves? I remember my son Adam, years ago, being so excited for St. Patrick’s Day, asking for a treat that was as green as a leprechaun’s hat. That sent me on a mission. I wanted something more exciting than just green frosting on a cupcake. I was looking for a recipe that felt special but didn’t require professional pastry skills. That’s when I rediscovered the magic of a classic icebox dessert and created this Easy Pistachio Lush st patricks day desserts recipe. It’s a beautifully layered dessert that combines the nutty sweetness of pistachio, the creamy tang of cheesecake, and a crunchy pecan crust. It’s the kind of dessert that brings instant smiles and has become a non negotiable part of our family’s celebration. It’s proof that sometimes the most beloved family traditions are the easiest ones to start. This delightful confection isn’t just a treat; it’s a centerpiece, a conversation starter, and the perfect, stress free way to bring a splash of festive color to your table.
Why You’ll Love This Easy Pistachio Lush st patricks day desserts
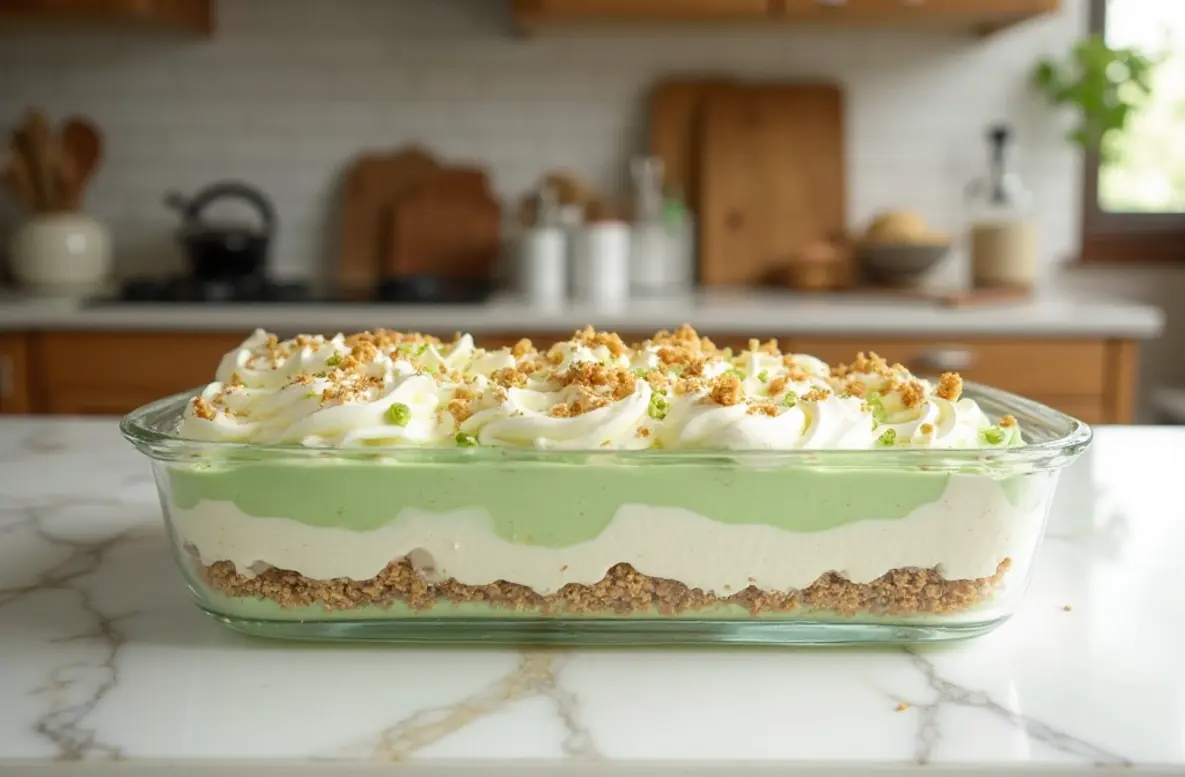
- Perfectly Festive and Incredibly Green: Let’s be honest, for St. Patrick’s Day, the greenier the better! This dessert delivers with its vibrant pistachio pudding layer that looks absolutely stunning on a dessert table. It’s a visual knockout that screams festive fun without needing a single drop of extra food coloring. When you bring this out, it’s not just a dessert; it’s a decoration. I love seeing the kids’ eyes light up at the bright color. It’s that immediate visual payoff that sets the mood for a celebration, making it a perfect dish for any St. Patrick’s Day idea. It’s a simple recipe that looks like you spent hours on it, and that beautiful green hue is one hundred percent part of its charm.
- Amazingly Simple with No Baking Required: The words “no bake” are music to any home cook’s ears, especially when preparing for a holiday. This entire dessert comes together right on your countertop and in your fridge. You won’t need to turn on your oven, which is a blessing when you’re juggling other dishes. The crust is a simple press in mixture, and the layers are just whisked together and spread. It’s a perfect recipe for beginner cooks or for when you want to get the kids involved in the kitchen. My daughter Jana loves helping me crush the pecans and press the crust into the pan. This is a truly accessible dessert that minimizes stress and maximizes enjoyment, much like other no bake desserts you might love.
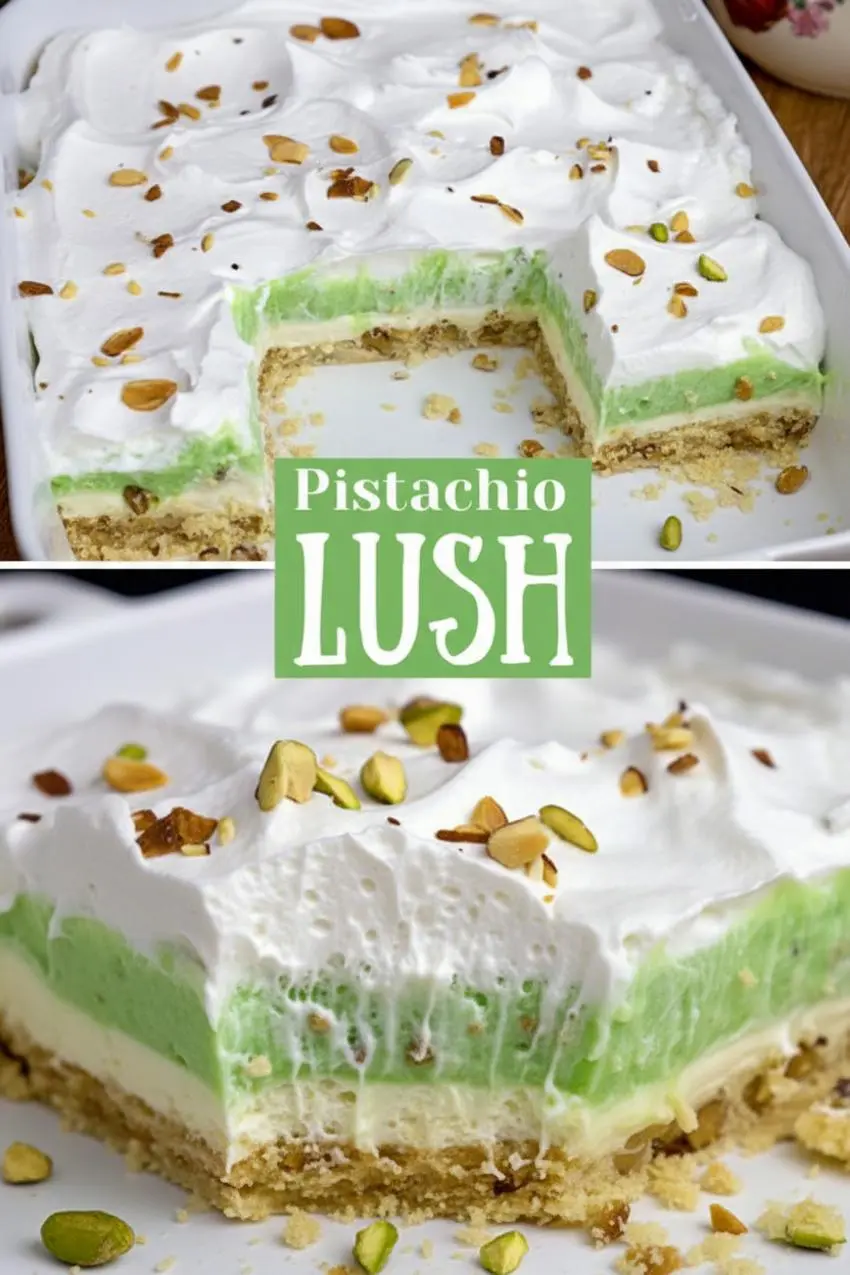
- A Crowd Pleasing Texture Explosion: This lush dessert is a symphony of textures in every single spoonful. You start with the crunchy, buttery pecan crust, which provides a beautiful savory contrast. Then you move to the rich, tangy cream cheese layer that’s smooth and luxurious. Following that is the star of the show the light, sweet, and nutty pistachio pudding layer. Finally, it’s all crowned with a fluffy layer of whipped topping and a sprinkle of more pecans. The combination is simply irresistible. It’s one of those desserts where every bite is interesting, keeping everyone coming back for more. It’s never heavy or dense, making it a refreshing end to a hearty holiday meal.
- The Ultimate Make Ahead Marvel: One of the best features of this recipe is that it *needs* to be made ahead of time. This is a game changer for party planning. You can assemble the entire dessert a day or even two before your event. This gives the layers time to set properly and the flavors to meld together, actually making it taste even better. On the day of your party, all you have to do is pull it out of the fridge and serve. It frees up your time and your mental space to focus on your guests and enjoy the celebration. It’s the definition of working smarter, not harder, in the kitchen. For more make ahead dessert ideas, check out our no bake cherry bourbon balls recipe.
- A New Family Tradition in the Making: Some recipes are so good and so easy that they instantly become a tradition. This is one of them. Because it’s so approachable and beloved by all ages, it’s the perfect recipe to make year after year. It has the nostalgic charm of a classic potluck dessert but with a flavor profile that feels timeless. It reminds me of the simple joy of sharing food and making memories, which is what holiday cooking is all about. It’s more than just a dish; it’s a slice of happiness that your family will look forward to every St. Patrick’s Day, just like our Vanilla Bean Shamrock Cookies.
Ingredients for Easy Pistachio Lush st patricks day desserts
For the Crust:
- 1 ½ cups finely chopped pecans (or substitute with walnuts or graham cracker crumbs)
- 6 tablespoons salted butter, melted
- 2 tablespoons granulated sugar
For the Cream Cheese Layer:
- 8 ounces cream cheese, softened to room temperature
- 1 cup powdered sugar
- 1 cup heavy whipping cream (or an 8 ounce container of thawed whipped topping)
For the Pistachio Layer:
- 2 packages (3.4 ounces each) instant pistachio pudding mix
- 3 cups cold milk
For the Topping:
- 8 ounces whipped topping (like Cool Whip), thawed
- ½ cup chopped pecans or mini chocolate chips for garnish
How to Make Easy Pistachio Lush st patricks day desserts
Step by Step Instructions
Making this dessert is all about the layers! Take your time with each step to ensure your final dessert sets up beautifully. Here’s how we do it:
- Prepare the Pan: Start with a 9×13 inch baking dish. There’s no need to grease it, as the buttery crust will prevent sticking. Having the right size pan is key to getting those nice, thick, distinct layers that make a lush so impressive.
- Make the Crust: In a medium bowl, combine your finely chopped pecans, melted butter, and granulated sugar. Mix them together with a fork until all the nut pieces are evenly coated in butter. The mixture should resemble wet sand. Now, pour this mixture into your baking dish. Use the back of a spoon or the bottom of a measuring cup to press it down firmly and evenly across the bottom of the pan. A solid, compact crust is the foundation of a good lush. Once it’s pressed, place the pan in the refrigerator to chill for at least 30 minutes. This helps the crust firm up so it doesn’t mix with the next layer.
- Create the Cream Cheese Layer: While the crust is chilling, it’s time to make the second layer. In a large bowl, beat the softened cream cheese with an electric mixer until it’s completely smooth and free of lumps. This is important; you want a silky texture. Scrape down the sides of the bowl, then gradually add the powdered sugar, mixing on low speed until it’s incorporated. Now, in a separate bowl, whip the heavy cream until stiff peaks form. Gently fold the whipped cream into the cream cheese mixture until it’s just combined. If you’re using thawed whipped topping instead, simply fold that in. The key is to be gentle to keep the mixture light and airy. Carefully spread this cream cheese mixture over your chilled pecan crust, making sure to go all the way to the edges to create a seal.
- Whisk the Pistachio Pudding Layer: Now for that beautiful green layer! In another bowl, whisk together the two packages of instant pistachio pudding mix and the three cups of cold milk. Make sure your milk is very cold, as this helps the pudding set quickly. Whisk for about two minutes, or until the pudding starts to thicken. You’ll feel the resistance on the whisk. Let it sit for a minute or two to firm up just a bit more. Then, pour and spread this pistachio layer evenly over the cream cheese layer. The similar idea can be found in this Pistachio Lush Dessert.
- Add the Final Topping: With the main layers complete, it’s time for the finishing touch. Gently spread the thawed whipped topping over the pistachio layer. Create some lovely swirls and peaks with your spatula for a pretty, homemade look. Finally, sprinkle the remaining chopped pecans or mini chocolate chips over the top. This not only adds flavor and crunch but also gives a hint as to what’s inside.
- Chill to Perfection: This is the most important step! Cover the dish with plastic wrap or a lid and place it in the refrigerator for at least 6 hours, but overnight is even better. This chilling time is crucial. It allows all the layers to set and firm up completely, which makes for clean, beautiful slices. It also gives the flavors time to meld together into the delicious dessert everyone will rave about. Do not rush this step!
Pro Tips & Variations
Over the years, I’ve learned a few things that take this Easy Pistachio Lush st patricks day desserts from good to absolutely unforgettable. Here are my best tips and some fun variations to try.
Pro Tips for a Perfect Lush:
- Soften the Cream Cheese Properly: This is a small step that makes a huge difference. If your cream cheese is too cold, your second layer will be lumpy, no matter how much you beat it. To get it perfectly soft, leave it on the counter for at least an hour before you start. If you’re short on time, you can unwrap the block, place it on a microwave safe plate, and microwave it in 10 second intervals until it’s soft but not melted. A smooth, creamy cream cheese layer is the key to that luxurious texture that contrasts so well with the crust.
- Toast Your Pecans: For a deeper, richer, and nuttier flavor in your crust and topping, take a few extra minutes to toast your pecans. Spread them in a single layer on a dry skillet over medium heat. Cook for just 3 to 5 minutes, shaking the pan frequently, until they become fragrant and lightly browned. Watch them carefully as they can burn quickly! Let them cool completely before chopping and using them in the recipe. This simple step elevates the flavor profile and adds an almost gourmet touch to the dessert.
- Wipe Your Knife for Clean Slices: You’ve done all the work to create those beautiful, distinct layers, so you want to show them off! The best way to get clean, picture perfect slices is to use a large, sharp knife. After each and every cut, wipe the knife clean with a damp paper towel. This prevents the layers from smudging into each other. It’s an extra bit of effort, but it’s so worth it when you serve those stunning, defined slices to your family and friends. It makes the dessert look as amazing as it tastes.
Fun Variations to Explore:
- Gluten Free Pistachio Lush: To make this recipe gluten free, simply swap the pecan crust for a gluten free alternative. You can purchase pre made gluten free cookie crumbs or make your own by crushing your favorite gluten free shortbread or vanilla cookies. Ensure your pudding mix is certified gluten free (most instant pudding mixes are, but it’s always good to check the label). With these simple swaps, you can create a dessert that everyone can enjoy without worry.
- Chocolate Pistachio Dream: For the chocolate lovers out there, this variation is a must try. Substitute the pecan crust with a crust made from crushed Oreo cookies (about 25 cookies, finely crushed) and 6 tablespoons of melted butter. Then, after spreading the whipped topping, drizzle the top with melted chocolate or a generous sprinkle of mini chocolate chips. The combination of chocolate and pistachio is a classic for a reason, and it takes this lush to a whole new level of decadence. It’s a bit like our Soft and Chewy Pistachio Pudding Cookies Recipe but in lush form!
Serving Suggestions
This Easy Pistachio Lush st patricks day desserts is an absolute star on its own, but pairing it with the right accompaniments can turn a simple dessert into a full fledged experience. The beauty of this dish is its versatility it’s light enough to follow a heavy meal but special enough to be the main event at a dessert table. I love thinking about how a dish will fit into a larger gathering, and this one offers so many wonderful possibilities.
First and foremost, a cup of freshly brewed coffee or a hot tea is a classic and perfect partner. The slightly bitter notes of coffee cut through the sweetness of the lush beautifully, cleansing the palate with each sip. The creamy, nutty flavors of the pistachio and cream cheese are wonderfully enhanced by the warmth of a hot beverage. For an after dinner treat, I often serve this with a pot of coffee, allowing guests to linger and chat. It’s a simple, elegant pairing that feels both comforting and sophisticated.
If you’re creating a dessert buffet for a party, this pistachio lush is a fantastic centerpiece. Its vibrant green color makes it a visual anchor. Pair it with other desserts that offer contrasting colors and flavors. For a St. Patrick’s Day theme, consider placing it alongside some rich, dark Triple Layer Fudgy Mint Oreo Brownies or a plate of simple sugar cookies with white icing. The visual variety is so appealing, and it gives guests a wonderful array of choices. Having a mix of creamy, chocolaty, and simple desserts ensures there’s something for every palate.
Don’t underestimate the power of a simple garnish to elevate the serving experience. While the recipe calls for chopped pecans, feel free to get creative. A few fresh raspberries or strawberries placed on top of each slice can add a pop of color and a touch of tartness that balances the dessert’s sweetness. During the holidays, a sprinkle of festive gold or green sanding sugar can add a bit of sparkle. You could even add a small dollop of extra whipped cream on each plate before placing the slice, making it look like it came straight from a restaurant kitchen. The goal is to make each serving feel like a special treat.
Storage & Reheating for Easy Pistachio Lush st patricks day desserts
Proper storage is key to keeping this dessert delicious. The best part is that it’s designed to be made ahead, so it stores wonderfully. Once you’ve assembled your lush, cover the baking dish tightly with a lid or plastic wrap. It’s important to ensure it’s well sealed to prevent it from absorbing any other odors from the refrigerator.
In the Refrigerator:
This dessert will keep beautifully in the refrigerator for up to 4 days. In fact, I think it tastes even better on day two, once the flavors have had more time to meld together. The crust will soften slightly over time, but it remains absolutely delicious. Keep it covered to maintain its freshness and prevent the whipped topping from drying out.
Freezing Instructions:
Yes, you can freeze this pistachio lush! This is a great option if you want to make it well in advance of a party. To freeze, first let it set completely in the refrigerator for at least 6 hours. Then, cover it tightly with a layer of plastic wrap, followed by a layer of aluminum foil to protect it from freezer burn. It can be frozen whole in the pan, or you can cut it into individual slices. If freezing slices, place them on a baking sheet to freeze solid, then wrap each one individually and store them in a freezer safe bag or container. It will keep in the freezer for up to 1 month. To serve, thaw it overnight in the refrigerator. Do not thaw it on the counter, as this can make the layers watery.
Serving from the Fridge:
This dessert is served cold, straight from the refrigerator. There is no reheating required, which is another reason it’s such a perfect, hassle free party dish! The cool, creamy texture is what makes it so refreshing and delightful.
FAQ about Easy Pistachio Lush st patricks day desserts
Can I make this pistachio lush ahead of time?
Absolutely! This is one of the best make ahead desserts. It actually needs at least 6 hours in the refrigerator to set properly, but making it a full day in advance is even better. This allows the layers to firm up for clean slicing and gives the flavors time to meld together beautifully. You can store it, tightly covered, in the fridge for up to 4 days.
Why is my lush watery or runny?
A watery lush is usually caused by one of two things. First, not chilling the layers long enough. Each step, from the crust to the final topping, benefits from chilling, but the final 6+ hour chill time is non negotiable. Second, the pudding layer may not have been thick enough. Make sure you use instant pudding mix (not the cook and serve kind) and whisk it with cold milk until it is noticeably thick before spreading it.
Can I use a different type of nut for the crust?
Of course! While pecans are classic, walnuts work wonderfully and have a slightly different flavor profile. If you have a nut allergy or just want a different base, a crust made from graham cracker crumbs, vanilla wafers, or even shortbread cookies is a delicious alternative. Use the same amount of crumbs (about 1 ½ cups) and melted butter.
Can I use real pistachios instead of pudding mix?
While I love fresh pistachios for garnish, the instant pudding mix is essential for the structure and flavor of this specific recipe. It contains stabilizers that help the layer set to the perfect creamy, yet firm, consistency. Creating a from scratch pistachio filling would require a different recipe with eggs and cornstarch to achieve a similar result, like in this Shamrock Lasagna Dessert Recipe.
How do I get those perfect, clean looking layers?
The secret to clean layers is patience! Chill the crust completely before adding the cream cheese layer. When spreading each layer, be gentle and spread it all the way to the edges of the pan. Most importantly, after the final chill, use a sharp, straight edged knife and wipe it clean with a damp cloth between every single cut. This prevents the colors and textures from dragging into one another.
Final Thoughts on Easy Pistachio Lush st patricks day desserts
There is something truly special about a recipe that is both incredibly simple and wonderfully impressive. This Easy Pistachio Lush is just that a dessert that brings so much joy and festive color with minimal effort. It’s a dish that’s filled with nostalgia, texture, and flavor, and it’s become a cherished part of my family’s St. Patrick’s Day celebrations. I hope it brings just as much happiness to your table.
If you make this recipe, I would absolutely love to hear about it! Drop a comment below and let me know how it turned out. And don’t forget to save this recipe to your favorite Pinterest board so you can find it easily year after year! For more family friendly recipes that create lasting memories, be sure to subscribe to my newsletter. Happy cooking!
Easy Pistachio Lush st patricks day desserts
Ingredients
Equipment
Method
- Start with a 9x13 inch baking dish. There's no need to grease it, as the buttery crust will prevent sticking.
- In a medium bowl, combine your finely chopped pecans, melted butter, and granulated sugar. Mix them together with a fork until all the nut pieces are evenly coated in butter. The mixture should resemble wet sand. Pour this mixture into your baking dish. Use the back of a spoon or the bottom of a measuring cup to press it down firmly and evenly across the bottom of the pan. Place the pan in the refrigerator to chill for at least 30 minutes.
- While the crust is chilling, in a large bowl, beat the softened cream cheese with an electric mixer until it's completely smooth and free of lumps. Gradually add the powdered sugar, mixing on low speed until it’s incorporated. In a separate bowl, whip the heavy cream until stiff peaks form. Gently fold the whipped cream into the cream cheese mixture until it’s just combined. (If using thawed whipped topping instead, simply fold that in.) Carefully spread this cream cheese mixture over your chilled pecan crust, making sure to go all the way to the edges to create a seal.
- In another bowl, whisk together the two packages of instant pistachio pudding mix and the three cups of cold milk. Whisk for about two minutes, or until the pudding starts to thicken. Let it sit for a minute or two to firm up just a bit more. Then, pour and spread this pistachio layer evenly over the cream cheese layer.
- Gently spread the thawed whipped topping over the pistachio layer. Create some lovely swirls and peaks with your spatula for a pretty, homemade look. Sprinkle the remaining chopped pecans or mini chocolate chips over the top.
- Cover the dish with plastic wrap or a lid and place it in the refrigerator for at least 6 hours, but overnight is even better. This chilling time is crucial for the layers to set and flavors to meld.


