
Introduction
Have you ever wondered why certain treats become the undisputed stars of the holiday season? We see them everywhere, from festive gatherings to cozy family nights, and one of the flavors that consistently captures our hearts is red velvet. Yet, for all its popularity, many home bakers feel intimidated, associating it with complex, multi layered cakes. But what if I told you that you could capture all that decadent flavor in a simple, bite sized cookie that’s impossible to get wrong? That’s where these incredible Red Velvet Kiss Cookies come in. This is the recipe that will make you fall in love with baking all over again.
Hi there! I’m Benjamin, the home cook and dad behind Mister Recipes. My love for cooking started in my grandmother’s kitchen, and it’s a passion I now share with my wife, Emily, and our two kids, Adams and Jana. For us, food is all about connection. It’s about creating those small, joyful moments that become cherished memories. I remember the first time I made these Red Velvet Kiss Cookies for a school bake sale. I was worried they might be too “fancy,” but they were the first thing to disappear! The parents wanted the recipe, and the kids were asking for more. It taught me that a truly great recipe is one that brings smiles to faces, and this one does it every single time.
These cookies are more than just a treat; they are a celebration in a single bite. They have the classic, slightly tangy flavor of red velvet, a soft, melt in your mouth texture, and that iconic chocolate kiss nestled in the center. They look stunning on a cookie platter and taste even better. Whether you’re a seasoned baker or just looking for an easy, family friendly recipe for the holidays, you’ve come to the right place. This recipe is designed for everyone. It’s proof that you don’t need to be a professional chef to create beautiful, delicious desserts that bring your family together. Grab your apron, and let’s get baking!
Why You’ll Love This Red Velvet Kiss Cookies Recipe
These cookies aren’t just another recipe; they are a game changer for holiday baking and beyond. From the moment you mix the vibrant red dough to the final, satisfying bite of a warm cookie, you’ll understand why this recipe is a keeper. It balances simplicity with show stopping results, making it a go to for any occasion that calls for a little sweetness and a lot of love.
- Incredibly Easy to Make: This is one of the biggest reasons you’ll adore this recipe. We use a red velvet cake mix as a shortcut, which cuts down on measuring and prep time significantly. It’s a brilliant hack that guarantees a perfect, consistent flavor and texture every time. You don’t have to worry about getting the delicate balance of cocoa and buttermilk just right. This approach makes it a fantastic recipe for beginners or for a fun afternoon of baking with the kids. It’s all the reward of homemade cookies with half the effort.
- Perfectly Soft and Chewy Texture: If you’re a fan of cookies that are pillowy soft with a delightful chew, you’ve hit the jackpot. The combination of cream cheese and butter in the dough creates a rich, tender crumb that practically melts in your mouth. Unlike crispy or crunchy cookies, these are pure comfort. Each bite is a luxurious experience, making them feel far more gourmet than they are to prepare. They stay soft for days, too, assuming they last that long!
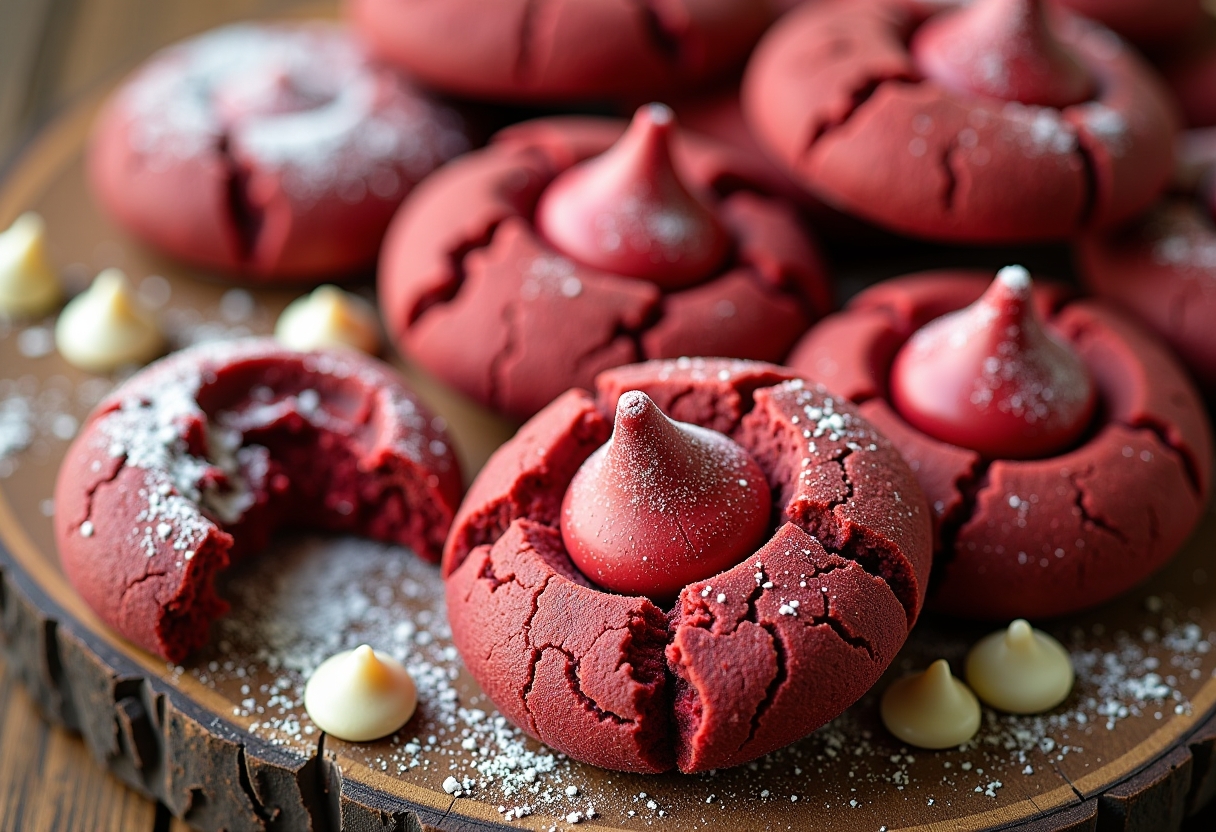
- Stunning Visual Appeal: Let’s be honest, we eat with our eyes first! The deep, vibrant red color of these cookies is absolutely gorgeous, especially when rolled in sparkling sugar. Topped with a glossy Hershey’s Kiss, they look like little jewels on a dessert platter. They are effortlessly elegant and are perfect for Valentine’s Day treats, Christmas cookie exchanges, or any time you want to impress your guests. You don’t need any special decorating skills to make these look professional.
- A Crowd Pleasing Flavor for All Ages: The flavor of red velvet is unique and beloved by many. It’s a subtle blend of tangy buttermilk, mild cocoa, and sweet vanilla. When you combine that with the rich, creamy chocolate of a Hershey’s Kiss, it’s a match made in heaven. It’s a sophisticated flavor that adults appreciate, but it’s also sweet and simple enough for kids to devour. These are truly family friendly cookies that will have everyone reaching for seconds. They are a guaranteed hit at parties, potlucks, and family gatherings.
This Kiss cookies recipe is more than just a dessert; it’s an experience you can share. It brings the wow factor without the stress, which is exactly what home cooking should be about. It embodies the spirit of my blog, Mister Recipes, where every meal is made with love and designed to be shared.
Ingredients for Red Velvet Kiss Cookies
- 1 box (15.25 ounces) red velvet cake mix
- 1/2 cup unsalted butter, softened
- 4 ounces cream cheese, softened
- 1 large egg
- 1 teaspoon vanilla extract
- 1/2 cup granulated sugar (for rolling)
- 36 Hershey’s Kisses, unwrapped
Substitutions:
- Butter: If you only have salted butter, you can use it and omit any additional salt if a recipe calls for it (ours doesn’t, so it’s a simple swap).
- Cream Cheese: For a tangier flavor, you can use full fat cream cheese. A lower fat version (Neufchâtel) also works, but the texture might be slightly less rich.
- Hershey’s Kisses: Feel free to get creative! Hugs (milk and white chocolate swirl), dark chocolate Kisses, or even caramel filled Kisses work wonderfully.
How to Make Red Velvet Kiss Cookies
Step by Step Instructions
- Preheat and Prepare: First things first, preheat your oven to 375°F (190°C). This is a crucial step! A properly heated oven ensures your cookies start baking the moment they go in, which helps them hold their shape. Line two large baking sheets with parchment paper. This prevents the cookies from sticking and makes cleanup a breeze. While the oven heats, take a moment to unwrap your Hershey’s Kisses. Having them ready to go is important because you’ll need to press them into the cookies while they are still hot.
- Mix the Wet Ingredients: In a large mixing bowl, combine the softened butter and softened cream cheese. Using an electric mixer (either a stand mixer with a paddle attachment or a hand mixer), beat them together on medium speed until the mixture is smooth, creamy, and well combined. This usually takes about 2 minutes. You want to make sure there are no lumps. Next, add the egg and vanilla extract and beat again until everything is just incorporated.
- Combine Wet and Dry Ingredients: Now, pour the entire box of red velvet cake mix into the wet ingredient mixture. Set your mixer to low speed and mix until the dry and wet ingredients are just combined. Be careful not to overmix! Overmixing can lead to tough cookies. The dough will be thick, sticky, and beautifully red.
- Chill the Dough (Optional but Recommended): For the best results, I highly recommend chilling the dough for at least 30 minutes. Cover the bowl with plastic wrap and place it in the refrigerator. Chilling solidifies the fat, which prevents the cookies from spreading too much in the oven. This step helps create those perfectly thick and soft and chewy red velvet kiss cookies.
- Shape the Cookies: Pour the granulated sugar into a small, shallow bowl. Scoop out portions of the chilled dough, about 1 tablespoon each, and roll them into balls. A small cookie scoop makes this process faster and ensures your cookies are all a uniform size. Roll each dough ball gently in the granulated sugar until it’s fully coated. The sugar adds a lovely sparkle and a subtle crunch to the exterior.
- Bake to Perfection: Place the sugar coated dough balls on your prepared baking sheets, about 2 inches apart, to give them room to spread a little. Bake for 10 to 12 minutes. The cookies should look set and slightly puffed up around the edges. Be careful not to overbake, as this will make them dry instead of soft and chewy.
- Add the Kiss: This is the most important step! As soon as you remove the baking sheets from the oven, immediately and gently press one unwrapped Hershey’s Kiss into the center of each hot cookie. The cookie will crack slightly around the edges which is what creates that beautiful signature look. The heat from the cookie will melt the bottom of the Kiss just enough to fuse it in place.
- Cool and Enjoy: Let the cookies cool on the baking sheet for about 5 minutes before transferring them to a wire rack to cool completely. This allows them to set fully without breaking. Once cool, they are ready to be devoured!
Pro Tips & Variations
Ready to take your Red Velvet Kiss Cookies to the next level? Here are some of my favorite pro tips and fun variations that I’ve learned over years of baking for my family and friends.
- Don’t Overbake for Maximum Softness: The secret to truly soft and chewy red velvet kiss cookies is to pull them from the oven when they look just slightly underdone in the center. They will continue to bake on the hot cookie sheet after you take them out. A good indicator is when the edges are set and the top is puffed. Overbaking is the number one enemy of a soft cookie, so watch them closely.
- The Perfect Kiss Press: Timing is everything. Press the Hershey’s Kisses into the cookies the second they come out of the oven. They will be hot and pliable, allowing the chocolate to nestle in perfectly. If you wait too long, the cookies will firm up, and the Kisses will just sit on top. A gentle but firm press is all you need to create those beautiful cracks.
- Uniform Cookies with a Scoop: Using a small cookie scoop is my secret weapon for perfectly uniform cookies. Not only does it make the process faster, but it also ensures that all your cookies are the same size, which means they bake evenly. This is how you get professional looking results every single time.
Variations:
- How to make red velvet kiss cookies from scratch: If you’re feeling adventurous and want to skip the cake mix, you can! You’ll need to create your own red velvet base using flour, cocoa powder, buttermilk, vinegar, and red food coloring. It’s more work, but the from scratch flavor is a rewarding experience. A great starting point can be found in established red velvet recipes that you can adapt for cookies.
- Gluten Free Red Velvet Kiss Cookies: To make this recipe gluten free, simply swap the regular cake mix for a gluten free red velvet cake mix. Brands like Betty Crocker and King Arthur offer great options. The rest of the recipe remains the same! It’s an easy switch that everyone can enjoy.
- Cream Cheese Frosting Drizzle: For an extra layer of decadence, you can add a drizzle of cream cheese frosting over the cooled cookies. Simply thin out your favorite cream cheese frosting with a little milk until it’s a drizzling consistency. It’s a beautiful and delicious finishing touch, making them true red velvet thumbprint cookies.
- Holiday Variations: These cookies are perfect for customization. For Christmas, use holiday themed Kisses (like the mint truffle ones) and roll the dough in red and green sprinkles instead of sugar. For Valentine’s Day, use heart shaped sprinkles. This is one of my favorite holiday baking traditions.
Serving Suggestions
These Red Velvet Kiss Cookies are fantastic on their own, but pairing them with the right things can elevate the experience from a simple treat to a memorable moment. When I make these for my family, we love to turn it into a little celebration. Here are a few of my favorite ways to serve them:
- Classic Milk or Hot Cocoa Pairing: You can’t go wrong with the classics. A cold glass of milk is the perfect counterpart to the rich, soft cookie, cleansing the palate between bites. For a cozier option, especially during the holidays, serve them alongside a mug of homemade hot chocolate. The warmth of the cocoa melts the chocolate kiss just a little more, making it an incredibly indulgent experience.
- Build a Festive Cookie Platter: These cookies are the star of any dessert platter thanks to their vibrant color. I love to arrange them with a variety of other cookies to create a beautiful and tempting display for parties or family gatherings. They pair beautifully with Easy Christmas Spritz Butter Cookies Recipe, some rich Easy Chocolate Crinkle Cookies Recipe, and classic Jam Thumbprints. The different shapes, colors, and textures create a feast for the eyes.
- Serve with Coffee or Espresso: For a more grown up treat, I love serving these cookies with a freshly brewed cup of coffee or a shot of espresso. The slightly bitter notes of the coffee cut through the sweetness of the cookie, creating a perfectly balanced flavor profile. It’s my favorite way to enjoy a quiet afternoon treat after the kids are off to school.
Storage & Reheating for Red Velvet Kiss Cookies
One of the best things about these cookies is that they store beautifully. Here’s how to keep them fresh:
- Room Temperature: Store the cooled cookies in an airtight container at room temperature for up to 5 days. The cream cheese in the dough helps keep them incredibly moist.
- Freezing: These cookies freeze exceptionally well. You can freeze the baked cookies or the cookie dough balls. To freeze baked cookies, place them in a single layer in a freezer safe container, with parchment paper between layers to prevent sticking. They will last for up to 3 months. To freeze the dough, place the rolled dough balls on a baking sheet and freeze until solid, then transfer them to a freezer bag. You can bake them straight from the freezer; just add a couple of extra minutes to the baking time.
Reheating: Honestly, these cookies are best enjoyed at room temperature or even slightly chilled from the fridge. Reheating them in a microwave can cause the Hershey’s Kiss to melt completely. If you prefer a warm cookie, it’s best to let them come to room temperature naturally.
FAQ about Red Velvet Kiss Cookies
- Can I make these red velvet cookies from scratch instead of using a cake mix?
- Absolutely! While the cake mix version is fantastic for its ease, making red velvet cookies from scratch is very rewarding. You will need to combine flour, cocoa powder, sugar, butter, leavening agents, and the key red velvet ingredients: buttermilk, a touch of vinegar, and red food coloring. It will be more steps, but you get full control over the ingredients.
- What if I don’t have cream cheese?
- The cream cheese is key for the soft texture and tangy flavor. If you’re in a pinch, you can try substituting it with an equal amount of softened butter. The cookies will still be delicious but will have a slightly different texture, more like a traditional butter cookie and less like the soft, cakey red velvet style.
- Why did my cookies spread out too much?
- This is a common cookie conundrum! It usually happens for a couple of reasons: the butter was too soft (almost melted), or you skipped chilling the dough. Chilling the dough for at least 30 minutes is the best way to prevent spreading. Also, ensure your oven is fully preheated before putting the cookies in.
- Can I use a different topping instead of a Hershey’s Kiss?
- Of course! This Kiss cookies recipe is very versatile. You can press a chocolate chip, a caramel, a Rolo, or even a different flavored Kiss into the center. For a non chocolate option, you could make an indentation with your thumb (like red velvet thumbprint cookies) and fill it with cream cheese frosting after they have cooled.
Final Thoughts on Red Velvet Kiss Cookies
And there you have it! The best red velvet kiss cookies recipe ever, a treat that’s as fun to make as it is to eat. I truly hope this recipe brings as much joy to your kitchen as it does to mine. There’s something special about seeing a platter of these vibrant cookies on the table, knowing they were made with love and simple, good ingredients.
If you make these cookies, I would absolutely love to hear about it! Please leave a comment below and let me know how they turned out. And don’t forget to save this recipe on Pinterest so you can easily find it for your next holiday or family gathering. For more family friendly recipes and baking inspiration, be sure to subscribe to the Mister Recipes newsletter. Happy baking!

Red Velvet Kiss Cookies
Ingredients
Equipment
Method
- Preheat your oven to 375°F (190°C). Line two large baking sheets with parchment paper. Unwrap the Hershey’s Kisses and set aside.
- In a large mixing bowl, beat together the softened butter and cream cheese until smooth and creamy, about 2 minutes. Add the egg and vanilla extract and beat until just combined.
- Add the entire box of red velvet cake mix to the wet ingredients. Mix on low speed until just combined. Be careful not to overmix. The dough will be thick and sticky.
- (Optional but recommended) Cover the bowl with plastic wrap and chill the dough in the refrigerator for at least 30 minutes.
- Pour granulated sugar into a small bowl. Scoop dough by tablespoon portions and roll into balls. Roll each ball in sugar until fully coated.
- Place the sugar-coated dough balls on prepared baking sheets about 2 inches apart. Bake for 10-12 minutes until cookies look set and slightly puffed.
- Immediately after removing from oven, gently press one Hershey’s Kiss into the center of each hot cookie. The cookie will crack slightly around the edges.
- Let cookies cool on baking sheet for 5 minutes before transferring to a wire rack to cool completely.


