
Fluffy Homemade Sandwich Bread: The Ultimate Recipe for Perfect Loaves
There’s something deeply satisfying about baking your own bread. Not only does it fill your kitchen with an irresistible aroma, but it also brings an unparalleled freshness that store bought bread simply can’t compete with. Whether you’re a novice baker or a seasoned kitchen enthusiast, this homemade sandwich bread recipe will quickly become a staple in your cooking repertoire.
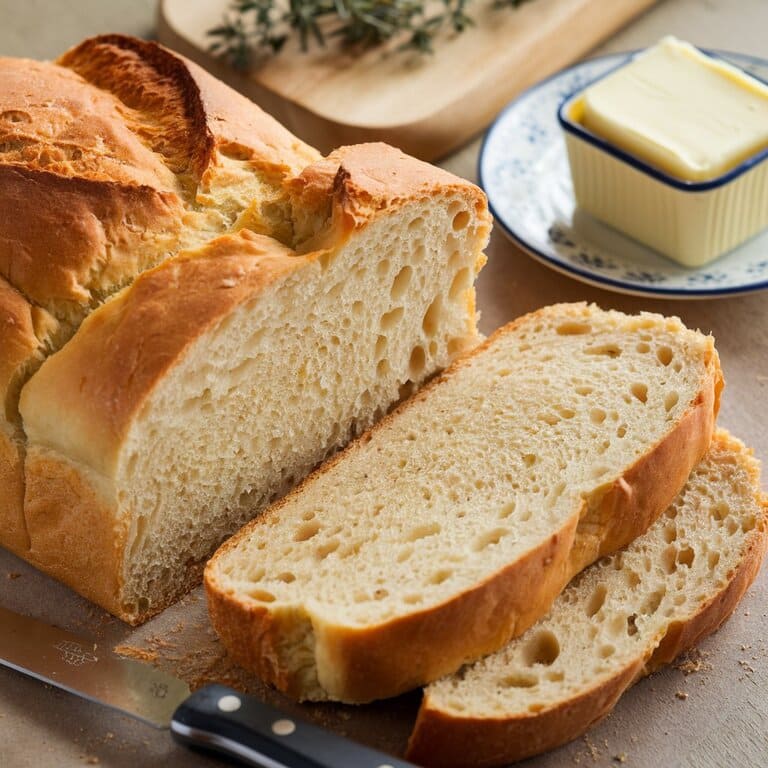
Picture a loaf that’s perfectly golden on the outside, while soft and fluffy on the inside, with a subtle hint of sweetness. This bread is tailor-made for everything from hearty sandwiches to buttery toast. Plus, baking your own sandwich bread at home is more economical, and it’s easier than you think! With just a few simple ingredients, you’ll have a versatile bread that enhances every meal and snack.
Table of Contents
“Good bread is the most fundamentally satisfying of all foods; and good bread with fresh butter, the greatest of feasts!”
James Beard
So, let’s roll up our sleeves and dive into this foolproof sandwich bread recipe that will turn your kitchen into a mini-bakery!

Why You’ll Love This Homemade Sandwich Bread Recipe:
- Easy to Make: No need to be an expert baker! This recipe walks you through every step clearly, making it approachable for beginners while still exciting for seasoned bakers.
- Freshness Guaranteed: Homemade means no preservatives, artificial flavors, or additives. This bread is fresh, wholesome, and completely customizable.
- Perfect Texture: Achieve the perfect balance light, fluffy, yet firm enough to hold up all your favorite sandwich fillings without falling apart.
- Versatile Uses: This bread is great for everything sandwiches, French toast, grilled cheese, or simply with butter and jam.
- Cost-Effective: Making your own bread is significantly cheaper than buying artisanal loaves from the store, and you’ll get a larger yield.
How to Make Fluffy Homemade Sandwich Bread Recipe

Holiday Baking? Make festive Sourdough Gingerbread Cookies for the season.
Ingredients:
- 3 cups all-purpose flour
- 1 cup warm water (110°F)
- 2 ¼ teaspoons active dry yeast (or 1 packet)
- 2 tablespoons sugar
- 1 teaspoon salt
- 2 tablespoons unsalted butter (room temperature)
- ¼ cup milk (warm, but not hot)
- Extra butter for greasing
Step-by-Step Directions:
- Activate the Yeast: Start by dissolving the sugar in warm water. Sprinkle the yeast over the top and let it sit for 5–10 minutes until it becomes frothy. This is a sign that your yeast is alive and ready to work its magic!
- Mix the Dry Ingredients: In a large mixing bowl, combine the flour and salt. Make a well in the center and pour in the yeast mixture along with the warm milk and softened butter.
- Knead the Dough: Use a spoon or your hands to mix everything until the dough starts to come together. Turn the dough out onto a lightly floured surface and knead for about 8–10 minutes until it’s smooth and elastic. If you have a stand mixer with a dough hook, this step becomes even easier!
- First Rise: Place the dough in a lightly greased bowl and cover it with a damp kitchen towel. Let it rise in a warm place for about 1–1.5 hours, or until it doubles in size. A good trick is to leave it in an oven that’s turned off, but with the light on for some warmth.

- Shape the Dough: Once the dough has doubled, punch it down gently to release air. Transfer it to a clean surface and shape it into a loaf by flattening it slightly and rolling it into a tight log.
- Second Rise: Grease a loaf pan with butter and place the shaped dough inside. Cover again with a towel and let it rise for another 45 minutes to 1 hour, until it has risen just above the rim of the loaf pan.
- Bake the Bread: Preheat your oven to 350°F (175°C). Bake the loaf for about 30–35 minutes, or until the top is golden brown and the bread sounds hollow when tapped.
- Cool Before Slicing: Once baked, remove the loaf from the oven and brush the top with a little melted butter for extra softness. Let it cool in the pan for about 10 minutes before transferring it to a wire rack to cool completely.

Tips for Perfect Homemade Sandwich Bread Recipe
- Don’t Overheat the Liquid: Make sure your water and milk are warm but not too hot. Too hot, and it will kill the yeast. Aim for around 110°F.
- Proofing Spot: Yeast thrives in a warm environment, but if your kitchen is chilly, try placing the dough in a turned-off oven with the oven light on.
- Kneading is Key: Proper kneading helps develop gluten, which gives the bread its structure. Don’t skimp on kneading time if you want that perfect, airy texture.
- Butter the Crust: For a soft crust, always brush the top of the bread with melted butter after baking.
- Storage: Keep the bread wrapped in a clean kitchen towel or in an airtight container. It will stay fresh for up to 3 days. You can also freeze it for up to 3 months.
FAQ:
| Question | Answer |
| Can I make this Sandwich Bread Recipe without a stand mixer? | Yes! You can knead the dough by hand. It will take about 8–10 minutes of kneading on a floured surface. |
| How can I make my bread softer? | Use whole milk and add a little extra butter. Brushing the crust with butter after baking also helps keep it soft. |
| Can I use whole wheat flour instead? | You can substitute half the all-purpose flour with whole wheat flour. Keep in mind that this will make the bread denser. |
| Why didn’t my bread rise? | Make sure your yeast is fresh and that the liquid isn’t too hot or too cold. The dough also needs a warm environment to rise properly. |
| Can I add herbs or cheese to this recipe? | Absolutely! Add chopped herbs, shredded cheese, or even garlic to the dough before kneading for a flavored loaf. |
People also ask
How long does homemade sandwich bread last?
Homemade sandwich bread typically lasts 3 to 5 days when stored properly at room temperature. You can keep it fresh by wrapping it in plastic wrap or storing it in an airtight container. If you want to keep it longer, you can freeze it. Frozen bread can last up to 3 months, and you can slice it before freezing so you only take out what you need.
What are some guidelines for choosing sandwich bread?
When choosing sandwich bread, consider these guidelines:
- Texture: Look for a soft, tender crumb. This makes it easier to slice and doesn’t crumble when you spread fillings on it.
- Flavor: Choose a bread with a mild, neutral flavor that complements your sandwich fillings.
- Thickness: Opt for a medium thickness thick enough to hold fillings but not too thick to overpower them.
- Freshness: Fresh bread is always best for sandwiches, as it will have the best texture and flavor.
- Ingredients: Read the ingredient list for additives, preservatives, and artificial ingredients. Homemade or artisanal breads are usually more natural.
How do you keep sandwich bread from getting hard?
To prevent your sandwich bread from getting hard, follow these tips:
- Proper Storage: Store bread in an airtight container or wrap it tightly in plastic wrap or a bread bag. This helps lock in moisture.
- Avoid Refrigeration: Don’t refrigerate bread, as it can cause it to dry out. Instead, keep it in a cool, dry place.
- Use Bread with More Moisture: Opt for bread recipes that include ingredients like butter, milk, or oil to keep the bread moist.
- Freezing: If you can’t eat the bread in time, slice it and freeze it. This way, you can toast slices as needed, and they will stay fresh.
What makes sandwich bread different?
Sandwich bread differs from regular bread in its texture, structure, and flavor. It’s typically softer and fluffier, with a finer crumb. The dough is often enriched with fats (like butter or oil) and sometimes dairy (milk) to make it softer and more pliable. Sandwich bread is usually square-shaped and has a uniform crumb to make it ideal for sandwich fillings, ensuring the bread doesn’t fall apart.
What is the difference between sandwich bread and normal bread?
The key differences between sandwich bread and normal bread are:
- Shape: Sandwich bread is usually made in a loaf pan and has a square shape with even, soft edges, while regular bread may be round or rustic.
- Texture: Sandwich bread has a tender, soft crumb that’s easy to bite into, while regular bread can be denser and chewier.
- Ingredients: Sandwich bread often contains fats (butter, milk, oil) to keep it soft, while some regular breads, like French bread or baguettes, focus more on simplicity and a crunchy crust.
Why does my homemade sandwich bread fall apart?
If your homemade sandwich bread is falling apart, it could be due to:
- Under-kneading: If the dough isn’t kneaded enough, the gluten doesn’t develop properly, leading to a weak structure that can’t hold together.
- Too Much Flour: Adding too much flour can make the dough too dry and crumbly, causing the bread to fall apart.
- Overbaking or Underbaking: If the bread is overbaked, it becomes too dry and crumbly. If underbaked, it might collapse and fall apart when sliced.
- Not Enough Binding Ingredients: Not using enough fat (butter, oil) or other enriching ingredients can result in bread that lacks the structure and moisture it needs to stay together.
Common Mistakes Sandwich Bread Recipe:
- Overmixing the Dough: If you mix the dough too vigorously, it can lead to a dense bread. Mix it just enough to combine the ingredients, and knead gently.
- Not Properly Proofing: Not allowing the dough to rise properly before baking can cause the bread to be flat or dense. Make sure to let the dough rise in a warm place until it has doubled in size.
- Wrong Oven Temperature: Baking at too high or too low a temperature can affect the texture. Make sure to preheat the oven properly and use an oven thermometer if necessary.
- Not Following Ingredient Proportions: Too much or too little flour, water, or yeast can throw off the balance and texture of the bread.
- Not Using the Right Type of Yeast: Make sure to use the correct yeast (active dry yeast or instant yeast) and proof it correctly if needed.
Conclusion:
Making sandwich bread at home is an incredibly satisfying experience, but it’s important to follow the recipe carefully to avoid common pitfalls. Pay attention to the dough’s texture, the proofing process, and the baking time. With a little practice, you can create soft, flavorful, and perfect sandwich bread that holds together beautifully for all kinds of fillings. Always remember that small adjustments in ingredients and techniques can lead to big differences in the final product.

Sandwich Bread Recipe
Ingredients
Equipment
Method
- Activate the Yeast: Start by dissolving the sugar in warm water. Sprinkle the yeast over the top and let it sit for 5–10 minutes until it becomes frothy. This is a sign that your yeast is alive and ready to work its magic!
- Mix the Dry Ingredients: In a large mixing bowl, combine the flour and salt. Make a well in the center and pour in the yeast mixture along with the warm milk and softened butter.
- Knead the Dough: Use a spoon or your hands to mix everything until the dough starts to come together. Turn the dough out onto a lightly floured surface and knead for about 8–10 minutes until it’s smooth and elastic. If you have a stand mixer with a dough hook, this step becomes even easier!
- First Rise: Place the dough in a lightly greased bowl and cover it with a damp kitchen towel. Let it rise in a warm place for about 1–1.5 hours, or until it doubles in size. A good trick is to leave it in an oven that’s turned off, but with the light on for some warmth.
- Shape the Dough: Once the dough has doubled, punch it down gently to release air. Transfer it to a clean surface and shape it into a loaf by flattening it slightly and rolling it into a tight log.
- Second Rise: Grease a loaf pan with butter and place the shaped dough inside. Cover again with a towel and let it rise for another 45 minutes to 1 hour, until it has risen just above the rim of the loaf pan.
- Bake the Bread: Preheat your oven to 350°F (175°C). Bake the loaf for about 30–35 minutes, or until the top is golden brown and the bread sounds hollow when tapped.
- Cool Before Slicing: Once baked, remove the loaf from the oven and brush the top with a little melted butter for extra softness. Let it cool in the pan for about 10 minutes before transferring it to a wire rack to cool completely.
Nutrition
Notes
Nutrition (per slice, based on 12 slices):
Calories: 160 | Carbohydrates: 30g | Protein: 4g | Fat: 3g | Saturated Fat: 1g | Polyunsaturated Fat: 0.5g | Monounsaturated Fat: 1g | Sodium: 250mg | Potassium: 55mg | Fiber: 1g | Sugar: 3g | Vitamin C: 0% | Calcium: 15mg | Iron: 1.5mgLet me know!
Did you find this post helpful? By leaving a star rating and share, it will help others find my recipes.


