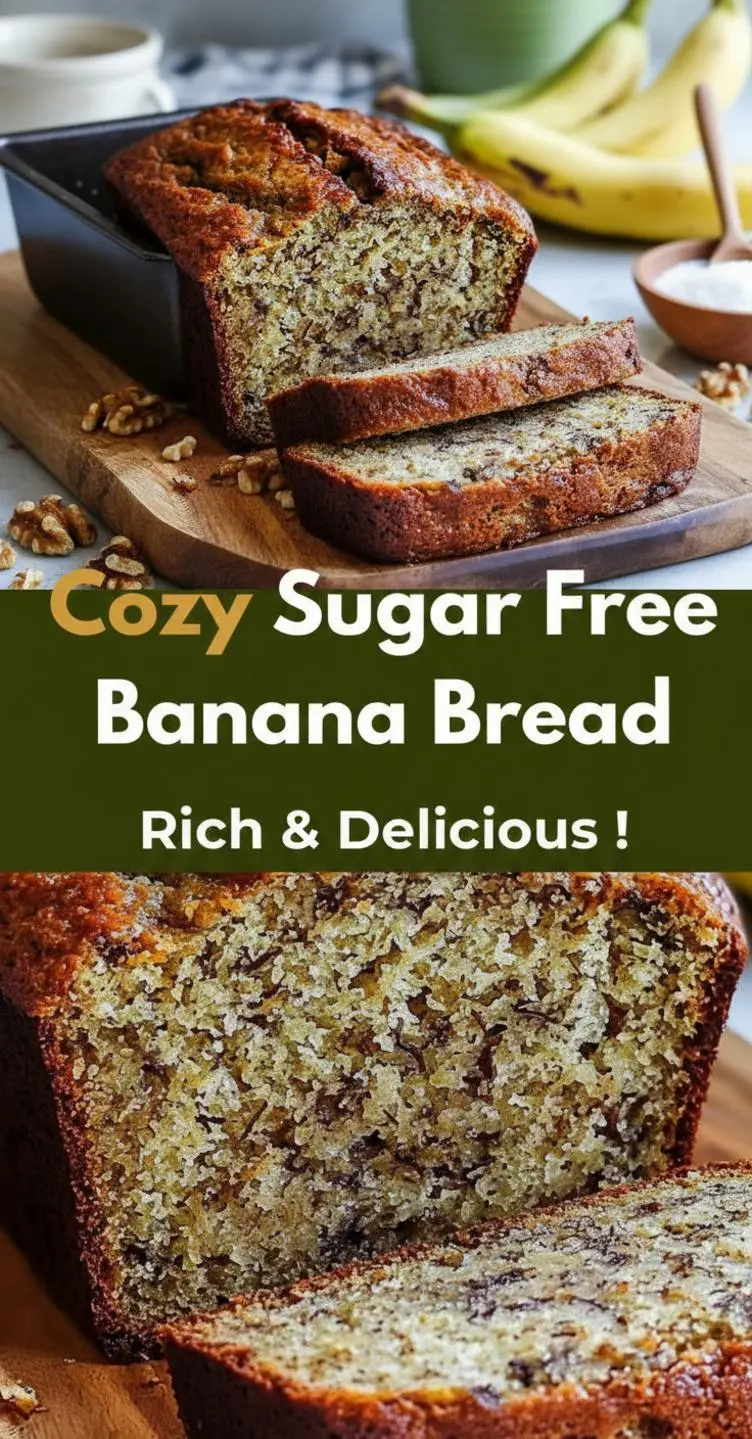
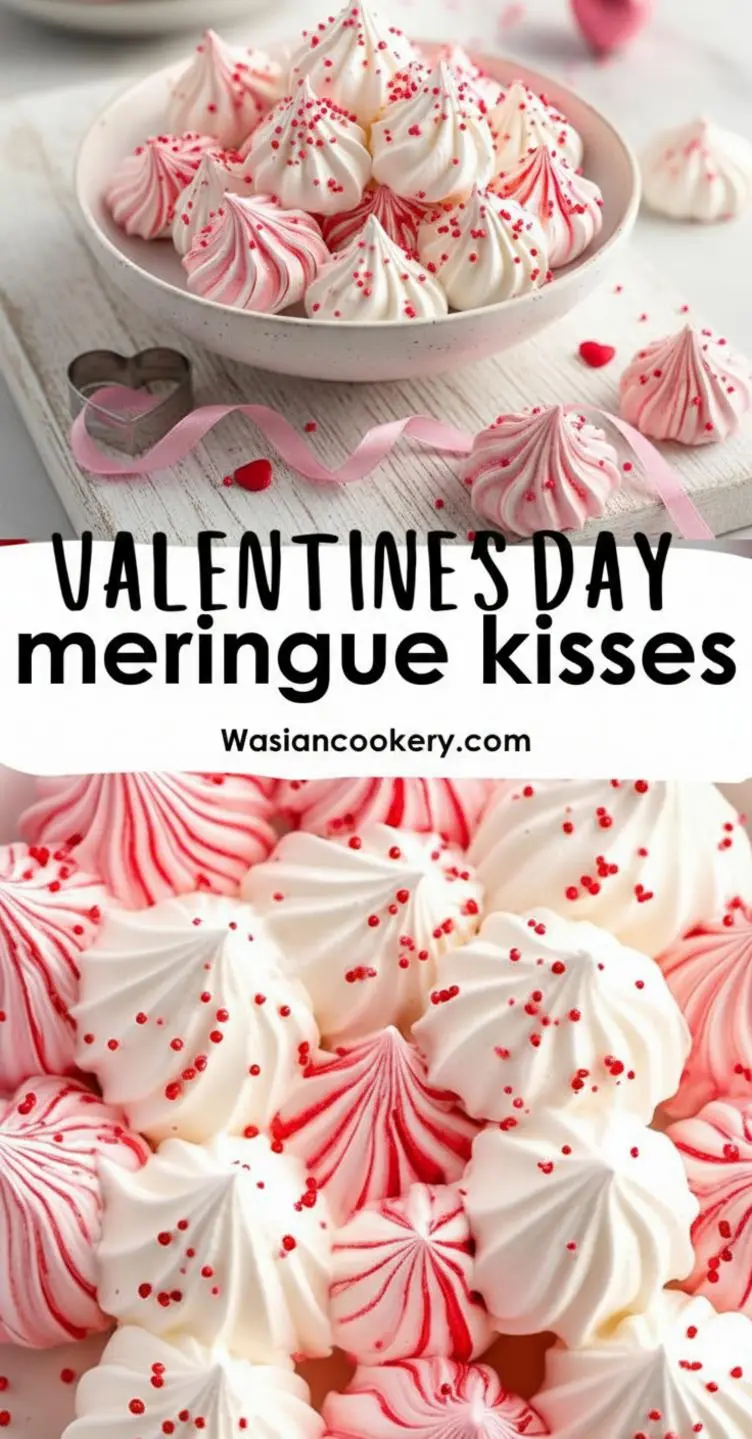
Have you ever wondered if it’s possible to capture the sweetness of Valentine’s Day in a single, airy bite? So often, we reach for dense chocolates or heavy cakes, but what if the most romantic treat was also the lightest? I remember my kids, Adams and Jana, when they were little, their eyes wide with wonder at the magic of turning simple egg whites and sugar into something so special. That’s the heart of these Valentine s Day Meringue Kisses. They aren’t just a dessert; they’re a little cloud of affection, a simple recipe that’s more about the love you put into it than complex techniques. These delightful little treats are incredibly easy to make, perfect for getting the whole family involved in the kitchen. They are proof that the best gifts are often homemade, light as a feather, and sweet enough to make anyone’s day. Let’s create some edible love letters together.
Why You’ll Love This Valentine s Day Meringue Kisses
There’s something truly magical about these meringue kisses, a quality that goes beyond their simple ingredients. When I first made them for Emily, she said they were like eating a sweet cloud, and that’s the perfect description. They are the ideal treat when you want to make something special without spending hours in the kitchen. They look impressive, but I promise, the process is wonderfully straightforward. This is one of those dessert recipes you’ll come back to for birthdays, holidays, or just a Tuesday when you need a little pick me up. They are a fantastic addition to any celebration, just like these Heart Shaped Sugar Cookies.
- Incredibly Simple Ingredients: You only need 4 basic ingredients you probably already have: egg whites, sugar, cream of tartar, and vanilla. It’s kitchen magic at its finest!
- Light as Air: Unlike heavy cakes or rich brownies, these meringue cookies are wonderfully light and airy. They satisfy your sweet tooth without weighing you down, making them the perfect post dinner treat.
- Completely Customizable: Want pink swirls? A hint of strawberry? A different shape? This meringue recipe is a blank canvas. You can easily color them, flavor them with different extracts, or pipe them into various fun shapes.
- Perfect for Gifting: Packaged in a small box or cellophane bag tied with a ribbon, these kisses make a beautiful and thoughtful homemade gift for teachers, friends, or that special someone. They show you care enough to make something by hand.
- Naturally Gluten Free: Since they’re made without any flour, these cookies are a wonderful treat for anyone with gluten sensitivities. It’s a dessert everyone can enjoy!
Ingredients for Valentine s Day Meringue Kisses
- Egg Whites: You’ll need 3 large egg whites, at room temperature. This is crucial as warm egg whites whip up to a much greater volume than cold ones.
- Granulated Sugar: 3/4 cup of fine granulated sugar or caster sugar is best, as it dissolves more easily into the egg whites, preventing a gritty texture.
- Cream of Tartar: Just 1/2 teaspoon helps stabilize the egg whites, allowing them to hold their shape and create a stronger meringue. If you don’t have it, you can substitute it with a teaspoon of lemon juice or white vinegar.
- Vanilla Extract: 1 teaspoon of pure vanilla extract adds a lovely warm flavor. You could also experiment with other extracts like almond or peppermint.
- Pink or Red Gel Food Coloring: This is optional, but just a tiny drop is all you need to create beautiful swirls for that perfect Valentine’s Day look.

How to Make Valentine s Day Meringue Kisses
Step-by-Step Instructions
Making meringue is a process that feels like a little bit of kitchen alchemy. Watching egg whites transform into a glossy, stiff mixture is so rewarding. The key is patience. Don’t rush the process of adding the sugar, and be sure to whip the meringue until it’s perfectly stiff and glossy. For a wonderful guide on the science of meringue, the folks at King Arthur Baking have a great recipe that also explains the process well.
- Preparation: First, preheat your oven to 225°F (107°C). A low and slow bake is the secret to perfectly crisp meringues. Line two large baking sheets with parchment paper. This is a must do step; do not grease the pans.
- Whip the Egg Whites: In the clean, dry bowl of a stand mixer fitted with the whisk attachment, beat the room temperature egg whites and cream of tartar on medium speed until they become foamy and soft peaks form. This should take about 2 to 3 minutes.
- Gradually Add Sugar: With the mixer still running, begin adding the granulated sugar, one tablespoon at a time. Wait about 30 seconds between each addition. This slow process is vital for allowing the sugar to dissolve completely, which ensures a smooth, stable meringue.
- Whip to Stiff Peaks: Once all the sugar is added, increase the mixer speed to high and beat until the meringue is very stiff, glossy, and holds a sharp peak. When you lift the whisk, the peak should stand straight up without curling over. This can take anywhere from 5 to 8 minutes. Beat in the vanilla extract during the last minute of mixing.
- Add Color (Optional): If you want colored swirls, here’s a fun trick. Use a thin paintbrush or a toothpick to paint 2 to 3 stripes of gel food coloring on the inside of your piping bag (fitted with a star tip, like a Wilton 1M).
- Pipe the Kisses: Carefully transfer the meringue into the prepared piping bag. Pipe 1 inch wide “kisses” onto the parchment lined baking sheets, about 1 inch apart. The little swirl at the top gives them their classic kiss shape.
- Bake: Bake for 45 to 60 minutes, or until the meringues are dry and firm to the touch. They should lift easily off the parchment paper.
- Cool Completely: Turn the oven off, crack the door open, and let the meringues cool completely inside the oven for at least 1 hour. This prevents them from cracking due to a sudden temperature change.
Pro Tips & Variations
Over the years, I’ve learned a few tricks that make this meringue recipe foolproof. First and foremost, make sure your mixing bowl and whisk are impeccably clean and dry. Any trace of fat or grease (even from an egg yolk) will prevent your whites from whipping up properly. I always wipe my bowl with a bit of vinegar just to be sure. Also, older eggs tend to whip up better than very fresh ones! For a touch of decadent variation, consider dipping the cooled kisses in melted chocolate, reminiscent of these Pink Chocolate Dipped Strawberries.
- Room Temperature Eggs are Key: I can’t stress this enough. Room temperature egg whites whip up much faster and create more volume. Simply separate your eggs and let the whites sit on the counter for about 30 minutes before you start.
- Go Slow with the Sugar: Dumping all the sugar in at once will deflate your egg whites. Adding it slowly, a tablespoon at a time, is the secret to a strong, stable, and smooth meringue.
- Test for Stiff Peaks: To know if your meringue is ready, pull the whisk out of the mixture. The peak that forms should stand straight up without bending. If it flops over, keep whipping!
- Flavor Variations: Swap the vanilla extract for 1/2 teaspoon of peppermint extract for a festive twist, or use almond extract for a nutty flavor. You can also add 2 tablespoons of unsweetened cocoa powder (sifted in at the end) for chocolate meringue kisses.
- Add Some Crunch: For a fun texture, gently fold in finely chopped nuts or mini chocolate chips into the meringue right before piping.
Serving Suggestions
These Valentine’s Day Meringue Kisses are delightful on their own, perhaps served with a cup of coffee or a creamy hot chocolate. But they are also incredibly versatile as a decorative element for other desserts. Imagine using them to top a beautiful cake, such as our Red Velvet Cupcakes with Cream Cheese Frosting, adding both beauty and a light, crispy texture. Another way my family loves them is crushed over a bowl of vanilla ice cream with fresh strawberries. You can also use two kisses to sandwich a small dollop of raspberry jam or lemon curd, creating a tiny, elegant dessert. For a more sophisticated pairing, serve them alongside a fruit platter with berries, kiwi, and melon.
Storage & Reheating for Valentine s Day Meringue Kisses
Proper storage is essential to keep your meringue kisses crisp and delicious. The enemy of meringue is moisture, so you must store them in a completely airtight container at room temperature. They will keep beautifully for up to two weeks this way. Do not store them in the refrigerator, as the humid environment will cause them to become soft and sticky. If, for some reason, your meringues do get a little soft, you can refresh them. Simply place them on a baking sheet in a preheated 200°F oven for about 10 to 15 minutes to dry them out again. Let them cool completely before serving or storing. These can’t really be frozen as the thawing process introduces too much moisture.
FAQ about Valentine s Day Meringue Kisses
I get a lot of questions about making meringues, so I wanted to answer a few of the most common ones here. For more inspiration on meringue kisses, check out this recipe from An Italian in my Kitchen.
Why are my meringue kisses sticky or weeping?
This is usually caused by undissolved sugar or humidity. To prevent it, use superfine (caster) sugar if you can, and make sure you add the sugar very slowly. Also, try not to make meringues on a very rainy or humid day, as the meringue will absorb moisture from the air.
Can I make this recipe without a stand mixer?
Absolutely! You can use a handheld electric mixer. It will take a bit longer, and you’ll need some arm strength, but it’s completely doable. Just be patient and keep whipping until you achieve those essential stiff, glossy peaks.
How do I get the perfect two tone swirl?
The easiest way is the paintbrush trick I mentioned in the instructions. Paint thin lines of gel food coloring inside your piping bag before adding the meringue. As you pipe, the color will transfer onto the meringue, creating beautiful, delicate stripes.
My meringues cracked. What went wrong?
Cracking is usually caused by a sudden change in temperature. Either the oven was too hot, or they cooled too quickly. Baking at a low temperature and letting them cool down slowly in the oven with the door ajar is the best way to prevent cracks.
Final Thoughts on Valentine s Day Meringue Kisses
I hope you and your family have as much fun making these Valentine s Day Meringue Kisses as we do. They are more than just a sweet treat; they are a chance to create something beautiful and delicious together. I can’t wait to see your wonderful creations! If you make them, please leave a comment below and let me know how they turned out. And don’t forget to save this recipe to your favorite Pinterest board so you can find it again easily! For another fun Valentine’s dessert, take a look at these Valentine Cookie Sandwiches. Happy baking!
Valentine s Day Meringue Kisses
Ingredients
Equipment
Method
- Preheat your oven to 225°F (107°C). Line two large baking sheets with parchment paper.
- In the clean, dry bowl of a stand mixer fitted with the whisk attachment, beat the room temperature egg whites and cream of tartar on medium speed until they become foamy and soft peaks form, about 2-3 minutes.
- With the mixer running, add the granulated sugar one tablespoon at a time, waiting 30 seconds between each addition, until dissolved.
- Increase to high speed and beat until meringue is stiff, glossy, and holds a sharp peak, 5-8 minutes. Beat in vanilla during the last minute.
- Use a toothpick to paint 2-3 stripes of gel food coloring inside a piping bag fitted with a star tip.
- Transfer meringue to the piping bag and pipe 1-inch wide kisses onto the baking sheets, about 1 inch apart.
- Bake for 45-60 minutes until dry and firm. Turn off oven, crack door open, and cool inside for 1 hour.