
A Sweet Tradition for the Heart
Is there anything more nostalgic than the scent of warm butter and vanilla wafting through a quiet house on a chilly February morning? I remember standing on a stool in my grandmother’s kitchen in Texas, watching her transform simple pantry staples into edible art. She used to say that any cookie could feed the stomach, but Valentines Decorated Sugar Cookies feed the soul. This year, my kids, Adams and Jana, were at the table before I even had the flour out. Adams is twelve now, and he acts like he is too cool for sprinkles until he gets a piping bag in his hand. Jana, our nine year old, is the resident artist who believes every heart shaped sugar cookie needs at least three layers of glittery sugar. Feeding my family is my love language, and these cookies are the ultimate expression of that sentiment. Grab your apron, because we are making memories today.
When it comes to celebrating love, skip the store bought boxes. This Valentine cookie decorating tutorial is designed to help you master the craft at home. Whether you are looking for elegant rose cookie designs to impress Emily, like I do every year, or you want a messy, fun afternoon with the little ones, this recipe is your foundation. We are diving into how to decorate valentines sugar cookies with royal icing so that your kitchen feels like a professional bakery, but with the warmth of a family home.
Table of Contents
- Why You’ll Love This Valentines Decorated Sugar Cookies
- Ingredients for Valentines Decorated Sugar Cookies
- How to Make Valentines Decorated Sugar Cookies
- Pro Tips & Variations
- Valentines Decorated Sugar Cookies Serving Suggestions
- Valentines Decorated Sugar Cookies Storage & Reheating
- FAQ about Valentines Decorated Sugar Cookies
- Final Thoughts
Why You’ll Love This Valentines Decorated Sugar Cookies
These Valentines Day sugar cookies are not just another dessert. They are a medium for connection. I have spent years perfecting this dough because I wanted something that wouldn’t spread in the oven. There is nothing more frustrating than putting a perfect heart in and pulling out a blob. This recipe holds its shape perfectly, ensuring your decorated heart cookies look professional every single time.
- Kid Friendly Activity: My kids, Adams and Jana, spend hours at the kitchen island together. It is one of the few times they aren’t bickering over the remote. Sharing a bowl of royal icing sugar cookies keeps hands busy and hearts full.
- Texture Perfection: We use a secret ingredient, a touch of sour cream, to ensure the cookies remain tender. They have that slightly crisp edge with a soft, melt in your mouth center that pairs perfectly with a cup of coffee.
- Customizable Designs: From swirled heart sugar cookies to minimalist white icing with a single red dot, the possibilities are endless. You can find inspiration for your designs at SugarHero, where the decorating ideas are truly world class.
- Make Ahead Magic: You can bake the cookies days in advance and decorate when you have the energy. In a busy household like ours, flexibility is the key to maintaining sanity.
- Gift Worthy: These valentines day cookies make the best gifts for teachers, neighbors, or that special someone. A hand decorated cookie says I care much louder than a store bought card.
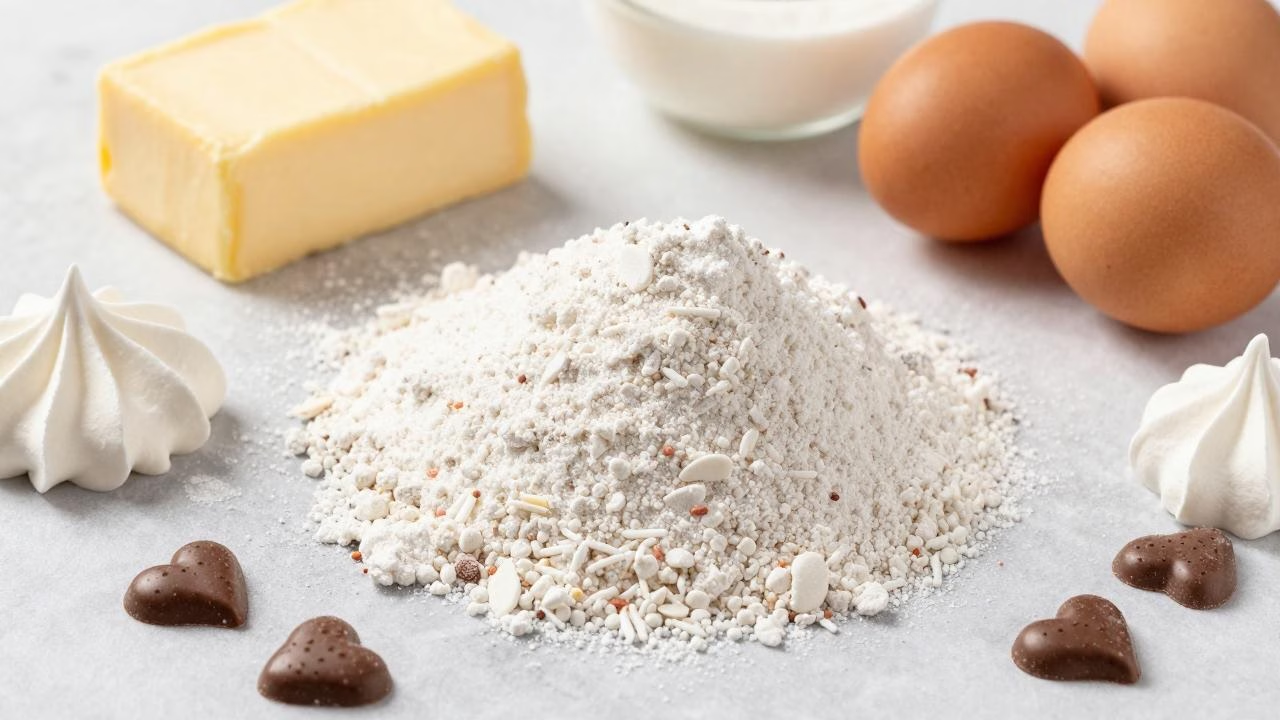
Ingredients for Valentines Decorated Sugar Cookies
The beauty of this easy valentines day heart sugar cookies recipe lies in the simplicity of the ingredients. You likely have most of these in your pantry right now. I always tell Emily that a well stocked pantry is the secret to a happy marriage.
- All Purpose Flour: This provides the structure. Sift it if you want an extra delicate crumb.
- Unsalted Butter: Ensure it is room temperature. If you use salted butter, simply omit the extra salt in the recipe.
- Granulated Sugar: For that classic sweetness we all crave.
- Egg: One large egg acts as the binder.
- Vanilla Extract: I prefer a high quality bean paste, but a good extract works wonders. For a floral twist, try almond extract or even lemon extract for vanilla substitutions.
- Sour Cream: This is my secret for a tender cookie. You can also use half and half if that is what you have on hand.
- Baking Powder: Just enough to give it a little lift without losing the shape.
- Meringue Powder: Essential for the royal icing techniques valentines cookies. It makes the icing safe to eat and allows it to dry hard for stacking.
- Powdered Sugar: The base of our sweet topping.
- Light Corn Syrup: This gives the icing a beautiful glossy sheen that looks stunning in photos.
- Gel Food Coloring: Use gels rather than liquids so you don’t thin out your icing consistency.
How to Make Valentines Decorated Sugar Cookies
Step-by-Step Instructions
Let’s get our hands dirty. This is the part where the kitchen starts to smell like a dream. Follow these steps for the perfect step by step valentines decorated sugar cookies experience.
- Cream the Butter and Sugar: In your stand mixer, beat the room temperature butter and granulated sugar until it is light and fluffy. This usually takes about three minutes. You want it to look like pale clouds. This is where you incorporate the air that gives the cookie its bite.
- Add Wet Ingredients: Mix in the egg, vanilla extract, and that secret dollop of sour cream. The smell at this stage is incredible. Jana always tries to sneak a taste of the vanilla, but I remind her we need it for the dough.
- Combine Dry Ingredients: In a separate bowl, whisk together the flour, baking powder, and salt. Gradually add this to the wet mixture on low speed. Stop as soon as the flour streaks disappear. Overworking the dough is the enemy of a tender cookie.
- Chill the Dough: This is non negotiable. Wrap the dough in plastic wrap and let it rest in the fridge for at least one hour. This prevents the valentine sugar cookies from spreading. While the dough chills, I usually clean up the mess with Adams. It is a good time for us to chat about his school day.
- Roll and Cut: On a lightly floured surface, roll the dough to about a quarter inch thickness. Use your favorite heart shapes. Pro tip, dip your cookie cutter in flour between every cut to ensure clean edges.
- Bake: Place them on a parchment lined sheet and bake at 350 degrees for about 8 to 10 minutes. You don’t want them to brown. They should look set and matte on top. Let them cool completely on a wire rack. A warm cookie will melt your beautiful sugar cookie decorating efforts.
- Prepare the Royal Icing: Whisk powdered sugar, meringue powder, water, and corn syrup until it reaches a thick, honey like consistency. Divide into bowls and add your gel colors. For royal icing sugar cookies, you want a thicker consistency for outlining and a thinner one for flooding.
- Decorate: Outline the edge of the heart first. Then, fill in the center with the thinner flood icing. Use a toothpick to pop any tiny bubbles. This is where you can practice those elegant rose cookie designs or simple swirled heart sugar cookies by dragging a toothpick through dots of a contrasting color.
Pro Tips & Variations
After making thousands of these over the years, I have learned a few tricks. If you want a step by step valentines decorated sugar cookies result that looks like it belongs in a magazine, listen close. First, always use unsalted butter. It allows you to control the salt content perfectly. If you only have salted, just skip the extra pinch in the dough.
For a different flavor profile, consider adding cream cheese for tenderness. It adds a lovely tang that cuts through the sweetness of the icing. If you are looking for a more adult version, a tiny bit of lemon extract in the icing provides a bright, citrusy finish that Emily absolutely loves. You can also find fantastic structural tips at The Baker Mama, who has mastered the art of the perfect cookie platter.
If you have dietary restrictions in the family, you can easily adapt this. For a gluten free version, use a high quality 1 to 1 baking flour blend. For a vegan twist, use vegan butter sticks and a flax egg, though the icing will require an aquafaba base instead of meringue powder. If you want to get fancy, try adding chocolate hearts or fancy sprinkles while the icing is still wet for added texture and sugar cookie decorating flair.
Valentines Decorated Sugar Cookies Serving Suggestions
Serving Valentines Decorated Sugar Cookies is an event in itself. In the Sharif household, we like to create a full experience. I often set out a Valentine’s Day sugar cookies spread on a large wooden board, surrounded by fresh strawberries and dark chocolate squares. The red of the berries really makes the pink icing pop.
These cookies are best enjoyed with a glass of cold milk for the kids or a steaming mug of Earl Grey tea for the adults. If you are hosting a party, consider a sugar cookie decorating station. Give each guest a few undecorated hearts and bowls of different colored icings. It is a fantastic way to get people talking and laughing. For a romantic evening, pair these cookies with a glass of sparkling rosé. The effervescence of the wine cleanses the palate between bites of sweet icing.
Valentines Decorated Sugar Cookies Storage & Reheating
Proper storage is the only way to keep your valentines day cookies fresh. Once the royal icing has dried completely, usually 6 to 12 hours, you can stack them between layers of parchment paper in an airtight container. They will stay fresh at room temperature for up to one week. Do not refrigerate decorated cookies, as the humidity can cause the colors to bleed and the icing to soften.
If you want to keep them longer, these cookies freeze beautifully. You can freeze the undecorated baked cookies for up to three months. When you are ready to eat, let them thaw at room temperature before starting your valentine cookie decorating tutorial. If you have already decorated them, you can still freeze them, but be very careful when thawing to avoid condensation on the icing. I usually just hide a small container in the back of the freezer so Emily and I can have a treat after the kids go to bed.
FAQ about Valentines Decorated Sugar Cookies
How do I get my icing to be perfectly smooth?
The secret to how to decorate valentines sugar cookies with royal icing is the consistency. If your icing is too thick, it won’t settle. If it is too thin, it will run off the edge. Aim for a 15 second consistency, which means when you drop a bit of icing back into the bowl, it takes 15 seconds to fully disappear into the surface.
Why did my cookies spread in the oven?
Usually, this happens if the butter was too soft or the dough wasn’t chilled long enough. Make sure your dough is cold to the touch before it hits the oven. Also, check that your baking powder hasn’t expired, as it affects the lift and spread of the heart shaped sugar cookies.
Can I use store bought icing?
While you can, it won’t dry hard like royal icing sugar cookies. Store bought frosting usually stays soft, which makes stacking and gifting very difficult. For the best decorated heart cookies, I highly recommend making the royal icing from scratch. It only takes a few minutes.
Final Thoughts
At the end of the day, these Valentines Decorated Sugar Cookies are just flour and sugar. But when you are standing in the kitchen with the people you love, laughing at a lopsided heart or sharing a secret over a mixing bowl, they become something much more. Cooking isn’t just about the food, it is about making people happy. Seeing the joy on Jana’s face when she finishes a design or seeing Adams actually take pride in his work is what it is all about. I am so grateful you invited me into your kitchen today. Please leave a comment below if you try these, and don’t forget to save this recipe on Pinterest for your next family baking day. Happy Valentine’s Day from my family to yours. Now, grab your apron and get baking!

Valentines Decorated Sugar Cookies
Ingredients
Equipment
Method
- In a stand mixer, beat room temperature unsalted butter and granulated sugar on medium speed until light and fluffy, about 3 minutes.
- Add the egg, vanilla extract, and sour cream. Mix until well combined, scraping down sides as needed.
- In a separate bowl, whisk together flour, baking powder, and salt. Add to wet mixture on low speed until just combined.
- Wrap dough in plastic and chill in refrigerator for at least 1 hour to prevent spreading.
- Preheat oven to 350°F. Roll chilled dough to 1/4-inch thickness on floured surface. Cut heart shapes.
- Place on parchment-lined sheet. Bake 8-10 minutes until set and matte. Cool on wire rack.
- Whisk powdered sugar, meringue powder, water, and corn syrup until thick and glossy, about 5 minutes.
- Divide into bowls, add gel coloring. Thin some with water for flooding (15-second consistency).
- Outline heart edges with thicker icing. Fill centers with thinner icing, using toothpick to pop bubbles.
- Create designs like swirled hearts by piping colored dots and dragging toothpick through wet icing. Let dry completely, 6-12 hours.


