Have you ever wondered if just two simple ingredients could unlock the secret to a truly magical dessert?
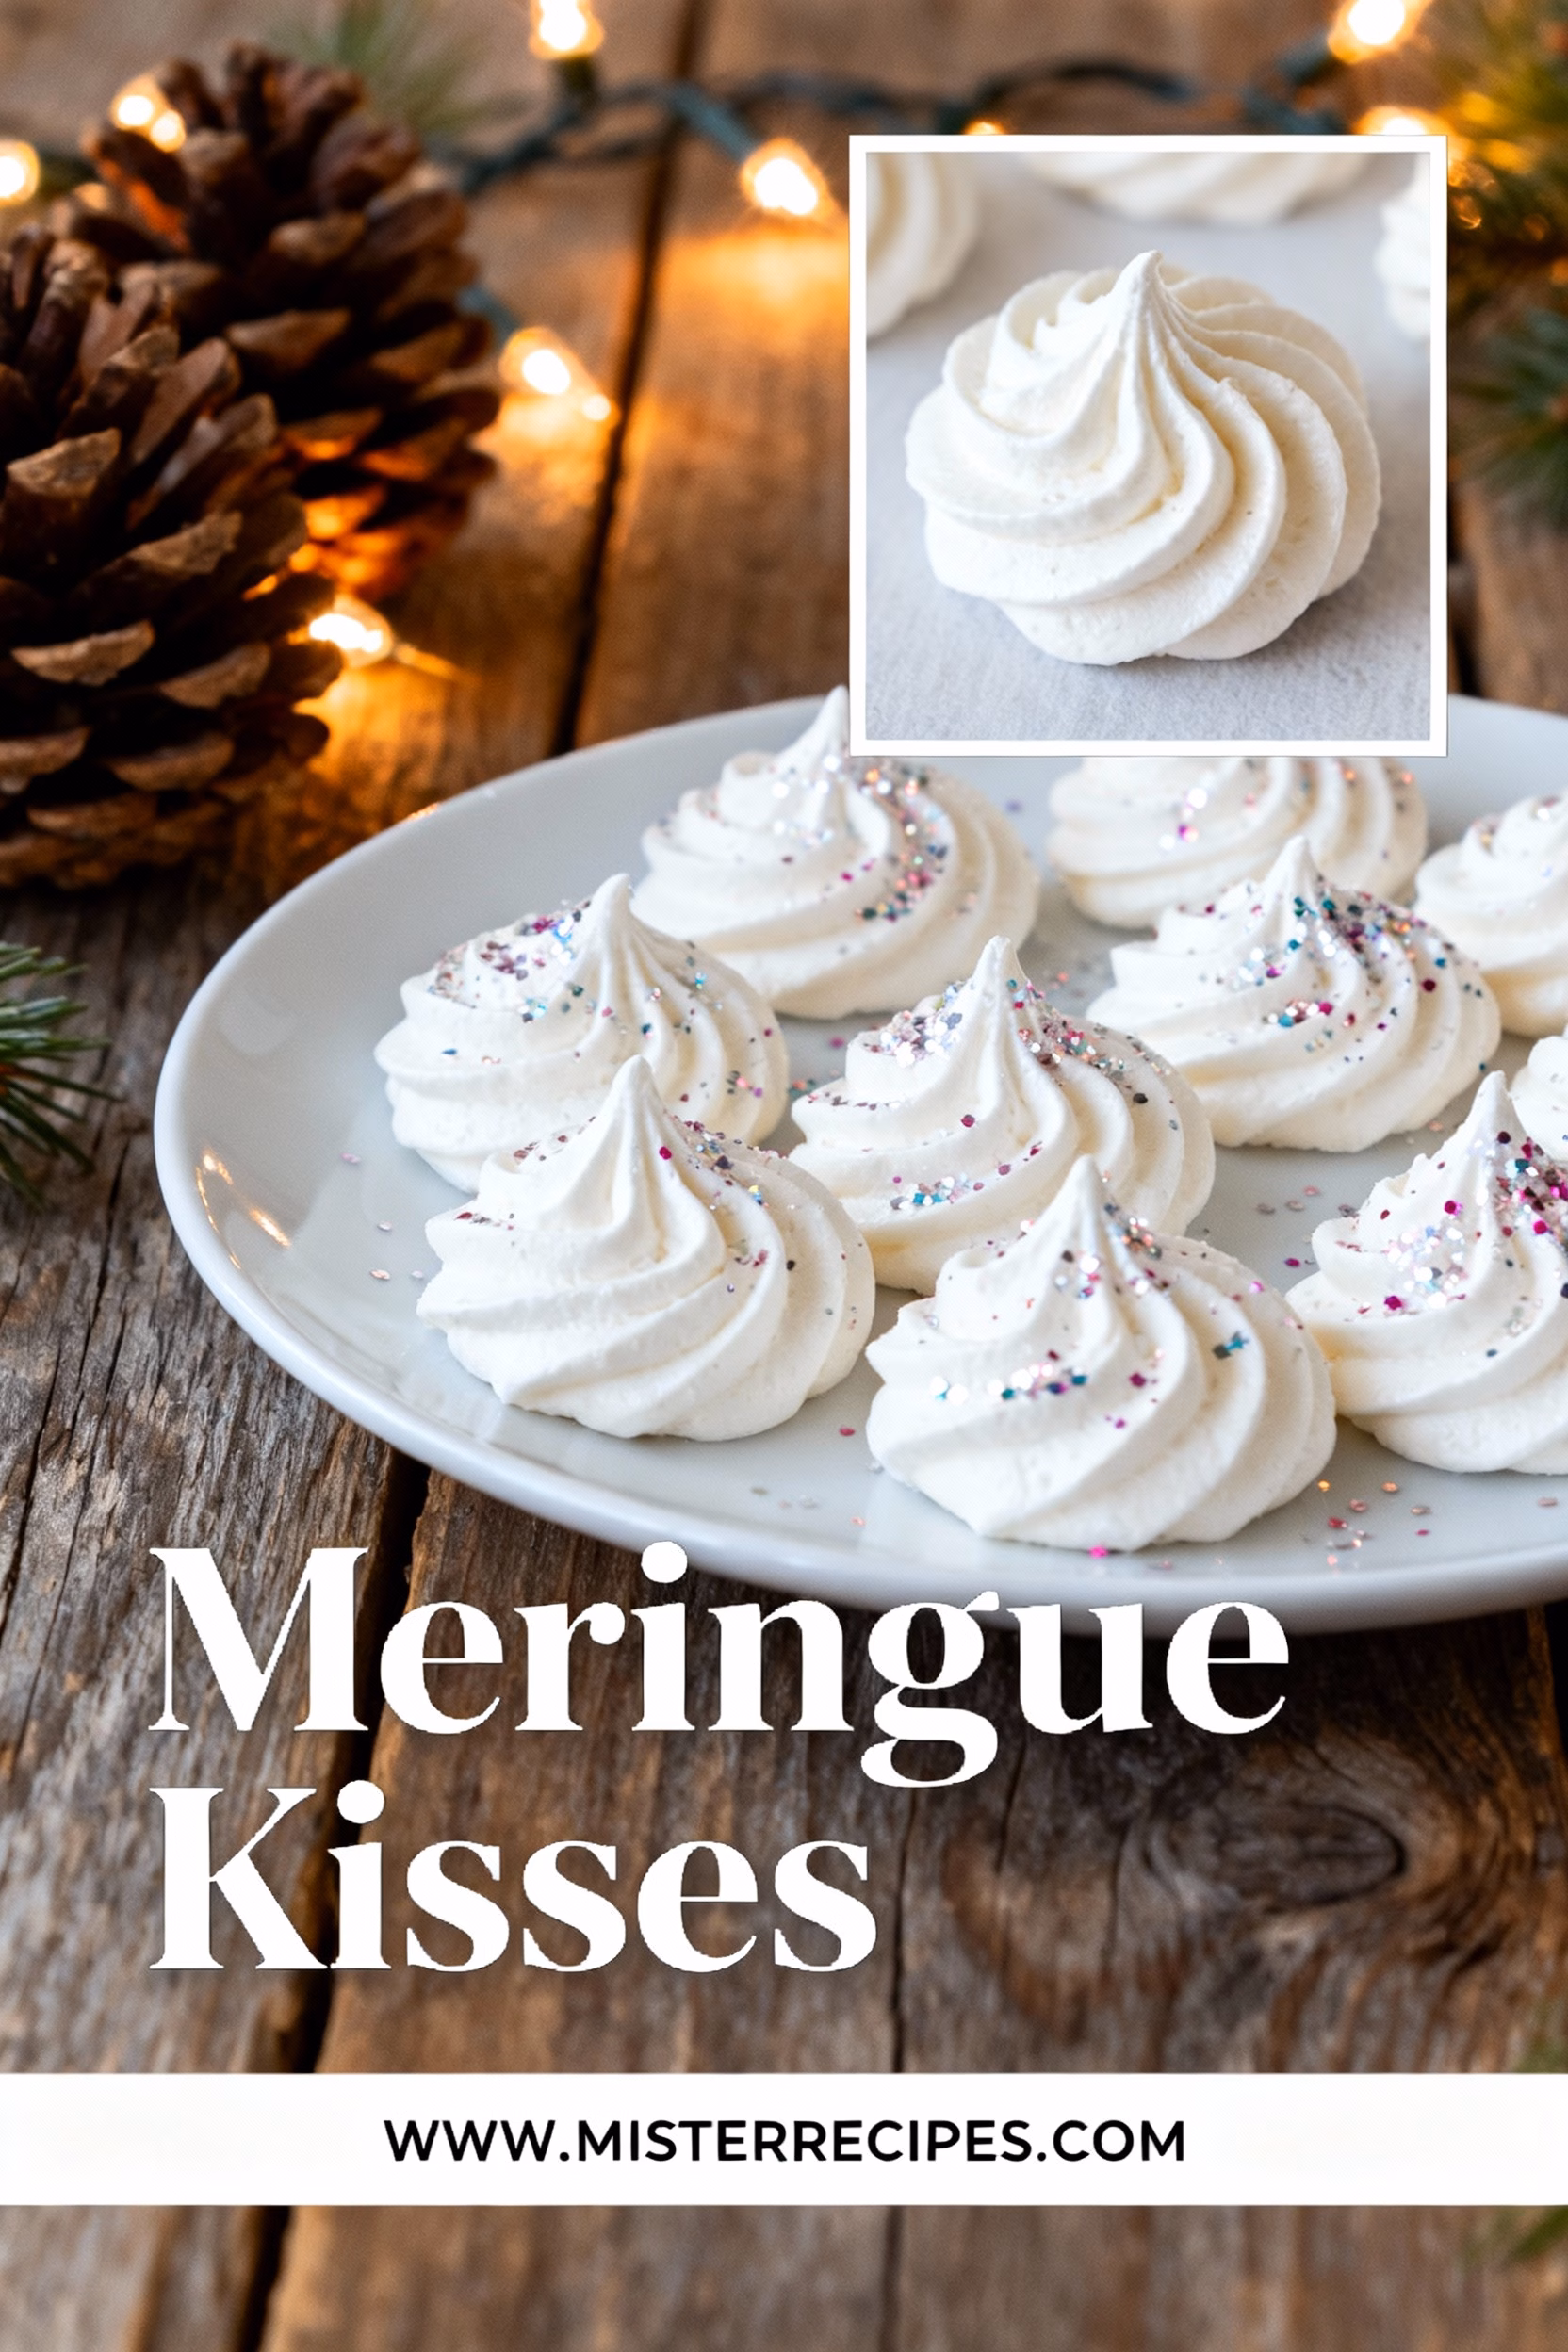
Hi there! I’m Benjamin, the voice behind Mister Recipes. I still remember the first time I saw pure magic in the kitchen. I wasn’t watching some famous chef on TV; I was standing beside my son, Adams, watching egg whites and sugar transform into a glossy, snow white mountain in our stand mixer. His eyes were wide with wonder, and he asked if we were making clouds. In a way, we were. We were making Meringue Kisses, those delightfully crisp, airy, and melt in your mouth treats that seem far more complicated than they truly are. It’s a recipe that feels special, a little bit fancy, yet it’s one of the most straightforward things you can make. It’s the kind of baking that brings the whole family together, a simple joy that I love to share. These little puffs of sweetness have become a staple in our home, especially around the holidays, proving that you don’t need a long list of ingredients to create wonderful kitchen memories.
Why You’ll Love This Meringue Kisses Recipe
These Meringue Kisses are more than just a simple sweet; they represent the kind of cooking I cherish most. It’s about creating something wonderful and impressive from the humblest of beginnings. It’s a recipe that’s perfect for getting the kids involved, for celebrating small moments, and for adding a touch of homemade elegance to any occasion. When my wife Emily and I first made these with the kids, Jana was so proud to pipe her own little stars onto the baking sheet. It’s these moments that turn simple recipes into cherished family traditions. This recipe is designed for everyone, from the novice baker to the seasoned home cook looking for a reliable classic. We’ve made these for everything from school bake sales to elegant toppings for a decadent chocolate avocado mousse, and they never fail to bring smiles. They are proof that the best things in life, and in baking, are often the simplest. You are going to fall in love with their simplicity and versatility.
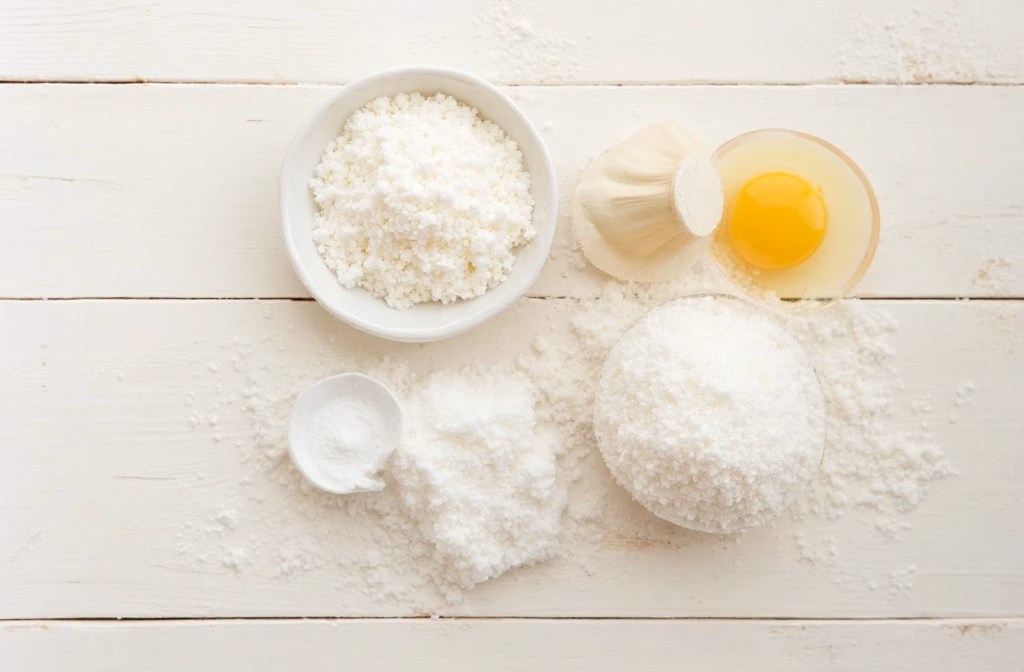
- Minimal Ingredients, Maximum Wow Factor. You only need two primary ingredients you likely already have: egg whites and sugar. It is amazing how these pantry staples can transform into such a stunning and delicious confection. This makes it an accessible recipe for a spontaneous baking session without a trip to the store.
- A Perfect Family Baking Project. The process is mesmerizing for all ages. Kids love watching the egg whites whip into a voluminous cloud and have a blast piping the shapes. It’s a low mess, high reward activity that gets everyone involved in the kitchen.
- Endlessly Customizable. This recipe is a perfect blank canvas. You can add vanilla, peppermint extract, or even a little cocoa powder. A touch of food coloring can transform them to match any party theme or holiday, from pastel Easter treats to festive Christmas goodies.
- Naturally Gluten Free and Fat Free. For those with dietary sensitivities, these Meringue Kisses are a dream. They are naturally gluten free and contain no fat, making them a light and airy dessert option that’s wonderfully inclusive.
- Incredibly Versatile. Enjoy them on their own as a light snack, crush them over ice cream or yogurt, use them to decorate cakes and cupcakes, or fold them into an Eton Mess with fresh berries and cream. My daughter Jana loves packing them in her lunchbox as a special treat.
Ingredients for Meringue Kisses
- Egg Whites: You’ll need 4 large egg whites. It’s best to use them at room temperature as they’ll whip up to a much greater volume, creating a lighter meringue. Make sure there is absolutely no trace of yolk.
- Granulated Sugar: 1 cup of granulated sugar provides the sweetness and, more importantly, the stable structure. Some recipes use caster sugar, but I find granulated works perfectly if you add it slowly.
- Cream of Tartar: 1/2 teaspoon helps stabilize the egg whites, making them less likely to collapse. If you don’t have it, a small amount of lemon juice or white vinegar can work in a pinch.
- Vanilla Extract: 1 teaspoon of pure vanilla extract for a classic, warm flavor. Feel free to substitute with other extracts like peppermint or almond for different variations.
- A Pinch of Salt: Just a small pinch enhances the flavor and balances the sweetness.
How to Make Meringue Kisses
Step by Step Instructions
Creating these beautiful Meringue Kisses is all about technique, not complexity. The magic happens when you give each step the attention it deserves. Before you begin, I always tell my kids this is where the kitchen science starts. We’re transforming liquids into solids with just air and a little patience. For an excellent overview of the science, the team at King Arthur Baking offers some great insights. Remember my grandmother’s advice: “Cooking isn’t just about food, Ben. It’s about making people happy.” And the process of making these is a happy one, so take your time and enjoy it. The key to perfect, crisp meringues is a slow, steady process. Rushing the whipping or the baking can lead to chewy or cracked results. Think of it as a gentle art. This detailed guide ensures you get it right the first time, every time, resulting in beautiful, delicious drops of baked perfection that will impress everyone.
- Preparation is Key: First, preheat your oven to a low 225°F (110°C). This low and slow baking method is what dries the meringues out, making them crisp rather than browned. Line two large baking sheets with parchment paper. Don’t grease the pans; the meringue needs to cling to the paper to rise properly.
- Start the Whipping Process: In the bowl of a stand mixer fitted with the whisk attachment, combine your room temperature egg whites, cream of tartar, and salt. Make sure your bowl and whisk are impeccably clean and free of any grease or oil, as even a tiny speck of fat can prevent the whites from whipping to their full volume. Begin mixing on a medium low speed until the whites become foamy and opaque.
- Add the Sugar Slowly: This is the most crucial step. With the mixer on medium speed, begin adding the granulated sugar one tablespoon at a time. Wait about 15 to 20 seconds between each addition. This slow process allows the sugar to dissolve completely into the egg whites, which is the secret to a stable, glossy meringue. If the sugar is added too quickly, the meringue can become gritty and may weep syrup while baking.
- Whip to Stiff Peaks: Once all the sugar has been added, increase the mixer speed to medium high. Continue to whip for about 5 to 7 minutes. You’re looking for a thick, glossy meringue that holds a stiff peak. To test this, stop the mixer and lift the whisk out of the meringue. The peak that forms should stand straight up without curling over. When you rub a little of the meringue between your fingers, it should feel smooth, not grainy. Now, gently fold in the vanilla extract.
- Pipe Your Kisses: Transfer the meringue to a large piping bag fitted with a star tip (like a Wilton 1M). This is the fun part that my kids, Adams and Jana, love to help with. Pipe small, 1 inch star shapes or “kisses” onto your prepared baking sheets, leaving about an inch between each one as they need air to circulate.
- Bake Low and Slow: Place the baking sheets in your preheated oven and bake for 45 to 60 minutes. The meringues should be firm to the touch and should lift easily off the parchment paper when done. They shouldn’t have much color; you want them to be pale and crisp.
- Cool and Dry Completely: Turn the oven off, crack the door open slightly, and leave the meringues inside to cool down completely with the oven. This can take another hour or two. This final step is vital as it helps prevent cracking and ensures a perfectly crisp texture all the way through.
Pro Tips & Variations
Over the years, I’ve made thousands of these little Meringue Kisses and have learned a few things that make the process foolproof. Cooking is a journey of discovery, and even simple recipes have nuances that can elevate them from good to great. One of my biggest influences has always been my father, who taught me the art of patience on the grill, a lesson that applies perfectly to the delicate process of making meringue. Just like you can’t rush a good barbecue, you can’t rush this. For more inspiration on technique and flavor, I often check out what the folks at Preppy Kitchen are whipping up. Here are some of my most trusted tips and fun variations to help you master this recipe and make it your own. These suggestions come from my own experience in a busy family kitchen, aiming to make your baking adventure as joyful and successful as possible.
- The Enemy of Meringue is Fat: I can’t stress this enough. Any trace of grease, oil, or egg yolk in your bowl, on your whisk, or in your egg whites will prevent them from reaching their full, airy potential. I always wipe my bowl and whisk with a little white vinegar before I start, just to be sure they’re perfectly clean.
- Weather Matters: Meringue is famously sensitive to humidity. Sugar is hygroscopic, meaning it attracts moisture from the air. On humid or rainy days, your meringues may absorb moisture, making them sticky or chewy. Try to bake them on a dry day for the best, crispiest results. If you must bake on a humid day, you may need to increase the drying time in the oven.
- Don’t Overwhip: While you want stiff, glossy peaks, it is possible to take it too far. If you overwhip the meringue after it has reached the stiff peak stage, it can become grainy and start to break down, losing its volume. Keep a close eye on it during the final minutes of whipping.
- Fun with Flavors: This is where you can get creative. Swap the vanilla for 1/2 teaspoon of peppermint extract and add a swirl of red food coloring for festive Christmas Meringue Kisses. You could also fold in 2 tablespoons of unsweetened cocoa powder along with the final additions of sugar for a chocolate version, or a teaspoon of instant espresso powder for a coffee flavored treat.
- Add Some Texture: For a delightful twist, consider gently folding in some mini chocolate chips, finely chopped nuts, or colorful sprinkles after the meringue has reached stiff peaks. Do this very gently with a spatula to avoid deflating the meringue. Our family favorite is adding finely crushed peppermint candies for a holiday crunch.
Serving Suggestions
One of the best things about Meringue Kisses is how versatile they are. They are a wonderful standalone treat, perfect for packaging in little bags as gifts or simply setting out on a platter for guests to enjoy. In our house, they rarely last long once they’re cool! But a simple meringue can also be the starting point for a truly spectacular dessert. It’s all about connection, and pairing these cookies with other flavors is a way to create a new experience. Think about contrast in texture and taste. The crisp, light sweetness of the meringue is a perfect counterpoint to rich, creamy, or tart elements. I love seeing what combinations my wife, Emily, comes up with when we’re entertaining. Here are a few of our favorite ways to serve them, turning these simple cookies into the star of a more complex and satisfying dessert that will have everyone talking.
- With Hot Chocolate: There is nothing better on a cold evening. Instead of marshmallows, float a few Meringue Kisses on top of a rich, homemade hot chocolate. They slowly soften and melt, adding a wonderful sweetness. It’s a pairing that feels incredibly indulgent and comforting, and it’s a huge hit with my kids.
- As a Cake Decoration: Use them to create a dramatic and beautiful border around a layer cake. The architectural shapes add instant elegance. They look particularly stunning on a rich chocolate cake or a lemon tart, providing both a visual and textural contrast. We often use them for birthday cakes in our family.
- Eton Mess: This classic British dessert is a fantastic, no fuss way to use your meringues. Gently crush some Meringue Kisses and fold them together with freshly whipped cream and a mix of fresh berries, like strawberries and raspberries. It’s a gloriously messy and delicious dessert that’s perfect for summer.
- With Ice Cream or Sorbet: Crumble a few Meringue Kisses over a scoop of your favorite ice cream or a tart fruit sorbet. It adds a delightful crunch that a simple sprinkle can’t match. A scoop of raspberry sorbet with crumbled meringues is a simple yet sophisticated dessert. It’s one of my favorite easy dessert recipes.
Storage & Reheating for Meringue Kisses
Storing Meringue Kisses correctly is crucial to keeping them crisp and delicious. As I mentioned, their main enemy is moisture, which will turn them soft and chewy in no time. Think of them as delicate little sugar sculptures that need protection from the elements. The good news is that when stored properly, they have a surprisingly long shelf life. You can absolutely make them ahead of an event, which is a lifesaver when planning for the holidays or a party.
To store, allow the meringues to cool completely. Never store them while they are still warm, as the steam they release will get trapped in the container and soften them. Once completely cool, place them in a truly airtight container. A cookie tin with a tight lid or a glass jar with a good seal works best. Store them at room temperature in a dry place, like a pantry, for up to two weeks. Avoid storing them in the refrigerator, as the environment is too humid.
Freezing is also an excellent option for longer term storage. Arrange the Meringue Kisses in a single layer in a freezer safe airtight container, placing parchment paper between layers to prevent them from sticking. They will keep beautifully in the freezer for up to three months. When you’re ready to enjoy them, simply take them out of the container and let them thaw at room temperature for an hour or so. They thaw very quickly and should be just as crisp as the day you made them.
Meringues are not meant to be reheated. The warmth would cause the sugar to melt and would ruin their delicate texture. If your meringues have become slightly soft due to humidity, you can sometimes crisp them back up. Place them on a parchment lined baking sheet in a 200°F (95°C) oven for 10 to 15 minutes, then let them cool completely again. This will help dry them out and restore some of their crunch.
FAQ about Meringue Kisses
I get a lot of questions about making meringues, and I love answering them because it helps demystify the process. Remember, I believe anyone can cook, and that includes mastering these elegant treats. Here are some of the most common questions I hear, with answers to help you on your baking journey.
Why are my Meringue Kisses chewy inside?
A chewy center is usually a sign of underbaking. Meringues are not so much baked as they are dried out. If the oven temperature is too high, the outside will brown before the inside has a chance to dry completely. A low and slow oven is your best friend. Also, letting them cool completely in the turned off oven is a key step to ensure a crisp, dry interior.
Can I make Meringue Kisses on a rainy day?
You can, but it’s a challenge. Meringue is very susceptible to humidity. Sugar attracts water from the air, which can make your meringue sticky and prevent it from crisping up. If you must bake on a humid day, make sure your kitchen is as dry as possible (avoid running the dishwasher or boiling water) and you might need to bake them a little longer. Storing them in a truly airtight container immediately after cooling is also essential.
Why did my Meringue Kisses crack?
Cracking is often caused by a sudden change in temperature. This can happen if the oven is too hot, or if they are taken out of a warm oven and exposed to cool air too quickly. This is why the method of turning off the oven and letting them cool down slowly inside is so effective. It allows for a gentle, gradual temperature change.
Can I reduce the amount of sugar in the recipe?
I would not recommend reducing the sugar significantly. The sugar does more than just add sweetness; it’s a critical structural component that stabilizes the egg whites. Without enough sugar, your meringue will be weak, less voluminous, and more likely to weep or collapse while baking. The ratio of sugar to egg white is important for perfect baking results.
Final Thoughts on Meringue Kisses
There you have it, the simple art of making perfect Meringue Kisses right in your own kitchen. It’s a recipe that’s close to my heart, a symbol of how the simplest ingredients can create the most joy and connection. From my family to yours, I hope this recipe brings as many smiles to your home as it does to mine. Every time I see these little white swirls, I think of my grandmother’s words, “Cooking is about making people happy.” These little cookies are pure happiness.
If you loved making these, I would be so grateful if you would leave a comment and a star rating below. I read every single one! And don’t forget to save this recipe to your favorite Pinterest board so you can always find it. For more family friendly recipes and kitchen stories, be sure to subscribe to my newsletter. Let’s get cooking!
Meringue Kisses
Ingredients
Equipment
Method
- Preheat your oven to 225°F (110°C). Line two large baking sheets with parchment paper. Do not grease the pans.
- In a stand mixer with whisk attachment, combine room temperature egg whites, cream of tartar, and salt. Mix on low speed until foamy.
- With the mixer on medium speed, add granulated sugar one tablespoon at a time, waiting 15-20 seconds between additions.
- Whip on medium-high speed for 5-7 minutes or until stiff, glossy peaks form. Test by lifting the whisk; the peak should stand straight up.
- Gently fold in vanilla extract.
- Transfer meringue into a piping bag fitted with a star tip. Pipe small 1-inch kisses onto the prepared baking sheets.
- Bake for 45-60 minutes until firm to touch and lift easily from parchment paper.
- Turn off oven and crack door slightly. Leave meringues inside to cool completely for about an hour or two.