Introduction
Have you noticed how every October, interest in no-bake treats surges across social feeds and search trends yet so many hosts still feel pressured to bake from scratch for their parties? If you’re craving something that’s big on flavor and presentation but small on effort and mess, you’re going to love Oreo Cookie Balls. This is the kind of recipe that turns a bag of cookies, a block of cream cheese, and some melted chocolate into party-ready, bite-size truffles no oven required.
Think of these as foolproof, crowd-pleasing “truffle dupes” you can make in under an hour, even if you don’t consider yourself a baker. They’re indulgent without being fussy, budget-friendly, and endlessly customizable for any holiday. For October gatherings, you can decorate them with orange drizzle, candy eyes, and dark chocolate coatings to fit right in with your spooky spread. The texture lands right between fudgy and creamy, and every bite tastes like the best part of cookies-and cream ice cream wrapped in a chocolate shell.
Hosting a school party, need a last-minute dessert for a potluck, or just want a weekend treat with the kids? Oreo Cookie Balls have your back. They’re easy for beginners, fun for kids to help decorate, and impressive enough for adult palates. Add a platter of these to your snack table next to a few on-theme bites like Halloween Food Recipes or other simple ideas, and your dessert situation is instantly solved.
This recipe is unique because it’s both flexible and reliable: swap flavors of sandwich cookies, adjust the sweetness, try different coatings, or dress them up to match any theme. And because they’re no-bake, you skip the stress of timing, ovens, or complicated steps. Whether you’re planning a cozy fall movie night or prepping a full table of spooky bites, Oreo Cookie Balls are the low-lift, high-reward treat you’ll make on repeat.
Why You’ll Love This Oreo Cookie Balls
When I say these are the easiest party treats ever, I mean it. You only need a few pantry staples, and the method is so straightforward that kids can help with most steps. Even better, they hold beautifully in the fridge, so you can make them the day before and simply plate them when guests arrive.
- No-bake simplicity: No oven, no thermometer, no stress. A food processor or a zip-top bag and rolling pin is all you need to crush the cookies.
- 30-minute assembly: The hands-on time is minimal, and setting happens in the fridge—ideal when you’re juggling other dishes.
- Customizable for any theme: Switch the chocolate, drizzle colors, and sprinkles. Add candy eyes to turn them into mini monsters for Spooky Snacks .
- Kid-approved, adult-adored: The nostalgic Oreo flavor wins with everyone. Great for bake sales, potlucks, and office treats.
- Budget-friendly: A single pack of cookies, cream cheese, and a bag of melting wafers gets you about 24–30 truffles.
- Scalable and make-ahead: Double or triple the recipe. Chill overnight and decorate the day of serving.
Looking for easy add-ons for your snack table? Pair these with simple themed bites like Halloween Candy inspired desserts, or keep the table balanced with savory picks that fit your party vibe. If you’re building a themed menu, try a few “showpiece” recipes from your list of Halloween Themed Food and fill the gaps with these truffle-like cookies. For cozy nights in, they also double as fantastic Fall Snacks alongside hot cocoa or a caramel apple mocktail.
Hosting a class party or neighborhood get-together? These bites are perfect for grab-and-go tables, especially when you want to minimize cutting or utensils. Stack them on tiered stands, tuck them into mini cupcake liners, or create a DIY decorating station to let guests add drizzle and sprinkles themselves. If you’re curating a spread of Halloween Food Ideas For Parties , these no-bake truffles bring color, texture, and fun without dominating your prep time.
Ingredients for Oreo Cookie Balls
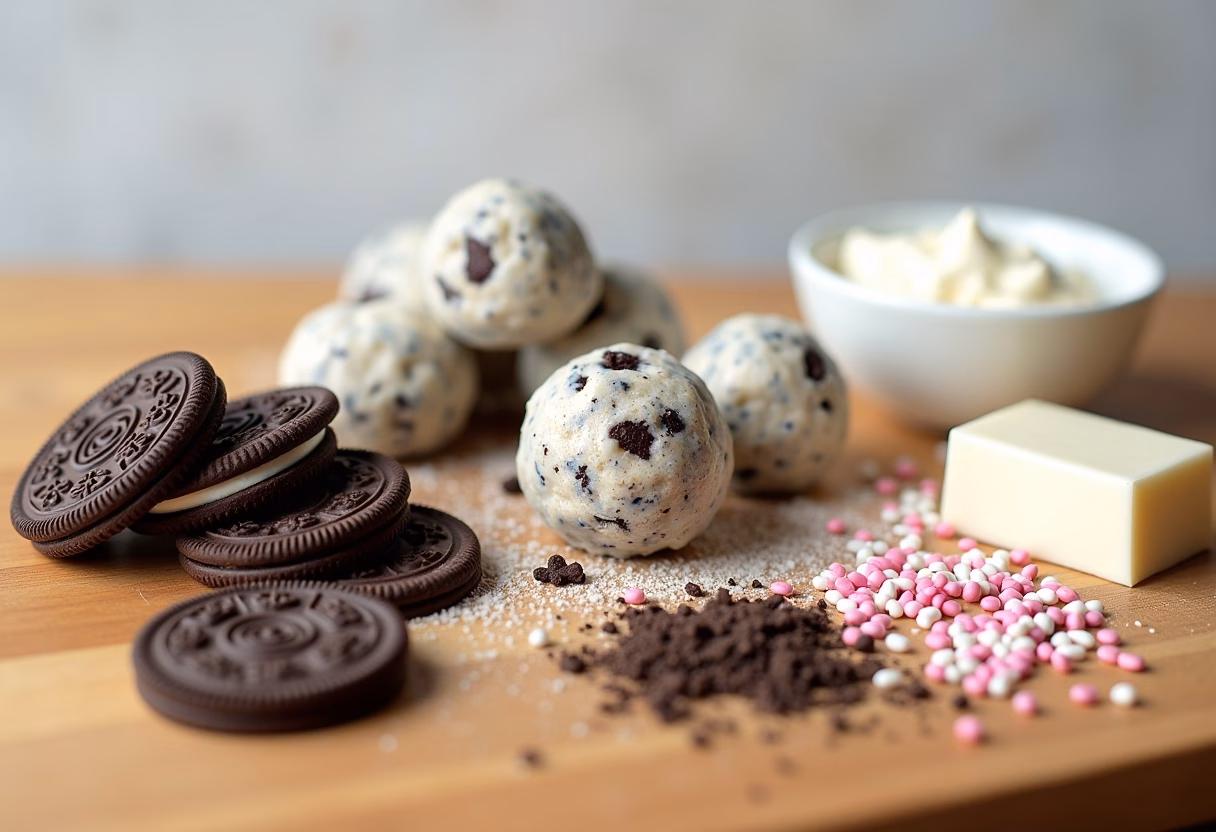
– 36 Oreo cookies (regular, not Double Stuf), plus 2–3 extra for garnish crumbs
– 8 oz (226 g) cream cheese, softened to room temperature
– 12 oz (340 g) chocolate or candy melts for coating (semi-sweet, dark, or white)
– 1–2 tsp neutral oil or coconut oil (optional, for smoother coating)
– Decorations: candy eyes, orange/black sprinkles, colored candy melts for drizzle (optional)
– Pinch of salt (optional, enhances flavor)
Substitutions:
- Gluten-free: Use gluten-free chocolate sandwich cookies.
- Dairy-free/vegan: Use dairy-free cream cheese and vegan chocolate.
- Flavor swaps: Try flavored Oreos (pumpkin spice, birthday cake, peppermint) for seasonal twists.
- Lower sweetness: Use dark chocolate coating or reduce drizzle/sprinkles.
- Add-ins: Mix in 2–3 tbsp peanut butter, cookie butter, or finely chopped nuts for variation.
How to Make Oreo Cookie Balls
Step-by-Step Instructions
- Prep your station
- Line a baking sheet with parchment paper or a silicone mat. Clear space in the fridge or freezer. Set cream cheese out to soften—it should feel cool but pliable when pressed.
- Crush the cookies
- Food processor method: Add 36 Oreos and pulse to fine crumbs (no big chunks). Reserve 2–3 tablespoons for garnish if you like.
- Bag-and-roll method: Place cookies in a heavy zip-top bag. Crush with a rolling pin until sandy and uniform. Work in batches if needed.
- Mix the filling
- In a large bowl, combine Oreo crumbs and cream cheese. Add a tiny pinch of salt to balance sweetness (optional).
- Use a spatula or clean hands to mix until no streaks remain. The texture should resemble thick, fudgy dough that holds together when squeezed.
- Chill briefly
- Cover and chill the mixture for 10–15 minutes. This makes scooping cleaner and helps the balls hold their shape.
- Scoop and shape
- Use a 1–1.5 tablespoon scoop to portion the mixture onto your lined tray. You should get about 24–30 balls.
- Roll each portion between your palms until smooth and round. Slightly flatten bottoms if you want them to sit neatly on a platter.
- Firm up
- Freeze the tray for 15–20 minutes (or refrigerate 30–40 minutes). You want them cold and firm, not rock solid. This prevents cracking when coated.
- Melt the coating
- Microwave method: Add chocolate or candy melts to a microwave-safe bowl. Heat for 30 seconds, stir, then 15-second bursts until smooth. Stir in 1–2 tsp neutral oil if needed for fluidity.
- Double boiler method: Set a heatproof bowl over a pot with 1 inch of simmering water. Stir chocolate until melted and glossy. Keep heat low.
- Dip like a pro
- Drop one chilled ball into the melted coating. Use a fork to lift it out. Tap the fork gently against the bowl to remove excess chocolate. Scrape the bottom of the fork on the bowl’s edge.
- Slide the coated ball onto the lined tray using a toothpick or another fork.
- Decorate
- While still wet, add sprinkles, crushed Oreos, or candy eyes. For colored drizzle, melt a small amount of orange or white candy melts and zig-zag over the top with a spoon or piping bag.
- Set and serve
- Refrigerate for 20–30 minutes until the shell is firm. Transfer to mini cupcake liners for a clean look. Serve chilled or slightly cool.
- Make them spooky
- For “mummy” balls: Coat in white chocolate, then add two candy eyes and crisscross white drizzle for bandages.
- For “pumpkin patch” balls: Use orange melts and add green stems with a dot of green candy melts. These pair beautifully with other Easy Halloween Food ideas on your table.
- Clean-up notes
- If chocolate thickens, rewarm in 10–15 second intervals and stir until smooth.
- Work in batches to keep balls cold while dipping the rest. Cold centers = smoother coatings.
Pro Tips & Variations
Practical tips:
– Control the crumb: Finer crumbs make a smoother truffle. Any large chunks can cause craters in your coating.
– Keep it cool: Chilling the dough before scooping and again before dipping is key to avoiding cracks and “slips” in the chocolate shell.
– Don’t overheat chocolate: Short bursts in the microwave with plenty of stirring keeps your coating silky. Overheating causes seizing and dull finishes.
– Add a touch of oil: A teaspoon or two of neutral oil thins thick melts and helps you achieve a professional, glossy shell.
– Portion consistency: A small cookie scoop ensures even sizes, which set uniformly and look great on platters.
Flavor variations:
- Double chocolate dream: Use dark chocolate Oreos and dip in dark or milk chocolate. Finish with cocoa nibs or flaky sea salt.
- Cookies and mint: Use mint Oreos; coat in dark chocolate; garnish with crushed mint candies.
- Pumpkin patch: Use pumpkin spice Oreos (when available), orange coating, and green “stems” for a seasonal look.
- Peppermint stick: For winter, use peppermint Oreos, white chocolate coating, and crushed candy canes.
Dietary variations:
- Gluten-free: Choose certified GF chocolate sandwich cookies. Check coatings for gluten-free labeling.
- Dairy-free/vegan: Use plant-based cream cheese and dairy-free chocolate melts. Chill longer so vegan coatings set firmly.
- Lower sugar: Choose dark chocolate 70%+, skip extra drizzle, and dust with Dutch cocoa or finely chopped nuts instead of sprinkles.
- Nutty crunch: Stir in 2–3 tablespoons of finely chopped roasted almonds or peanuts into the base mixture for texture.
Themed decorations for Spooky season:
- Spiders and webs: White-coated balls with black or dark chocolate spiderweb drizzles. Serve alongside a platter of on-theme bites from your favorite Halloween Themed Food .
- Ghoul eyes: Add candy eyes and a streak of red gel for a fun fright-night finish to complement your lineup of Halloween Dinner Ideas .
Serving Suggestions
Plate these bites in mini cupcake liners for a bakery-style look, or pile them high on a tiered dessert stand. A mix of chocolate coatings—dark, white, and orange—creates instant visual variety. Try one or two of these pairing ideas:
- Sweet-and-salty board: Arrange Oreo Cookie Balls with pretzels, apple slices, and caramel dip for contrast. Add a small bowl of roasted seeds or nuts for crunch.
- Spooky dessert sampler: Include a few decorated truffles with candy eyes next to themed treats like Halloween Finger Foods and colorful mocktails for maximum whimsy.
- After-dinner finisher: Serve these alongside coffee or hot cocoa for grown-ups after a cozy bowl of chili or a themed entrée. For party planners curating Halloween Food Ideas For Parties , a tray of truffles rounds out the menu without extra prep.
- Savory contrast: Pair with a big salad and warm, comforting mains from your list of Halloween Dinner Ideas to balance the dessert table.
- Spooky party platter: Set Oreo Cookie Balls among other Halloween Themed Food for a shareable buffet. Consider including a truly theatrical main like a Spooky Dinner centerpiece to keep the theme cohesive.
If you’re planning a family-friendly spread of Spooky Snacks and sweets that feel like Easy Halloween Food , these no-bake truffles are the perfect finishing touch minimal work, maximum delight.
Storage & Reheating
– Fridge: Store Oreo Cookie Balls in an airtight container for up to 1 week. Separate layers with parchment to protect the coating. They’re best served chilled or slightly cool.
– Freezer: Freeze undecorated or decorated balls for up to 2 months. Freeze on a tray until firm, then transfer to a freezer-safe bag or container. Thaw in the fridge overnight to retain texture and prevent condensation.
– Make-ahead: You can prepare the filling up to 2 days ahead and store it tightly covered in the fridge. Scoop, dip, and decorate on the day of serving.
– Reheating? Not needed: These are served chilled. If the chocolate coating blooms or dulls in the fridge, a fresh drizzle or dusting of crumbs can refresh the look.
FAQ about Oreo Cookie Balls
Q: Can I make Oreo Cookie Balls without a food processor?
A: Yes. Place cookies in a zip-top bag and crush with a rolling pin until fine and sandy. Work slowly and press out any larger pieces for a smooth finish.
Q: Why is my chocolate coating thick or streaky?
A: It may be overheated or too cool. Rewarm in 10–15 second bursts, stirring often. Add 1–2 teaspoons neutral oil to thin. Keep your balls cold and your coating warm for a glossy shell.
Q: Are these safe to sit out at a party?
A: Because of cream cheese, keep them chilled until serving and limit time at room temperature to about 2 hours. For longer events, set out in small batches and refresh from the fridge.
Q: Can I make them gluten-free or dairy-free?
A: Absolutely. Use gluten-free sandwich cookies and check that your chocolate is GF. For dairy-free, choose plant-based cream cheese and vegan chocolate. Chill longer so the coating sets firmly.
Q: How do I theme these for a party?
A: Use colored candy melts, candy eyes, and on-theme sprinkles. Combine with other fun ideas like Halloween Food Recipes and simple treats for a cohesive look.
Final Thoughts on Oreo Cookie Balls
If you love big flavor with minimal effort, Oreo Cookie Balls are your new party MVP. They’re creamy, dunkable, and endlessly customizable perfect for weeknight treats, potlucks, and holiday spreads alike. In a season filled with costumes, crafts, and packed calendars, it’s liberating to have a dessert that feels special without demanding your entire afternoon.
Pin this recipe for later so it’s ready for your next event. If you try it, I’d love to hear how you decorated yours did you go classic chocolate, bright orange drizzles, or candy-eyed monsters? Drop a comment with your twist, and don’t forget to subscribe for more time-saving ideas, from themed bites to smart make-ahead desserts.
And if you’re building a complete party menu, add a few savory anchors and a couple of show-stopper themed dishes. Blend these no-bake truffles with a handful of Easy Halloween Food picks, sprinkle in some fun Spooky Snacks , and you’ve got an effortless, eye-catching spread. For a finale, serve them after a comforting main from your list of Halloween Dinner Ideas or keep things snackable with festive Halloween Finger Foods . However you serve them, Oreo Cookie Balls deliver the sweet spot of easy, fun, and delicious every time.

Oreo Cookie Balls
Ingredients
Equipment
Method
- Line a baking sheet with parchment paper or a silicone mat. Clear space in the fridge or freezer. Set cream cheese out to soften.
- Crush the cookies using a food processor or placing them in a zip-top bag and crushing with a rolling pin until fine crumbs form. Reserve some crumbs for garnish.
- In a large bowl, combine Oreo crumbs, softened cream cheese, and a pinch of salt if desired. Mix until dough is uniform and fudgy.
- Cover and chill the mixture for 10–15 minutes to firm it up.
- Portion the mixture with a 1–1.5 tablespoon scoop, roll into balls, and slightly flatten bottoms if preferred. Place on lined tray.
- Freeze for 15–20 minutes or refrigerate for 30–40 minutes until firm but not rock solid.
- Melt chocolate or candy melts using a microwave in short bursts or a double boiler. Stir in oil if needed for smoothness.
- Dip each chilled ball into melted coating, remove excess chocolate by tapping the fork, and place back on the lined tray.
- While coating is still wet, decorate with sprinkles, crushed Oreos, or candy eyes. Add colored drizzle as desired.
- Refrigerate for 20–30 minutes until shell is firm. Transfer to mini cupcake liners and serve chilled or slightly cool.
- Optional spooky themes: coat in white chocolate with candy eyes for ‘mummy’ balls, or orange coating with green ‘stems’ for ‘pumpkin patch’ balls.
- Rewarm thickened chocolate in short bursts if needed, and work in batches to keep balls cold while dipping.