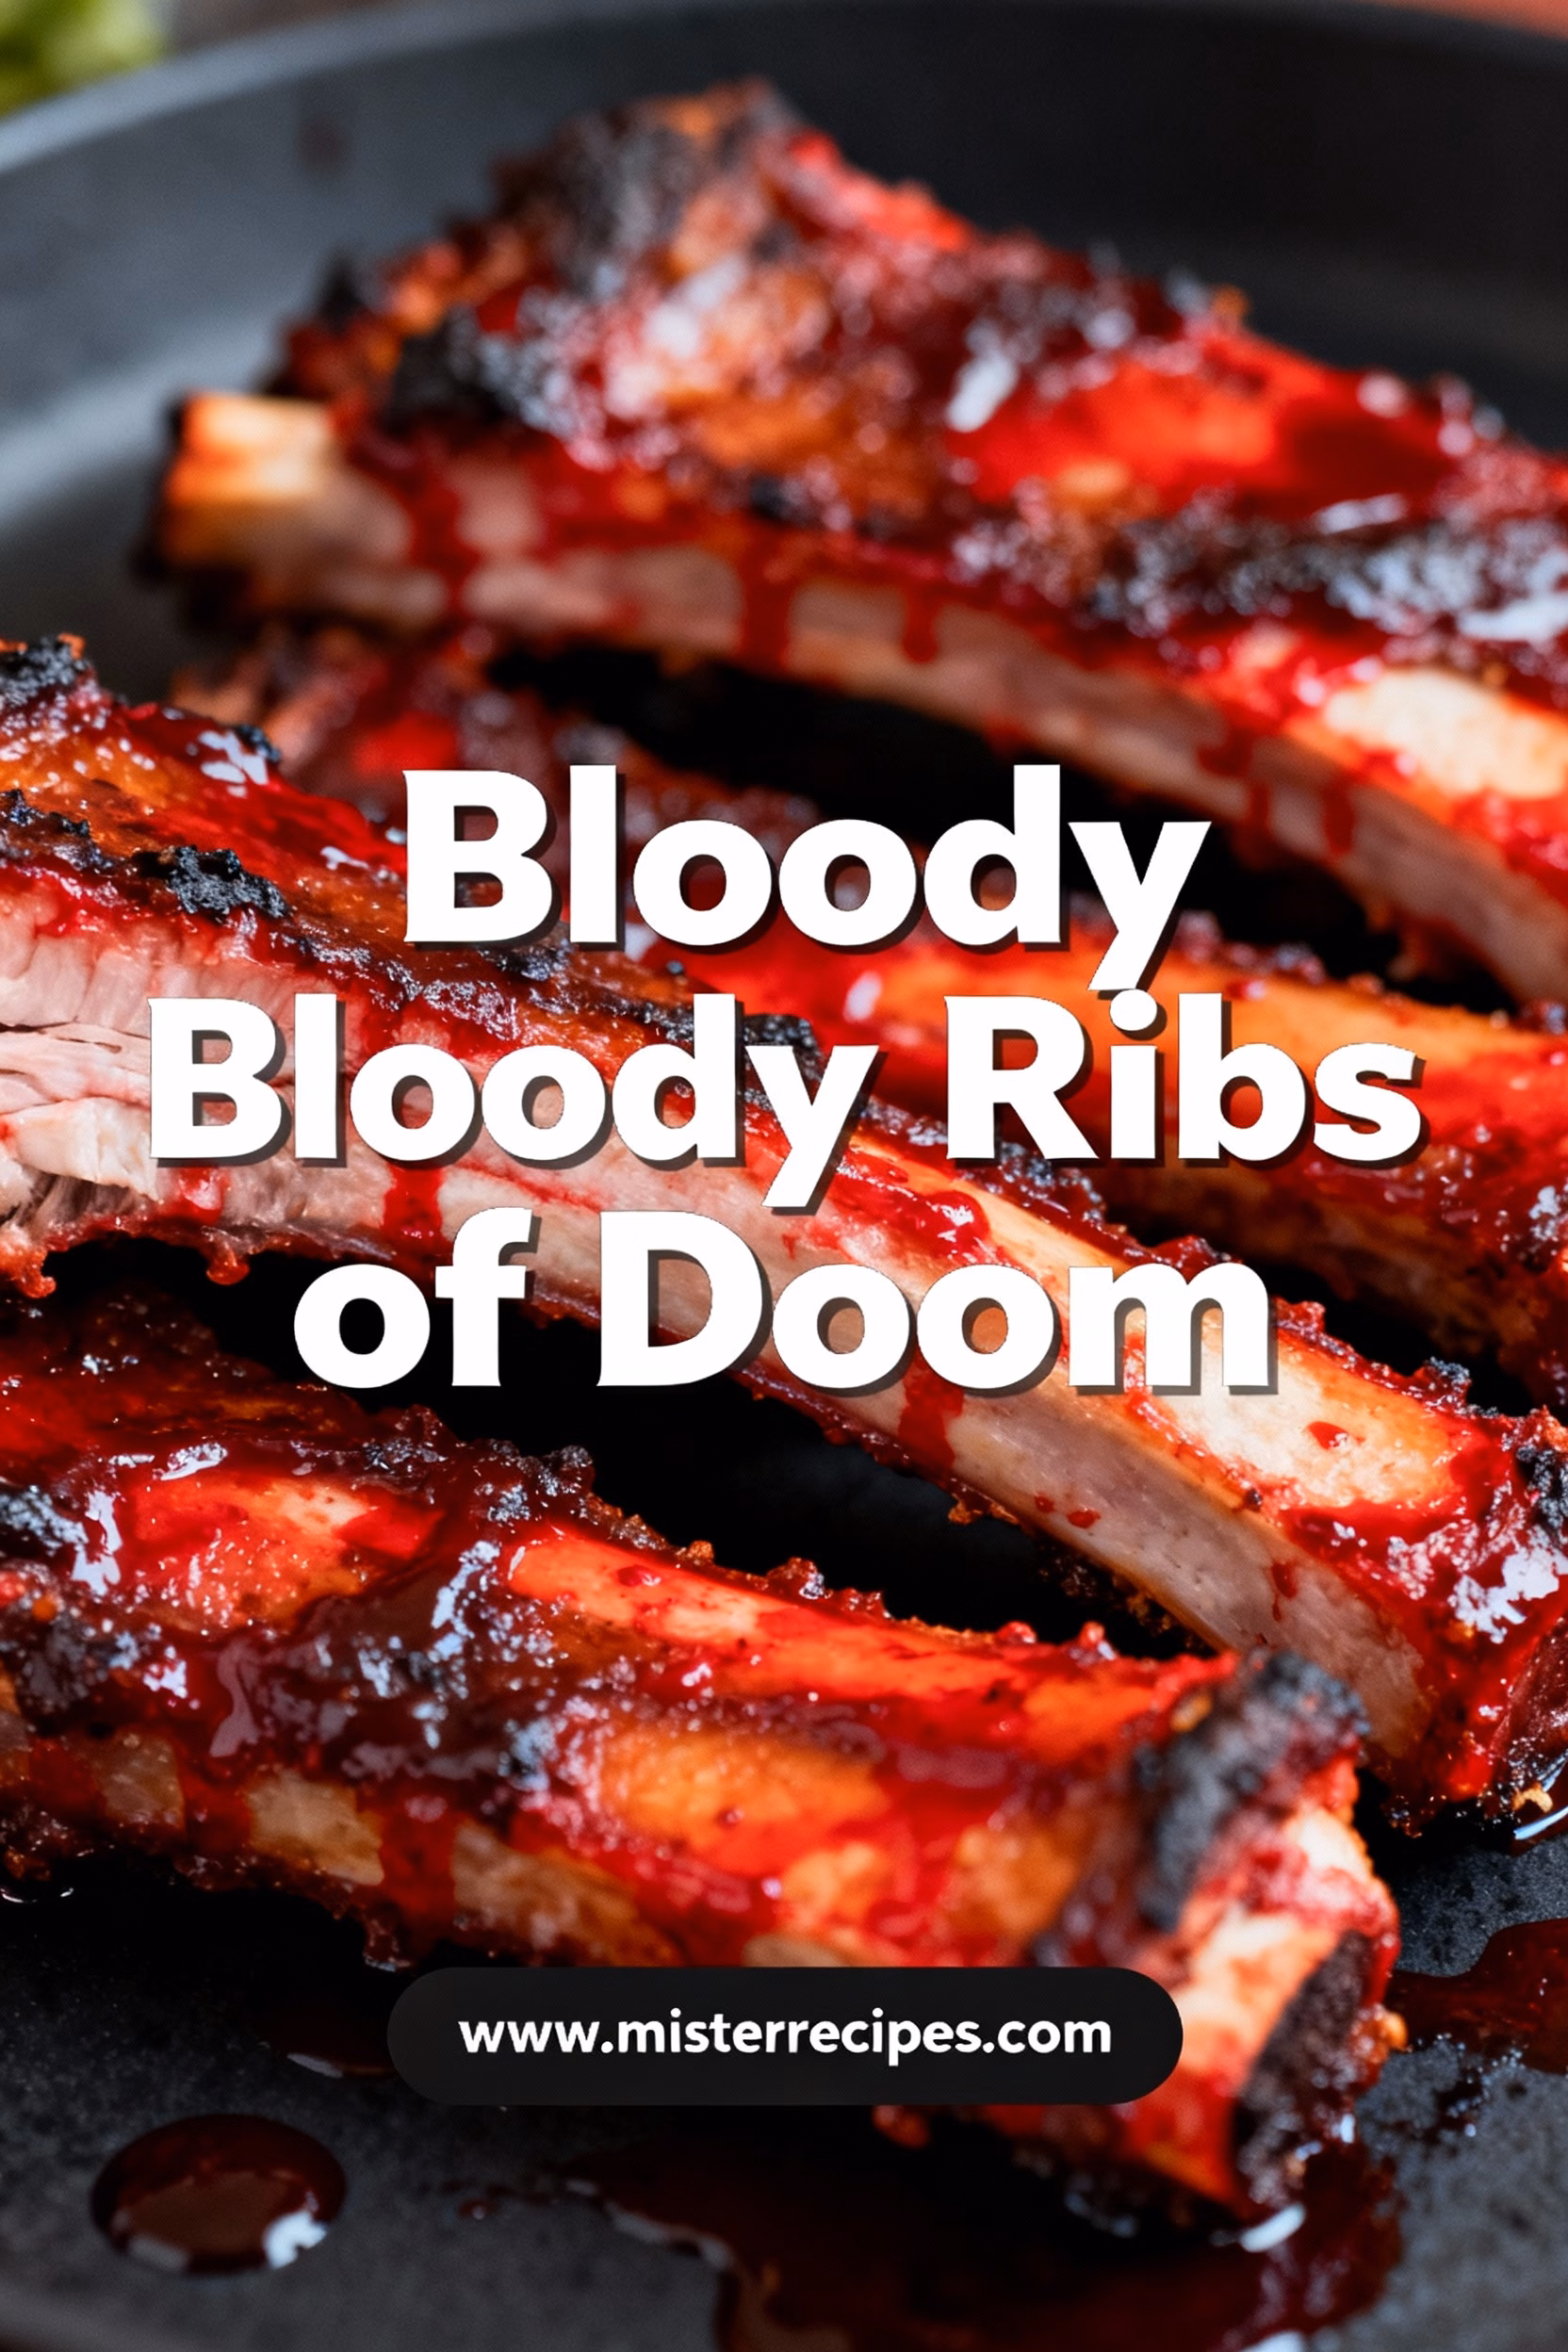
Introduction
Have you ever wondered if a single recipe could transform your Halloween gathering from “just another party” into an unforgettable, ghastly feast that leaves your guests both delighted and slightly terrified? Imagine plates piled high with something so visually striking, so deliciously sinister, that it becomes the talk of the town long after the last candy corn is devoured. We’re talking about a dish that perfectly balances culinary excellence with spooky aesthetics. Enter the star of our show: Bloody Ribs of Doom. This isn’t just a meal; it’s an experience, a centerpiece, and a conversation starter, guaranteed to elicit gasps and “oohs” in equal measure.
In a world where Halloween treats often lean sweet, providing a savory showstopper can truly elevate your seasonal spread. Our Bloody Ribs of Doom offer a succulent, fall-off-the-bone tender rib experience, coated in a rich, “bloody” glaze that looks unbelievably gruesome but tastes absolutely divine. Data suggests that visually engaging and themed dishes significantly increase guest interaction and satisfaction at holiday parties. This recipe taps directly into that desire for both novelty and delicious comfort food, making it an instant hit. Forget the same old dips and predictable finger foods; these ribs are designed to make a statement.
Why settle for ordinary when you can create extraordinary? This recipe for Bloody Ribs of Doom is a testament to how creative cooking can intertwine with festive fun. We’ve meticulously crafted this guide to ensure that even novice cooks can achieve deeply flavorful, perfectly tender ribs that look like they’ve just escaped a horror movie set. From selecting the right cut of meat to achieving that perfect “bloody” sheen, every step is detailed with precision. We understand the pressure of hosting, and this recipe is engineered to minimize stress while maximizing impact. Picture your guests’ faces as they encounter this culinary masterpiece – a blend of awe and a slight shiver down their spine. It’s not just about the taste; it’s about the theatricality, the story, and the sheer joy of creating something truly unique for your celebration. Get ready to embrace the deliciously dark side of cooking this Halloween!
Why You’ll Love These Bloody Ribs of Doom
These aren’t just any ribs; these are the Bloody Ribs of Doom, designed to be the ultimate showstopper for your Halloween festivities or any occasion where you want to impress with a deliciously devilish dish. You’ll absolutely adore this recipe for a multitude of reasons that go beyond just their shockingly good looks.
- Unforgettable Flavor Profile: These ribs boast a complex layering of sweet, smoky, and savory notes, culminating in a sticky, slightly spicy “bloody” glaze that will have everyone licking their fingers. The slow cooking process ensures maximum tenderness, allowing the meat to absorb all the rich seasonings and marinades.
- Visually Stunning & Spooky: Let’s face it, the visual impact is a huge part of the fun! The deep red, glistening glaze perfectly mimics a “bloody” aesthetic, making them an instant conversation starter and the ideal centerpiece for your spooky spread. They’re a feast for the eyes before they’re a feast for the stomach.
- Surprisingly Easy to Make: Despite their impressive appearance, the cooking process is incredibly straightforward. We break it down into simple, manageable steps, making this a perfect recipe for both seasoned cooks and those new to preparing ribs. Most of the work is hands-off, allowing you to focus on other party preparations.
- Crowd-Pleasing Perfection: Ribs are inherently a crowd-pleaser, and when you add this level of theme and flavor, they become irresistible. They’re perfect for feeding a large group and are guaranteed to disappear quickly. Pair them with other spooky sides like Easy Mummy Hot Dogs or Easy Spider Web Pizza for a full terror-ific menu.
- Customizable “Doom” Factor: Want more heat? Add extra cayenne. Prefer a smokier flavor? A few drops of liquid smoke or a sprinkle of smoked paprika will do the trick. You can easily adjust the “bloody” intensity and flavor profile to suit your family’s preferences, truly making them your Bloody Ribs of Doom.
- Versatile Serving Options: While perfect for Halloween, these ribs are so delicious you’ll want to make them year-round. They can be served as a main dish with classic BBQ sides, or cut into individual riblets for an impressive appetizer. Imagine these alongside a platter of Skull Veggie Platter for a balanced (yet still spooky) offering. Everyone will be asking for the recipe, eager to recreate their own version of doom.
Ingredients for Bloody Ribs of Doom
To craft the most devilishly delicious Bloody Ribs of Doom, you’ll need the following ingredients. We’ve also included some helpful substitutions to ensure you can conjure up this dish even if you’re missing an item or two.
For the Ribs:
- 2 racks (about 3-4 pounds each) pork spare ribs, St. Louis style
- 2 tablespoons brown sugar, packed
- 1 tablespoon smoked paprika
- 1 tablespoon garlic powder
- 1 teaspoon onion powder
- 1 teaspoon black pepper
- 1/2 teaspoon cayenne pepper (optional, for a spicy kick)
- 1 teaspoon salt
For the “Bloody” Glaze:
- 1 cup ketchup
- 1/2 cup apple cider vinegar
- 1/4 cup Worcestershire sauce
- 1/4 cup packed brown sugar
- 2 tablespoons molasses
- 1 tablespoon smoked paprika
- 1 teaspoon garlic powder
- 1/2 teaspoon black pepper
- 1/4 teaspoon cayenne pepper (adjust to desired heat)
- 1/2 cup beet juice (from canned beets or fresh beets, for intense red color)
- 2 tablespoons cornstarch (mixed with 2 tablespoons cold water, for thickening)
Substitutions:
- Pork Spare Ribs: Baby back ribs can be used, but cooking time may be slightly reduced. St. Louis style ribs are preferred for their meatiness and uniform shape.
- Brown Sugar: Maple syrup or honey can be used as a substitute for half of the brown sugar in the rub and glaze for a slightly different sweetness.
- Smoked Paprika: Regular paprika is fine, but you’ll lose some of the smoky depth. A tiny dash of liquid smoke can compensate in the glaze.
- Apple Cider Vinegar: White vinegar or even red wine vinegar can work, though apple cider offers a specific tang.
- Worcestershire Sauce: Soy sauce can be used if Worcestershire is unavailable, but reduce the salt slightly elsewhere in the recipe.
- Molasses: Dark corn syrup or more brown sugar can substitute, though molasses provides a unique depth of flavor and color.
- Beet Juice: For the “bloody” color, you can use a small amount of red food coloring (gel preferred for intensity) if beet juice is not accessible, but beet juice offers natural coloring and a subtle earthy sweetness that complements the ribs beautifully. You can also use the liquid from canned pickled beets.
- Cornstarch: All-purpose flour can be used as a thickener, but mix with an equal amount of cold water first to form a slurry, and be aware it might give a slightly less glossy finish.
How to Make Bloody Ribs of Doom
Get ready to unleash the most deliciously terrifying dish this Halloween! These Bloody Ribs of Doom are easier to make than they look, promising fall-off-the-bone tenderness and a shockingly realistic “bloody” glaze. Follow these detailed steps to conquer your kitchen and impress your ghoulish guests, perhaps alongside some Easy Bloody Eyeball Meatballs for maximum impact!
Step-by-Step Instructions
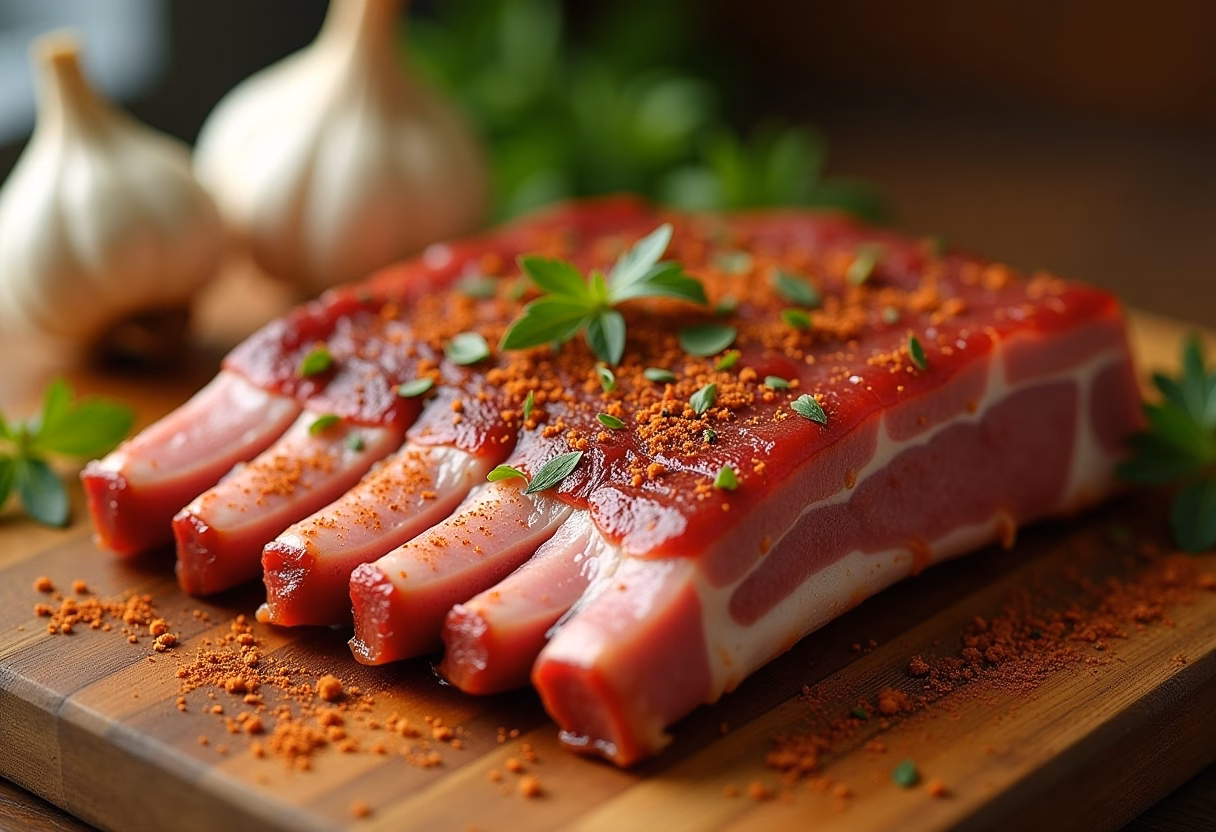
Prepare the Ribs: Start by removing the membrane from the back of each rib rack. This is crucial for tender ribs! Slide a knife under the membrane at one end and carefully lift it. Grip it with a paper towel and pull it off in one piece. If it tears, just repeat the process. Pat the ribs dry thoroughly with paper towels. This helps the rub adhere and creates a better crust.
Make the Dry Rub: In a small bowl, combine the brown sugar, smoked paprika, garlic powder, onion powder, black pepper, cayenne pepper (if using), and salt. Mix well until all spices are evenly distributed.
Season the Ribs: Generously rub the spice mixture all over both sides of the rib racks, ensuring every crevice is coated. Don’t be shy – this is where the foundational flavor comes from. Wrap the seasoned ribs loosely in plastic wrap or place them in a large resealable bag. Refrigerate for at least 2 hours, or preferably overnight, to allow the flavors to meld and penetrate the meat. This step is a game-changer for deep flavor.
Preheat & Prepare for Baking: Preheat your oven to 275°F (135°C). Line a large baking sheet with heavy-duty aluminum foil, then place a wire rack on top of the foil-lined sheet. This setup allows for even cooking and helps with cleanup.
Bake the Ribs (First Stage): Place the seasoned ribs, bone-side down, on the prepared wire rack. Tightly cover the baking sheet with another layer of aluminum foil, sealing the edges to create a steamy environment. Bake for 2.5 to 3 hours, or until the meat is very tender and begins to pull away from the bones. The goal here is tenderness, not crispiness.
Prepare the “Bloody” Glaze: While the ribs are baking, prepare your signature blood-red glaze. In a medium saucepan, combine the ketchup, apple cider vinegar, Worcestershire sauce, brown sugar, molasses, smoked paprika, garlic powder, black pepper, and cayenne pepper (if using). Stir well to combine. Bring the mixture to a gentle simmer over medium heat, stirring occasionally.
Add the “Blood” and Thicken: Once simmering, stir in the beet juice. This is your key ingredient for that spooky, gory color! In a separate small bowl, whisk together the cornstarch and cold water to create a smooth slurry. Slowly pour the cornstarch slurry into the simmering glaze, whisking constantly to prevent lumps. Continue to simmer and stir for 2-3 minutes, or until the glaze has thickened to a syrupy consistency, similar to barbecue sauce. Remove from heat and set aside.
Glaze the Ribs & Finish Baking: After 2.5-3 hours, carefully remove the ribs from the oven. Uncover the foil. The ribs should be incredibly tender. Increase the oven temperature to 375°F (190°C). Generously brush a thick layer of the “bloody” glaze over the top side of the ribs.
Broil for Char (Optional but Recommended): For extra stickiness and a slightly caramelized char, you can broil the ribs for 3-5 minutes. Watch them very closely to prevent burning, as the sugar in the glaze can burn quickly. Alternatively, you can continue baking at 375°F for 15-20 minutes, brushing with more glaze every 5-7 minutes, until the glaze is beautifully caramelized and sticky.
Rest and Serve: Once done, remove the Bloody Ribs of Doom from the oven. Tent them loosely with foil and let them rest for 10-15 minutes. This allows the juices to redistribute, making the ribs even more succulent. Slice the ribs between the bones into individual portions. Serve immediately with extra “bloody” glaze on the side for dipping, and perhaps a side of Tombstone Shepherd’s Pie for a truly macabre meal.
Pro Tips & Variations
Crafting the perfect Bloody Ribs of Doom is an art form, and with these pro tips and variations, you can elevate your dish to legendary status.
- The Membrane is Your Nemesis (and Opportunity): Don’t skip removing the silverskin membrane from the back of the ribs! It’s tough, chewy, and prevents the rub from penetrating the meat effectively. If you’re struggling, use a paper towel for a better grip. Professional tip: If you find it hard, start with a small paring knife, lift a corner, then use pliers or kitchen tongs with a paper towel for a firm grip and pull it off in one swift motion. A tender rib experience starts here.
- Low and Slow is the Way to Go: Resist the urge to crank up the oven temperature. The “low and slow” cooking method (275°F for 2.5-3 hours) is crucial for breaking down the tough connective tissues in the ribs, resulting in that coveted fall-off-the-bone tenderness for your Bloody Ribs of Doom. Patience truly pays off in rib perfection.
- The Power of the Rest: Just like a good steak, ribs need to rest after cooking. This 10-15 minute resting period allows the muscle fibers to relax and reabsorb all those delicious juices, ensuring each bite is incredibly moist and flavorful. Skipping this step can lead to drier ribs.
- Achieving Deeper Color in the Glaze: If you want an even more intense “bloody” appearance, consider roasting a fresh beet, pureeing it, and then straining the juice. This yields a more vibrant, natural red than canned beet juice. Alternatively, a few drops of high-quality red food gel coloring (not liquid) can boost the hue without affecting flavor.
- Don’t Over-Glaze Early: While tempting to slather on the glaze from the start, wait until the ribs are almost fully tender before applying the “bloody” glaze. The sugars in the glaze can burn if cooked for too long in the oven, leading to a bitter taste. Apply it during the last 15-20 minutes of cooking or during the broiling phase for that perfect sticky, caramelized finish.
Variations:
- Spicier Ribs of Doom: For those who crave an extra kick of doom, increase the cayenne pepper in both the dry rub and the glaze. You can also add a pinch of red pepper flakes to the glaze or even a finely minced habanero or scotch bonnet pepper (wear gloves!) for a truly fiery experience.
- Smoky Ribs of Doom (Smoker Method): If you have a smoker, these ribs are even better! Smoke them at 225-250°F (107-121°C) for 3-2-1 method (3 hours smoked, 2 hours wrapped in foil, 1 hour unwrapped with glaze). The “bloody” glaze can be applied during the last hour. Wood chips like apple, cherry, or hickory work wonderfully.
- Herbaceous Ribs of Doom: Add a tablespoon of dried thyme or rosemary to your dry rub for an aromatic twist. You could also include a sprig or two of fresh rosemary in your “bloody” glaze as it simmers, removing it before serving.
- Gluten-Free Doom: Ensure your Worcestershire sauce is gluten-free (some brands contain wheat). Otherwise, all other ingredients are naturally gluten-free, making this a fantastic option for those with dietary restrictions.
- Fruity Twist: For a subtle sweetness that complements the beet juice, add a splash of cherry juice or cranberry juice to your “bloody” glaze. It will deepen the red color and add a slight tart fruitiness. This pairs wonderfully with other fruity Halloween treats like Easy Vampire Donuts .
Serving Suggestions
Your Bloody Ribs of Doom are destined to be the star of any Halloween feast, but even the scariest show needs a stellar supporting cast! Here are some fantastic side dishes and pairings to complement the rich, savory, and slightly sweet flavor profile of these gruesome ribs, elevating your meal into a truly memorable event.
- Graveyard Mashed Potatoes: Imagine creamy mashed potatoes, piped to look like graves or mounds of earth, perhaps with a sprig of fresh rosemary acting as withered trees. The smooth, buttery texture of mashed potatoes perfectly contrasts the sticky, tender ribs and provides a comforting base. You can even add a touch of black food coloring for a spooky effect!
- “Witch’s Brew” Roasted Vegetables: A medley of colorful root vegetables like carrots, parsnips, and potatoes, roasted until tender and slightly caramelized with herbs like thyme and sage. You can cut them into jagged shapes to mimic bones or mysterious forest findings. The earthy sweetness of roasted veggies beautifully balances the richness of the ribs.
- Bloody Rice Pilaf: A vibrant rice pilaf infused with a touch of beet juice or tomato paste to give it a reddish hue, perhaps studded with black beans and corn for a textural contrast. This is a hearty and visually appealing side that can soak up all that delicious “bloody” glaze.
- Chilled “Eyeball” Caprese Skewers: For a lighter, fresher contrast, thread cherry tomatoes, small mozzarella balls (the “eyeballs”), and fresh basil leaves onto skewers. Drizzle with balsamic glaze to mimic veins. The cool, tangy flavors will provide a refreshing counterpoint to the warm, savory ribs.
- Corn on the Cob (Blackened or “Poisoned”): Grill or roast corn on the cob until slightly charred for a “blackened” effect, or lightly brush with a food-safe black gel food coloring (diluted slightly) for a dramatic “poisoned” look. The sweet crunch of corn is a classic BBQ pairing that works wonderfully with ribs.
- Haunted House Rolls or Garlic Bread: Warm, crusty rolls or garlic bread are perfect for soaking up any extra glaze or juices. You can shape the rolls into “ghosts” or “bones” before baking, or cut garlic bread into tombstone shapes.
- Seasonal Salad with a Spooky Vinaigrette: A simple green salad with seasonal fruits like pomegranate arils (like blood drops!) or candied nuts, tossed in a dark, fruit-based vinaigrette (like blackberry or balsamic reduction). This offers a refreshing, crisp element to cut through the richness.
- Pair with Spooky Sips: Don’t forget your beverages! Pair these ribs with themed drinks like a Poison Apple Sour cocktail or a Non-Alcoholic Halloween Punch .
Storage & Reheating
Ensuring your delicious Bloody Ribs of Doom remain just as spectacular the next day is key. Proper storage and reheating techniques will keep them tender and juicy, ready for another round of spooky enjoyment.
Storage:
- Cool Completely: Before storing, allow the cooked ribs to cool completely to room temperature (this usually takes about 30-60 minutes). Do not leave them out for more than 2 hours to prevent bacterial growth.
- Airtight Container: Cut the ribs into individual or smaller portions if desired, then place them in an airtight container. This prevents them from drying out and absorbing other odors from your refrigerator.
- Refrigeration: Stored properly in the refrigerator, these Bloody Ribs of Doom will remain fresh and delicious for 3-4 days.
- Freezing (for longer storage): For longer storage, you can freeze the ribs. Wrap individual portions tightly in plastic wrap, then an additional layer of aluminum foil, before placing them in a freezer-safe bag or container. This double layer helps prevent freezer burn.
- Portioning Tip: Freeze ribs in individual servings or by the rack so you can easily thaw and reheat only what you need.
- Freezer Life: Frozen ribs will maintain their quality for up to 2-3 months. Thaw them overnight in the refrigerator before reheating.
Reheating Methods:
- Oven (Recommended for best results): This method helps maintain tenderness and allows the glaze to re-caramelize slightly.
- Preheat your oven to 250-300°F (120-150°C).
- Place the ribs in an oven-safe dish with a splash of water or broth (about 1/4 cup) to create steam and prevent drying.
- Cover the dish tightly with aluminum foil.
- Heat for 20-30 minutes, or until heated through. For best results, uncover for the last 5-10 minutes to allow the glaze to re-crisp, and you can even brush with a little extra fresh “bloody” glaze if you have some saved.
- Grill: If you’re reheating a larger quantity or want that smoky kiss again, the grill is a great option.
- Preheat your grill to medium-low heat.
- Wrap each rib portion loosely in foil, perhaps with a tablespoon of water or broth.
- Place on the grill and heat, turning occasionally, for 10-15 minutes, or until warmed through.
- For a slight char, remove from foil for the last few minutes.
- Microwave (Quickest, but less ideal for texture): While convenient, the microwave can sometimes make ribs tougher or rubbery.
- Place ribs on a microwave-safe plate.
- Cover with a damp paper towel or microwave-safe lid to retain moisture.
- Heat in 30-second intervals until warmed through, checking periodically to avoid overcooking. This method is best for small portions.
No matter how you store and reheat your Bloody Ribs of Doom, they’re bound to bring a second round of hauntingly good flavor to your plate!
FAQ about Bloody Ribs of Doom
Here are some common questions about making and serving your Bloody Ribs of Doom, ensuring you’re fully equipped to impress and delight your guests with this frightfully delicious dish.
Q1: Can I make Bloody Ribs of Doom ahead of time for a party?
A: Absolutely! This recipe is fantastic for meal prepping for a party. You can actually prepare the ribs up to 1-2 days in advance. Follow all the cooking steps through the initial baking (Step 5), allowing them to cool completely. Store them in an airtight container in the refrigerator. On the day of your event, simply prepare the “bloody” glaze, then proceed with glazing and the final bake/broil (Steps 8-9) just before serving. This frees you up to enjoy your other Halloween preparations, like making spooky treats such as Easy Monster Rice Krispie Treats or Easy Pumpkin Patch Dirt Cups .
Q2: My ribs aren’t falling off the bone. What went wrong?
A: The most common reason for ribs not being tender enough is insufficient cooking time or temperature. Ribs require low and slow cooking to break down connective tissues. Ensure your oven temperature is accurate and that you’ve cooked them for the full recommended time (or even a bit longer if needed). The “meat is very tender and begins to pull away from the bones” stage (Step 5) is crucial. If they’re still a bit tough after the initial bake, cover them again and return them to the oven for another 30-60 minutes at 275°F (135°C).
Q3: Is the beet juice flavor noticeable in the “bloody” glaze?
A: When used in the specified amount, the beet juice primarily contributes to the vibrant red color of the glaze, rather than an overpowering beet flavor. It adds a very subtle earthy sweetness that actually complements the savory, smoky, and tangy notes of the BBQ sauce beautifully. Most people won’t even detect a distinct beet flavor, making it a fantastic natural coloring agent for your Bloody Ribs of Doom. If you’re concerned, you can use less beet juice and supplement with a tiny amount of red food gel.
Q4: Can I use different types of ribs for this recipe?
A: Yes, you can! While St. Louis style ribs are recommended for their meatiness and easy handling, baby back ribs can also be used. If using baby back ribs, be aware that they are typically smaller and leaner, so they may cook a bit faster. Adjust your initial baking time (Step 5) to 2-2.5 hours, checking for tenderness earlier. The “bloody” glaze works perfectly with any cut of pork ribs. You could even adapt the glaze for a terrifying Face Pie Creepy Meat Pie or Zombie Meatloaf !
Q5: How can I make these ribs extra sticky and caramelized?
A: The key to that glorious sticky, caramelized glaze is the final high-heat cooking step (Step 9). After applying the “bloody” glaze, broiling for 3-5 minutes (watching very closely) or baking at 375°F (190°C) for 15-20 minutes, brushing with more glaze every 5-7 minutes, will achieve that perfect sticky, slightly charred finish. The sugars in the glaze caramelize, creating an irresistible crust. Just be careful not to burn them!
Final Thoughts on Bloody Ribs of Doom
As we wrap up this culinary journey into the deliciously macabre, it’s clear that the Bloody Ribs of Doom are more than just a recipe – they’re an experience. Designed to be the ultimate centerpiece of any Halloween feast, these ribs marry tender, succulent meat with a rich, smoky, and irresistibly “bloody” glaze that tantalizes both the taste buds and the imagination. We’ve explored every facet, from selecting the perfect cut to mastering the art of low and slow cooking, ensuring that your venture into the world of spooky gourmet is met with success and rave reviews.
Remember, the magic of these ribs lies not only in their incredible flavor but also in their dramatic presentation. Imagine the delight and delicious shivers your guests will experience as they encounter this visually stunning dish. It’s a testament to how creative cooking can elevate a simple meal into an unforgettable event, perfectly aligning with the playful spookiness of the season. Whether you’re a seasoned chef or a kitchen novice, our detailed steps and helpful tips are crafted to guide you to culinary triumph.
We genuinely hope you enjoy creating and, more importantly, devouring your very own Bloody Ribs of Doom. This dish is truly a labor of love, designed to bring joy, deliciousness, and a touch of delightful fright to your table. Don’t let the name scare you away; the taste is pure heaven!
If you’ve loved this terrifyingly tasty creation, we’d be thrilled to hear from you. Please take a moment to leave a comment below and share your experience. Did you add a unique twist? What did your guests think? Your insights inspire us and help our community of food lovers.
Before you go, don’t forget to save this recipe! Pin it to your favorite Halloween or recipe boards on Pinterest so you can easily find it for next year’s fright night or whenever the craving for deliciously dark ribs strikes. Your pins help spread the word and allow more people to discover the wonders of the Bloody Ribs of Doom.
Lastly, if you’re eager for more wickedly good recipes and culinary adventures, make sure to subscribe to our newsletter. You’ll get exclusive access to new recipes, cooking tips, and all the latest updates directly in your inbox. Thanks for joining us on this spooky culinary adventure – happy cooking, and may your feast be filled with delicious doom!
Bloody Ribs of Doom
Ingredients
Equipment
Method
- Remove the membrane from the back of each rib rack, then pat ribs dry thoroughly with paper towels.
- In a small bowl, combine brown sugar, smoked paprika, garlic powder, onion powder, black pepper, cayenne pepper (optional), and salt to make the dry rub.
- Generously rub the dry spice mixture on both sides of the ribs. Wrap loosely in plastic wrap or place in a resealable bag and refrigerate for at least 2 hours, preferably overnight.
- Preheat oven to 275°F (135°C). Line a baking sheet with foil and place a wire rack on top.
- Place ribs bone-side down on wire rack, cover tightly with foil, and bake for 2.5 to 3 hours until very tender and meat pulls from bones.
- While ribs bake, combine ketchup, apple cider vinegar, Worcestershire sauce, brown sugar, molasses, smoked paprika, garlic powder, black pepper, and cayenne pepper in a saucepan. Bring to a gentle simmer, stirring occasionally.
- Stir in beet juice. Mix cornstarch with cold water to make slurry and whisk slowly into glaze. Simmer 2-3 minutes until thickened. Remove from heat.
- Remove ribs from oven and uncover. Increase oven temperature to 375°F (190°C). Brush a thick layer of glaze over ribs.
- Broil ribs 3-5 minutes for caramelized char, watching closely, or bake at 375°F for 15-20 minutes, brushing glaze every 5-7 minutes until sticky and caramelized.
- Let ribs rest tented with foil for 10-15 minutes. Slice between bones and serve immediately with extra glaze on the side.