Are you ready to transform your kitchen into a mad scientist’s lab and unleash some wickedly delicious creativity? If the thought of whipping up treats that are both spooky and scrumptious excites you, then you’ve landed in the right spot! Today, we’re diving headfirst into the eerie, yet utterly delightful, world of Toxic Slime Cupcakes. Forget your average, run-of-the-mill confections; these spooky cupcakes are designed to be the star of any Halloween party, science-themed birthday, or just a fun afternoon baking session.
There’s a common misconception that highly decorated or themed desserts are complicated, requiring hours of intricate work and professional pastry skills. Many believe that achieving that vibrant, gooey “toxic slime” effect is beyond the reach of the average home baker. But what if I told you that creating eye-popping, easy toxic slime cupcake recipes is not only achievable but incredibly fun and straightforward? We’re here to challenge that notion and show you how simple it can be to conjure up these wonderfully weird treats. This recipe isn’t just about baking; it’s about embracing the playful side of cooking, making memories, and impressing everyone with your culinary wizardry.
My journey into themed baking often starts with a single, inspiring image or idea. For these toxic slime cupcakes, it was the sheer joy of seeing children’s faces light up at the sight of something both a little bit gross and undeniably tasty. This recipe is unique because it perfectly balances visual spectacle with fantastic flavor. You’re not just making cupcakes; you’re crafting an edible experience. From the vibrant toxic green frosting to the delightfully gooey “slime” oozing over the top, every element is designed for maximum impact and enjoyment.
Baking should be a joyful, stress-free activity, not a daunting task. That’s why we’ve meticulously crafted this guide to ensure that even beginners can follow along with ease. Whether you’re a seasoned baker looking for new unique Halloween cupcake designs or a parent hoping to create something special with your kids, these toxic slime cupcakes for kids are perfect. They’re adaptable, forgiving, and most importantly, incredibly rewarding to make and eat. So, grab your aprons, prepare to get a little messy (in the best way possible!), and let’s conjure up some magic in the kitchen. These aren’t just desserts; they’re conversation starters, mood setters, and a guaranteed hit for any occasion that calls for a touch of edible eccentricity. Get ready to bake, decorate, and devour these extraordinary slime themed cupcakes!
Why You’ll Love These Toxic Slime Cupcakes
These toxic slime cupcakes are more than just a pretty face; they’re an experience! Here’s why they’re about to become your new favorite spooky treat:
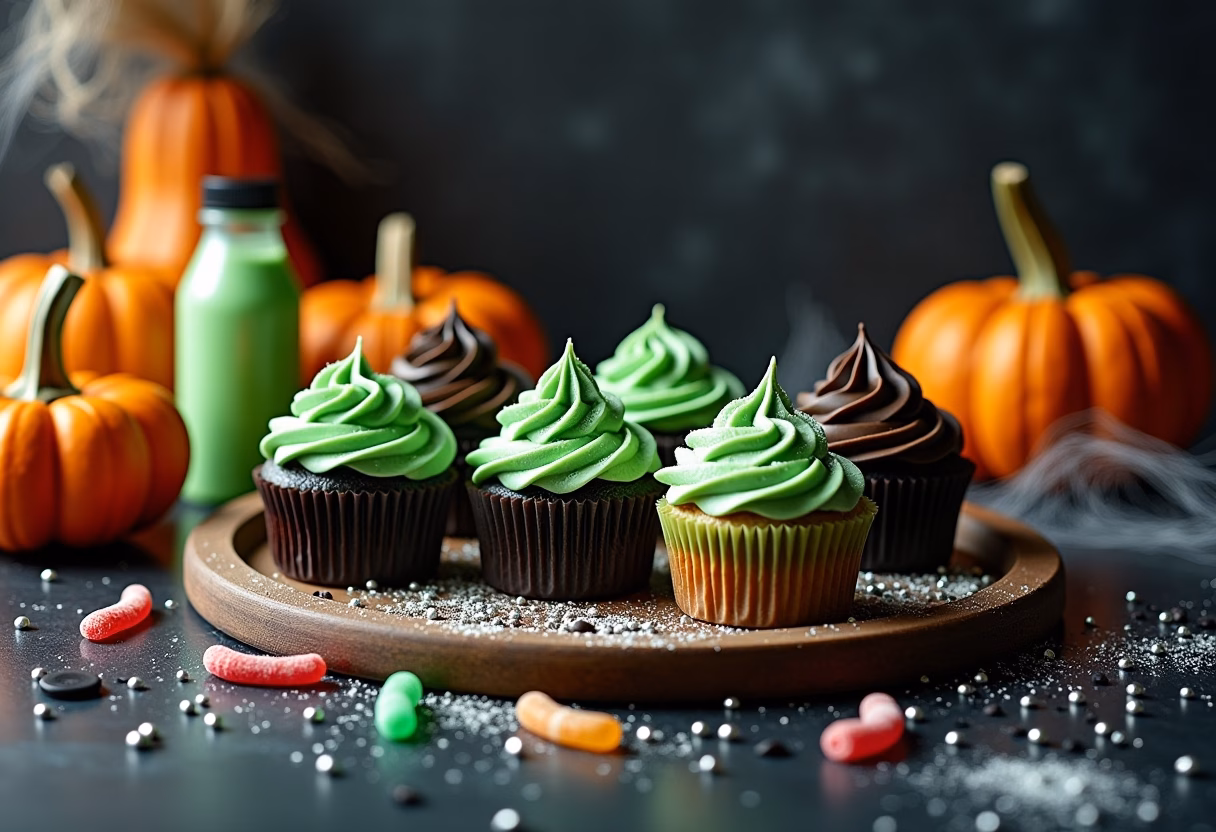
- Visually Stunning & Spooky: Let’s be honest, the “toxic slime” effect is just plain cool! The vibrant green, oozy topping creates an irresistible, slightly gross (in a good way!) appeal that’s perfect for Halloween or a mad scientist theme. They’re guaranteed to get gasps and giggles.
- Deceptively Easy to Make: Despite their impressive appearance, these are easy slime cupcakes that even beginner bakers can master. Our step-by-step instructions break down the process into simple, manageable tasks, ensuring success every time. You won’t need any high-level decorating skills, just a willingness to have fun!
- Deliciously Moist & Flavorful: We don’t sacrifice taste for looks! The cupcake base is wonderfully moist and tender, providing the perfect canvas for the sweet, tangy frosting and the playful “slime” topping. It’s a delightful combination that will satisfy any sweet tooth.
- Kid-Friendly & Engaging: Making these toxic slime cupcakes for kids is an fantastic activity. Children will adore helping with the green coloring, adding the slime, and decorating with candies. It’s a great way to get them involved in the kitchen and unleash their creativity, making it a fun family baking project.
- Highly Customizable: From the cupcake flavor to the type of edible slime, this recipe offers plenty of room for personalization. Want a different color of slime? Go for it! Want to add gummy worms or candy eyeballs? Absolutely! This flexibility ensures your Halloween dessert ideas can be as unique as you are.
- Perfect for Parties: Whether you’re hosting a Halloween bash, a birthday celebration, or just a themed get-together, these monster cupcakes or creepy cupcakes are fantastic party food. They’re individual portions, easy to serve, and always a huge hit with guests of all ages, making them a standout among Halloween bake sale ideas.
Ingredients for Toxic Slime Cupcakes
Gather your ingredients, and let the spooky baking commence!
For the Cupcakes:
- 1 ½ cups all-purpose flour
- 1 ½ teaspoons baking powder
- ¼ teaspoon salt
- ½ cup (1 stick) unsalted butter, softened
- 1 cup granulated sugar
- 2 large eggs
- 1 teaspoon vanilla extract
- ½ cup milk (whole or 2%)
- Green food coloring for cupcakes (gel works best for vibrant color)
For the Toxic Green Frosting:
- 1 stick (½ cup) unsalted butter, softened
- 2 cups powdered sugar, sifted
- 1-2 tablespoons milk or heavy cream
- ½ teaspoon vanilla extract
- Pinch of salt
- Green food coloring for cupcakes (gel)
For the Edible Slime:
- ½ cup corn syrup
- ¼ cup powdered sugar
- Green food coloring for cupcakes (gel)
- Optional: a few drops of lemon juice (for tang and thinning)
Optional Decorations:
- Gummy worm cupcakes
- Candy eyeballs for cupcakes
- Sprinkles (toxic waste themed, if you can find them!)
- Small non-toxic plastic Halloween spiders or bugs (for display, not eating)
How to Make Toxic Slime Cupcakes
Step-by-Step Instructions
This detailed guide will walk you through every stage of creating your spectacular toxic slime cupcakes, ensuring even beginners can achieve a professional and spooky result.
Prepare Your Baking Station: Start by preheating your oven to 350°F (175°C). Line a 12-cup muffin tin with paper liners. This simple step ensures easy cleanup and prevents your cupcakes from sticking. Having everything ready before you begin mixing makes the process much smoother.
Mix the Dry Ingredients: In a medium bowl, whisk together the 1 ½ cups all-purpose flour, 1 ½ teaspoons baking powder, and ¼ teaspoon salt. This aeration helps to distribute the leavening agents evenly and creates a lighter texture in your finished cupcakes. Set aside.
Cream Butter and Sugar: In a large mixing bowl, using an electric mixer, beat the ½ cup (1 stick) softened unsalted butter and 1 cup granulated sugar on medium-high speed until the mixture is light, fluffy, and pale in color. This creaming process is crucial for incorporating air, which contributes to the cupcakes’ tender crumb. Scrape down the sides of the bowl as needed to ensure everything is well combined.
Add Eggs and Vanilla: Crack in the 2 large eggs one at a time, beating well after each addition until fully incorporated. Follow with 1 teaspoon vanilla extract, mixing until just combined. The vanilla adds a lovely warmth and depth of flavor that complements the sweetness.
Alternate Dry and Wet Ingredients: With the mixer on low speed, gradually add about one-third of the dry ingredient mixture to the wet mixture, mixing until just combined. Then, pour in half of the ½ cup milk, mixing until smooth. Repeat this process, finishing with the remaining dry ingredients. Be careful not to overmix, as this can lead to tough cupcakes. Mix only until no streaks of flour remain.
Add the Green Hue: Now for the fun part that leans into our toxic cupcakes recipe! Add a few drops of green food coloring for cupcakes (gel coloring is recommended for its intensity) to the batter. Mix until you achieve your desired shade of eerie green. Remember, a little goes a long way with gel coloring!
Fill and Bake: Divide the colored cupcake batter evenly among the 12 lined muffin cups, filling each about two-thirds full. Bake for 18-22 minutes, or until a wooden skewer or toothpick inserted into the center of a cupcake comes out clean. Once baked, remove the cupcakes from the oven and let them cool in the muffin tin for a few minutes before transferring them to a wire rack to cool completely. Cooling completely is essential before frosting to prevent the frosting from melting.
Prepare the Toxic Green Frosting: While the cupcakes cool, let’s create our toxic green frosting. In a large bowl, beat 1 stick (½ cup) softened unsalted butter until creamy. Gradually add 2 cups sifted powdered sugar, alternating with 1-2 tablespoons milk or heavy cream, until you reach a smooth, spreadable consistency. Stir in ½ teaspoon vanilla extract and a pinch of salt. Finally, add several drops of green food coloring for cupcakes until you achieve a vibrant, eye-catching “toxic” green. For an even more intense color, consider using a good quality gel food coloring.
Frost the Cupcakes: Once the cupcakes are completely cool, scoop the green frosting into a piping bag fitted with your favorite tip (or use a zip-top bag with the corner snipped off). Pipe a generous swirl of toxic green frosting onto each cupcake. Alternatively, you can use an offset spatula or knife to spread the frosting evenly.
Make the Edible Slime: In a small bowl, combine ½ cup corn syrup and ¼ cup powdered sugar. Stir well until mostly smooth. This forms the base of your edible green slime recipe. Now, add 3-5 drops of green food coloring for cupcakes (or more, until you get that intense, slimy shade). Mix thoroughly. If the slime is too thick to drip, add a few drops of lemon juice or a tiny bit more corn syrup, one drop at a time, until it reaches a slow, oozy consistency. This step is key to creating realistic edible slime for spooky treats.
Apply the Slime Effect: Using a spoon or a small piping bag with a tiny hole, carefully drizzle the edible slime over the frosted cupcakes. Let it drip haphazardly down the sides, creating that authentic “toxic ooze” effect. Don’t worry about perfection; the messier, the better for this slime themed cupcakes look!
Decorate & Serve Your Monster Cupcakes! This is where your toxic slime cupcake decorating ideas truly come to life! Add your optional decorations like candy eyeballs for cupcakes, gummy worms, or fun sprinkles. You can even place a fake spooky bug on the wrapper for an extra scare. Your toxic slime cupcakes are now ready to unleash their spooky charm!
Pro Tips & Variations
Elevate your toxic slime cupcakes with these expert tips and creative twists!
- Achieving the Perfect Green: For truly vibrant and “toxic” green hues, always opt for gel food coloring over liquid. It’s more concentrated, meaning you need less to achieve a deep, rich color without compromising the texture of your batter or frosting. To make them truly stand out, consider using a neon green gel for the slime, and a slightly darker green for the frosting to create contrast.
- Troubleshooting Your Edible Slime: If your edible slime for cupcakes is too thick, add corn syrup or a tiny bit of water, one drop at a time, stirring between each addition until you reach your desired dripping consistency. If it’s too thin, sift in a little more powdered sugar until it thickens. The ideal “slime” should drip slowly and look gooey, not watery.
- Storage Savvy: To keep your toxic slime cupcakes fresh, store them in an airtight container at room temperature for up to 3 days. If your kitchen is warm, or if you’ve added perishable fillings, refrigerate them, but allow them to come to room temperature for about 30 minutes before serving for the best taste and texture.
- Creative Toppings: Beyond gummy worm cupcakes and candy eyeballs for cupcakes, consider adding a sprinkle of edible glitter for a “radioactive” shimmer, or crushed Oreo cookies (graveyard “dirt”) at the base of the frosting before adding slime. For extra fun, poke a few pretzel sticks into the cupcakes to resemble caution signs sticking out of the “toxic waste.”
- Themed Presentation: For a truly immersive experience, serve your Halloween party food for kids on a black platter or a tray covered with a “science lab” tablecloth. Add small beakers, test tubes (filled with green juice!), or plastic spiders around the display to enhance the mad scientist party cupcakes theme.
Variations to Explore:
- Vegan Toxic Slime Cupcakes: Easily adapt this recipe by using plant-based butter, egg substitutes (like flax eggs or commercial egg replacers), and your favorite non-dairy milk (almond, oat, or soy milk work well). Ensure your powdered sugar is vegan (some contain bone char). The edible slime should remain vegan as corn syrup and powdered sugar are typically plant-based.
- Gluten-Free Toxic Slime Cupcakes: Substitute the all-purpose flour with a 1:1 gluten-free baking blend that contains xanthan gum. Ensure all other ingredients, especially baking powder, are certified gluten-free. The edible slime is naturally gluten-free. This makes for fantastic school safe toxic slime cupcakes options for those with dietary restrictions.
- Flavor Twists: Don’t limit yourself to vanilla! You could make chocolate cupcakes for a darker, more mysterious base, or even lemon cupcakes for a zesty contrast to the sweet slime. A hint of mint extract in the frosting could also add a refreshing, unexpected twist.
- “Bubbling” Slime Effect: To create a “bubbling” effect for your bubbling slime effect cupcakes, just before serving, you can lightly mist the slime with a spray bottle filled with a tiny amount of green edible glitter mixed with a few drops of vodka (the alcohol evaporates, leaving just the glitter). For a dry ice effect, place a small bowl of dry ice hidden under the serving platter (NOT IN THE CUPCAKES!) away from direct contact with guests.
- Niche Appeal: Glowing Toxic Slime Cupcakes: For an extra wow factor, procure UV reactive food coloring! Mix a few drops into your edible slime. When placed under a black light, your toxic slime cupcakes will literally glow, making them the ultimate horror themed desserts for a party.
Serving Suggestions
These toxic slime cupcakes make a statement all on their own, but pairing them with the right accompaniments can elevate your themed event to legendary status!
- Spooky Sips: Complement the cupcakes with a vibrant, themed beverage. Consider a “Witch’s Brew Punch” – a large bowl of green or purple soda with gummy worms and dry ice for a smoky effect. Or, concoct individual “Potions” using brightly colored fruit juices in test tubes or small, decorative bottles.
- Savory Counterparts: Balance the sweetness with some savory treats. Halloween party food for kids often benefits from a mix! Think Mummy Hot Dogs wrapped in pastry strips, Skull Veggie Platter with creepy dips, or a “Spider Web Dip” (layered bean dip with sour cream piped into a web design).
- “Gross” Edible Treats: Fully embrace the “gross but delicious treats” theme! Serve alongside Frankenstein Brownies, Bloody Eyeball Meatballs, or Witch Finger Cookies. The more eerie, the better!
- Creative Display: Don’t just place them on a plate. Arrange your toxic slime cupcakes on a multi-tiered stand or a large platter covered with black fabric or fake spiderwebs. Add small laboratory props like plastic beakers, petri dishes, or even some dry ice (used carefully and not directly with food!) for a “smoking” effect that enhances the mad scientist party cupcakes atmosphere.
- Themed Candy Bar: Create a small candy bar with green, black, and purple candies. Think green sour belts, black licorice, gummy worms, and candy eyeballs. Guests can pick extra toppings for their cupcakes or just enjoy the sugary spread.
Storage & Reheating
Ensuring your toxic slime cupcakes stay fresh and delicious is key to enjoying them long after the party.
Storage:
- Room Temperature (Short-Term): For optimal freshness and texture, these cupcakes are best stored in an airtight container at room temperature for up to 2-3 days. This keeps the cake moist and the frosting from becoming too firm. Avoid direct sunlight or warm spots in your kitchen.
- Refrigeration (Longer-Term): If you need to store them for longer, or if your kitchen is particularly warm, place the airtight container in the refrigerator. They will stay fresh for up to 5 days when refrigerated. Be aware that refrigeration can sometimes dry out cupcakes slightly and firm up the frosting.
- Freezing (Extended Storage): For future enjoyment, freeze your cupcakes!
- Prep: If frosted, place cupcakes in the freezer on a baking sheet, uncovered, for about 30-60 minutes until the frosting is firm. This prevents smudging.
- Wrap: Individually wrap each cupcake tightly in plastic wrap, then place them in a freezer-safe airtight container or heavy-duty freezer bag.
- Store: They can be frozen for up to 2-3 months.
Reheating/Thawing:
- From Refrigerator: If refrigerated, remove the cupcakes from the fridge about 30-60 minutes before serving. This allows them to come to room temperature, softening the frosting and making the cake more tender.
- From Freezer:
- Thaw: Remove the wrapped cupcakes from the freezer and place them in the refrigerator overnight, or on the countertop for a few hours.
- Room Temp: Once thawed, let them sit at room temperature for about 30 minutes before enjoying to reach optimal flavor and texture.
- Do NOT Microwave: Microwaving frosted cupcakes can melt the frosting and alter the cake’s texture, making it rubbery. Slow thawing is always best.
FAQ about Toxic Slime Cupcakes
Got questions about these delightfully eerie treats? We’ve got answers!
Q1: Can I make the cupcakes ahead of time?
A1: Absolutely! You can bake the cupcakes up to 2-3 days in advance. Store them unfrosted in an airtight container at room temperature. Frost and add the slime topping closer to when you plan to serve them for the freshest appearance. The edible slime is best made just a few hours before assembly for optimal gooiness.Q2: What if my edible slime is too thin or too thick?
A2: No problem! If your edible slime is too thick, stir in a tiny amount (1/4 teaspoon at a time) of corn syrup or water until it reaches your desired oozy consistency. If it’s too thin, gradually mix in more powdered sugar, a teaspoon at a time, until it thickens up. Remember, you want it to drip slowly, not run off the cupcake quickly.Q3: Can I use store-bought frosting for convenience?
A3: Yes, you certainly can! Choose a good quality vanilla or white frosting. Then, simply add green food coloring for cupcakes until you achieve a vibrant “toxic” shade. While homemade frosting often tastes better, store-bought can definitely save time, especially when creating easy slime cupcakes.Q4: Are there any alternatives for the “slime” if I don’t want to use corn syrup?
A4: You can make edible green slime recipe using a mixture of condensed milk and powdered sugar for a thicker, less drippy slime. Another option for creating a gooey effect is a simple glaze made from powdered sugar and a small amount of milk, colored green. For a jello-like texture, you could also use a green gelatin mixture, though this sets firmer and might not have the same “drippy” effect as the corn syrup-based slime.Q5: How can I make these even more kid-friendly for young bakers?
A5: Get them involved in every step! Let them mix the dry ingredients, add the food coloring (with supervision!), and especially the decorating part. Providing a variety of kid-friendly Halloween treats like sprinkles, gummy worms, and candy eyeballs for cupcakes allows them to personalize their own toxic slime cupcakes. Emphasize the fun, messy aspect of creating “toxic waste”!
Final Thoughts on Toxic Slime Cupcakes
Phew! You’ve bravely ventured into the spooky side of baking and emerged victorious with a batch of mesmerizing toxic slime cupcakes! Wasn’t that an exhilarating (and surprisingly easy!) journey? From the moment we discussed embracing the unique charm of these slime themed cupcakes to conquering the art of creating that perfectly oozy, vibrant green slime, every step has been about infusing fun and flavor into your kitchen.
These aren’t just any ordinary desserts; they’re conversation starters, edible art, and a fantastic way to celebrate Halloween dessert ideas or any occasion that calls for a touch of playful horror. The joy of seeing those brilliant green swirls and gooey drips instantly transforms a simple cupcake into a show-stopping creation. We’ve demystified the process, proving that even the most impressive-looking treats, like these monster cupcakes, can be totally accessible for home bakers.
Remember that with our toxic slime cupcake decorating ideas, creativity is your only limit. Whether you added extra candy eyeballs for cupcakes, experimented with spooky sprinkles, or even ventured into the realm of glowing toxic slime cupcakes with UV-reactive food coloring, you’ve made something truly special. These treats are designed to be enjoyed by everyone, from the littlest goblins to the most seasoned monsters, making them the ultimate kid friendly slime cupcake recipe.
So, next time you’re planning a party or just looking for a fun baking project, don’t hesitate to bookmark this page. Imagine the delight on your guests’ faces when they encounter these delightfully gross and delicious creations. We encourage you to share your best toxic slime cupcake recipe creations with us! We absolutely love seeing your culinary adventures.
Don’t let this spooky fun end here! We’re always conjuring up new and exciting recipes to inspire your kitchen escapades. Be sure to subscribe to our newsletter for more spellbinding recipes, tips, and exclusive content delivered straight to your inbox. And if you loved making these, please consider giving us a share on your favorite social media platforms. Pin this recipe to your Halloween boards on Pinterest so others can discover the magic of these toxic slime cupcakes too! Your support helps us continue to bring you more fantastic Halloween bake sale ideas and creative treats. Happy baking, and may your cupcakes always be gloriously gooey!