The Sweet Spookiness of Small Hands and Savory Bites
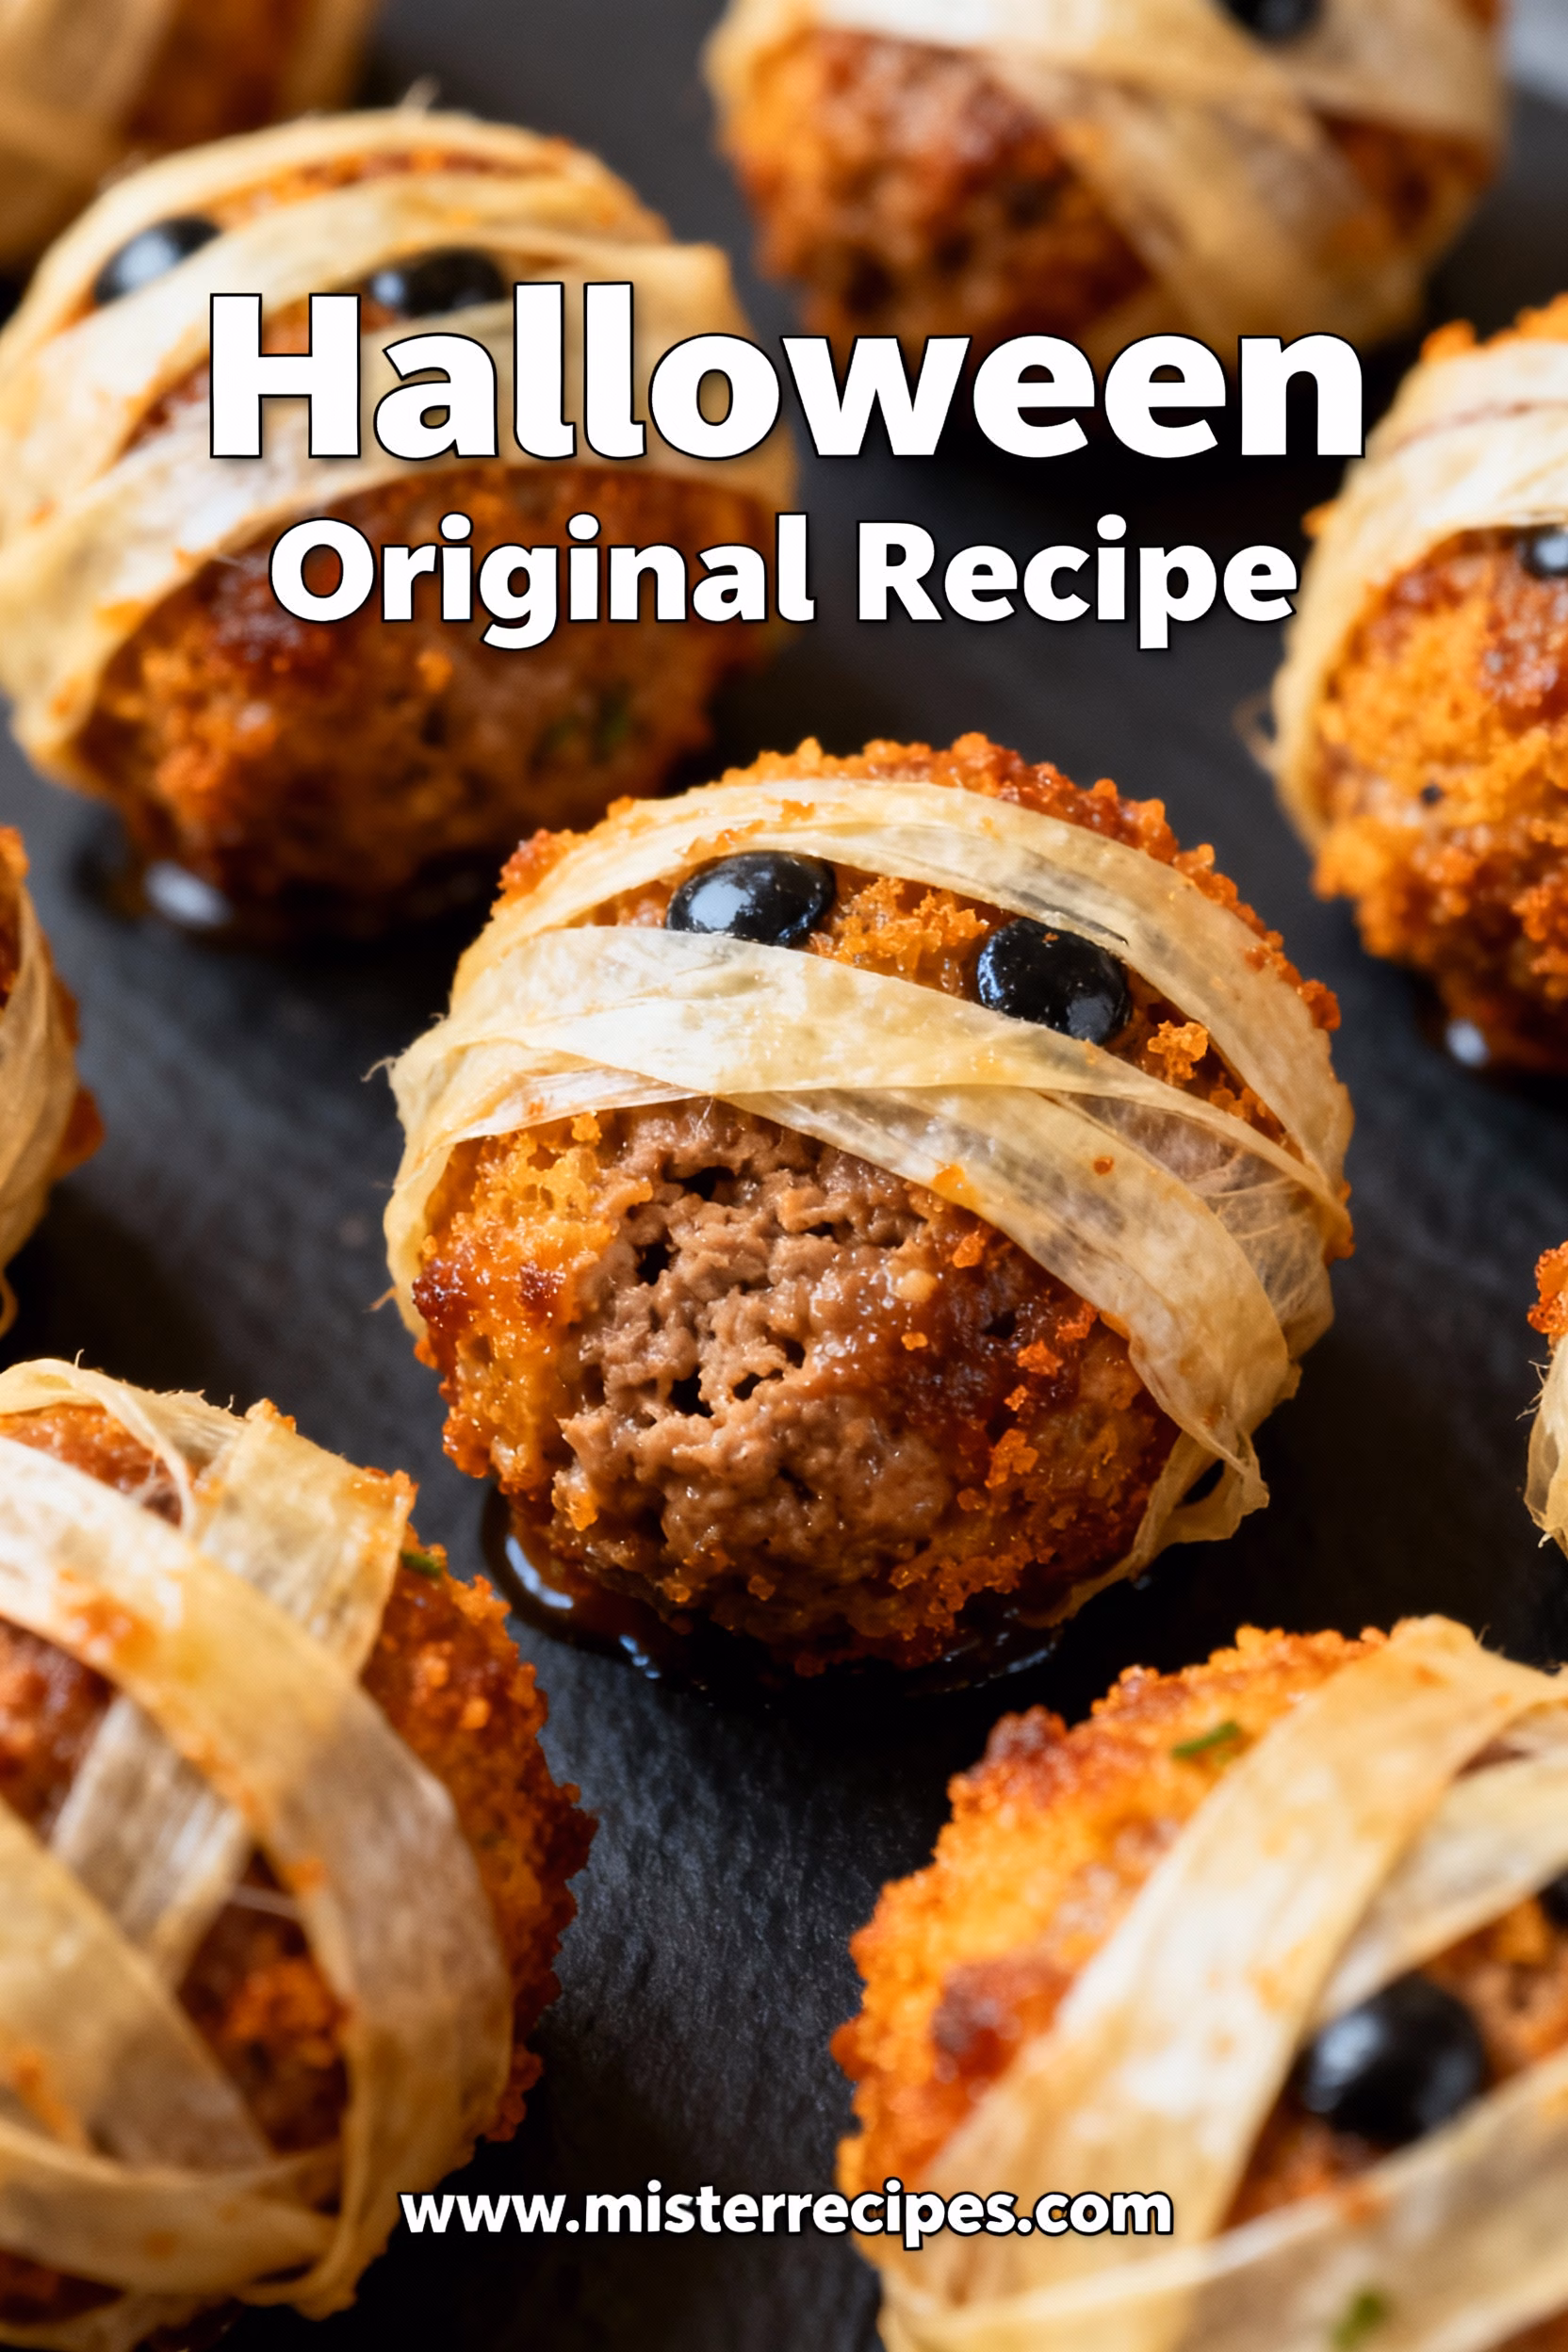
There’s a particular slant of light in October here in Bend that feels like a secret whispered just between the Ponderosa pines and me. It’s a golden, knowing light that filters through the kitchen window, landing on the flour dusting the countertop like a soft blanket of frost. Outside, the air smells of pine needles and damp earth, a scent that always pulls me toward the warmth of the oven. It’s the season of slowing down, of simmering soups, and of that delicious, anticipatory hum that buzzes in the air as Halloween approaches. In our home, this is the time when the line between cooking and playing blurs completely. This is when we make our Mini Mummy Meatballs.
Have you ever wondered if the most memorable holiday traditions are born not from perfection, but from happy, flour-dusted chaos? For us, the answer is a resounding yes. I remember the first time Olivia, with her tiny, determined fingers, tried to wrap a meatball in a strip of dough. It looked less like a mummy and more like a very confused little dough ball, but her squeal of delight was the most delicious sound I’d heard all day. These spooky meatballs aren’t just about making halloween party food; they’re about creating a moment. They’re about the giggles that erupt when a candy eye is placed just a little off-kilter, the shared bites over a plate of warm, savory mummies, and the quiet satisfaction of making something together. This mummy meatballs recipe is one of our most treasured rituals, a simple way to transform an ordinary afternoon into something magical. It’s more than a recipe; it’s our story, wrapped in dough, and I’m so happy to be sharing it with you.
Why You’ll Love These Mini Mummy Meatballs
These little guys are more than just a cute face on a platter; they are the heart of our Halloween celebration. Ethan, my husband, who usually sees the world through a camera lens, puts his camera down for these. He says capturing the joy on the kids’ faces as they make them is better than any photograph. I think he’s right. They are one of those rare recipes that are as fun to create as they are to eat, making them a staple in our kitchen every October.
- Incredibly Easy & Kid-Friendly: This is the ultimate recipe for getting little hands involved in the kitchen. The steps are simple: unroll, slice, and wrap. It’s a wonderful, tactile activity for children. There’s no right or wrong way to do it, which makes these kid friendly mummy meatballs a fantastic confidence builder. The joyful mess is part of the charm!
- The Perfect Savory Halloween Treat: Amidst a sea of sugar, these savory bites are a welcome addition to any celebration. They are hearty, flavorful, and satisfying, making them one of the best halloween appetizers savory style. They provide a bit of wholesome substance before the candy rush begins, which every parent can appreciate. They are the ideal finger food halloween guests of all ages will love.
- Quick to Assemble: With pre-made meatballs and store-bought crescent roll dough, this quick mini mummy meatballs recipe comes together in a flash. You can have a tray of these adorable mummies ready for the oven in under 20 minutes, leaving you more time to enjoy the Halloween festivities with your family and friends.
- A Visually Stunning Centerpiece: Let’s be honest, they are just so cute! These mummies are guaranteed to be the talk of your party platter ideas halloween spread. Their spooky, silly look brings an instant smile to everyone’s face. They look impressive, but only you will know how unbelievably easy mummy meatballs are to make.
- Completely Customizable: This recipe is a wonderful base for your own creativity. You can use your favorite homemade mini mummy meatballs, try different kinds of meat like turkey or sausage, or even make a vegetarian version. It’s a flexible recipe that invites you to play and make it your own. For a fun twist, check out our Easy Mummy Hot Dogs, which use the same fun wrapping technique!
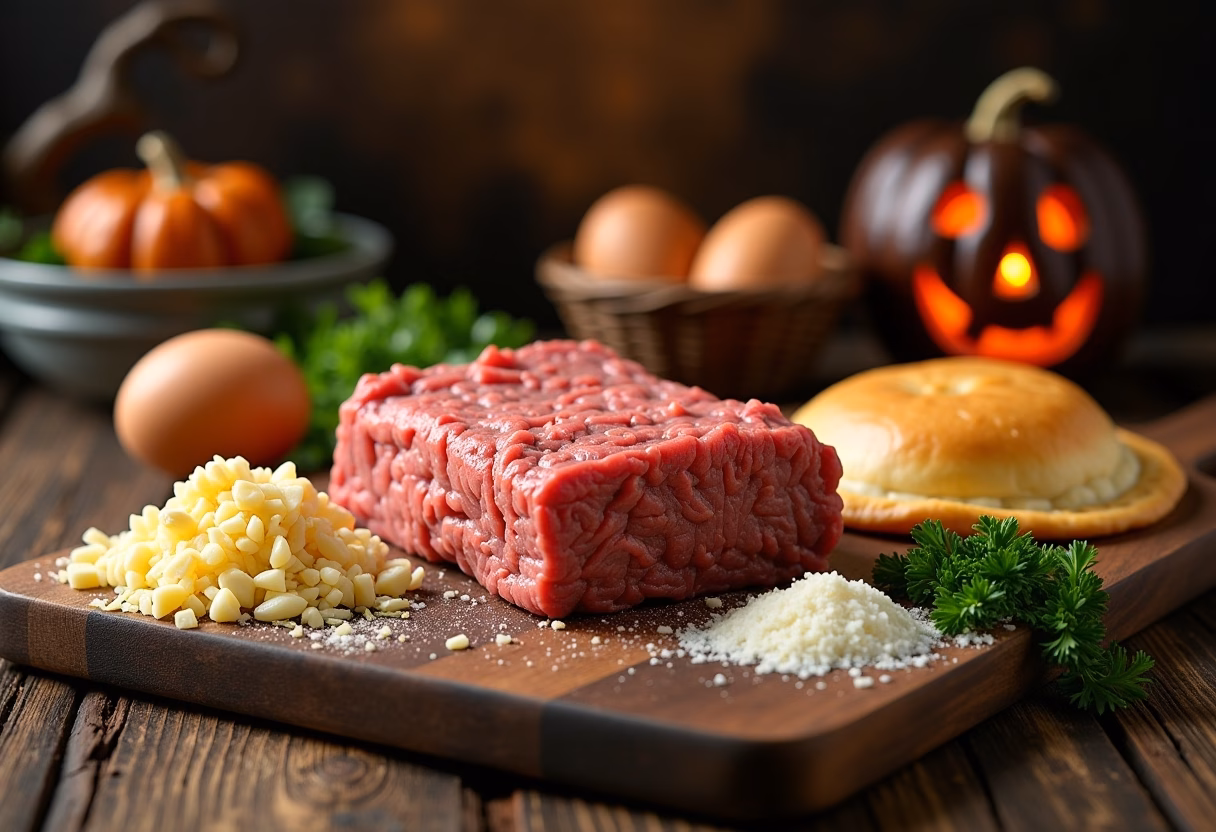
Ingredients for Mini Mummy Meatballs
One of the things I love most about this recipe is its simplicity. It’s built on a foundation of easy-to-find ingredients, proving that you don’t need a long, complicated list to create something truly special and delicious for your family.
- Meatballs: One 12-ounce package of frozen, fully cooked Italian-style or homestyle mini meatballs, thawed. (About 24-30 mini meatballs). You can also use your favorite recipe for homemade mini mummy meatballs.
- Crescent Roll Dough: One 8-ounce can of refrigerated crescent roll dough. The seamless dough sheets work wonderfully here, but the classic perforated kind is just as good.
- Egg Wash: 1 large egg, lightly beaten with 1 tablespoon of water. This is our secret for that beautiful golden-brown color on the mummy “bandages.”
- Marinara Sauce: Your favorite marinara sauce, warmed, for serving. A “bloody” dip is a must for these spooky meatballs!
- Edible Eyes: Small candy eyeballs for giving your mummies their personality. You can find these in the baking aisle of most grocery stores, especially around Halloween.
A Note on Substitutions:
- Dough: If you can’t find crescent roll dough, mini mummy meatballs with puff pastry are also delicious, offering a flakier, crispier texture.
- Meatballs: Feel free to use turkey, chicken, or even vegetarian mummy meatballs recipe alternatives. Just ensure they are pre-cooked and mini-sized. Sausage mummy meatballs are also a wonderfully savory option.
How to Make Mini Mummy Meatballs
This is where the magic begins. Put on some festive music, gather your little helpers, and get ready to create some deliciously spooky memories. The process is a meditation in itself; the rhythmic wrapping, the anticipation of the bake. It’s one of my favorite kitchen rituals.
Step-by-Step Instructions
- Prepare Your Kitchen Station: First, preheat your oven to 375°F (190°C). Line a large baking sheet with parchment paper for easy cleanup. This is a small step that makes a big difference. I always have Olivia and James help with this part; it makes them feel like official kitchen assistants. Have your thawed meatballs, unrolled dough, and a small bowl with the egg wash ready to go.
- Unroll and Slice the Dough: Gently unroll the crescent dough sheet onto a lightly floured surface. If you’re using the perforated kind, pinch the seams together to form a solid rectangle. Using a pizza cutter or a thin knife, slice the dough lengthwise into very thin strips, about 1/8 inch wide. Don’t worry about making them perfect; uneven strips add to the rustic, “mummified” charm. This is the perfect job for older kids who can handle a pizza cutter with supervision.
- Wrap Your Mummies: Now for the fun part: how to wrap mini mummy meatballs. Take one thawed meatball and one strip of dough. Gently stretch the dough strip slightly and begin wrapping it around the meatball, overlapping the strips and leaving a small gap near the top for the eyes. There’s no perfect technique here. Let it be a little messy and random. That’s what makes them look authentic! Continue this process until all your meatballs are snugly wrapped.
- Arrange and Brush: Place the wrapped meatballs about an inch apart on your prepared baking sheet. Using a pastry brush, lightly coat the dough “bandages” with the egg wash. This will give them a beautiful, glossy, golden-brown finish as they bake, making them look even more delicious.
- Bake to Golden Perfection: Slide the baking sheet into the preheated oven. Bake for 12 to 15 minutes, or until the dough is golden brown and puffed up, and the meatballs are heated through. The smell that will fill your kitchen is pure comfort: savory meatballs and buttery, baked dough.
- Add the Eyes and Serve: Once you remove the mummies from the oven, let them cool for just a minute or two. While they are still warm, gently press two candy eyeballs into the gap you left in the dough. The warmth from the meatballs will help the eyes adhere. If you’re looking for more fun ways to use those candy eyes, try them on our Easy Monster Rice Krispie Treats! Serve your halloween meatballs immediately with a side of warm marinara sauce for dipping.
Pro Tips & Variations
Over the years, our family has made countless batches of these mummies, and we’ve picked up a few tricks along the way. These little tips can help make your mummy-making experience even smoother and more delicious. As I always say, a good recipe is like a story that you can add your own chapter to.
- Don’t Over-Wrap: A common mistake is using too much dough. You want thin, delicate “bandages,” not a thick doughy blanket. Gently stretch the thin strips of dough as you wrap. This ensures the dough cooks through and gives you the perfect ratio of savory meatball to flaky crust. The goal is to see a little bit of the meatball peeking through.
- Thaw Your Meatballs Completely: This is crucial! If your meatballs are still frozen in the middle, the dough will bake much faster than the meatball can heat up. Thaw them in the refrigerator overnight or use the defrost setting on your microwave for a quicker solution. This ensures everything is perfectly hot when you pull them from the oven.
- Make-Ahead Tip: You can absolutely make mummy meatballs ahead of time! To do this, assemble the mummies completely (without the egg wash) and arrange them on your parchment-lined baking sheet. Cover them tightly with plastic wrap and refrigerate for up to 4 hours. When you’re ready to bake, brush them with the egg wash and pop them in the oven. You may need to add a minute or two to the baking time.
- Don’t Skimp on the Egg Wash: It might seem like an optional step, but the egg wash is what gives the mummy “bandages” that beautiful, shiny, golden-brown finish. It elevates them from a simple snack to a show-stopping appetizer that looks as good as it tastes.
Fun Variations to Try:
- Spicy Mummy Meatballs: Add a pinch of red pepper flakes to the meatballs before wrapping, or serve with a spicy arrabbiata sauce for a fiery kick that adults will love.
- Cheesy Mummies: Before wrapping a meatball, press a tiny cube of mozzarella or provolone cheese into the center. As it bakes, the cheese will melt, creating a deliciously gooey surprise inside.
- Air Fryer Method: For extra crispy mummies, you can use an air fryer! Place the wrapped meatballs in a single layer in the air fryer basket. Cook at 350°F (175°C) for 6 to 8 minutes, or until the dough is golden and cooked through. These mummy meatballs air fryer instructions are perfect for a smaller batch.
- Gluten-Free Mummies: To make gluten free mummy meatballs options, use your favorite gluten-free cooked meatballs and wrap them with a gluten-free crescent or pizza dough. The baking time may vary slightly, so keep a close eye on them.
Serving Suggestions
Part of the joy of these Mini Mummy Meatballs is how they anchor a whole spread of spooky snacks for kids and adults alike. I love to nestle them on a large platter, creating a scene that tells a story. For a truly festive table, think about textures, colors, and complementary flavors.
We always serve ours with a bowl of warm marinara sauce that we call “blood dip,” which the kids find hilariously gruesome. A pesto or a creamy, herby dip could also work as a spooky “slime” dip. I often place the dip in a small cauldron-shaped bowl to enhance the theme.
These savory bites pair wonderfully with other creepy halloween party finger foods. Consider serving them alongside:
- A Spooky Veggie Platter: Create balance with a Skull Veggie Platter. The fresh crunch of cucumbers, carrots, and bell peppers is a great counterpoint to the rich meatballs.
- Pumpkin Deviled Eggs: These Pumpkin Deviled Eggs are another one of our family’s favorites. They are creamy, delicious, and their bright orange color looks fantastic next to the mummies.
- Spider Web Pizza: For a more substantial meal, these mummies are a perfect appetizer before serving our Easy Spider Web Pizza. It keeps the fun, spooky theme going right through the main course.
- A Sweet Treat to Finish: After the savory fun, transition to a sweet treat like our Witch Finger Cookies or a platter of Ghostly Marshmallow Pops.
Creating a halloween party food table is like setting a stage. The more playful and creative you are with your pairings, the more magical the experience will be for everyone.
Storage & Reheating
While these Mini Mummy Meatballs are definitely best enjoyed warm from the oven, leftovers are still a wonderful treat. Here’s how to store them to keep them tasting great.
In the Refrigerator:
Store any leftover mummies in an airtight container in the refrigerator for up to 3 days. I find that placing a paper towel at the bottom of the container helps absorb any excess moisture and keeps the dough from getting too soft.
In the Freezer:
For longer storage, you can freeze the baked meatballs. First, let them cool completely. Then, place them on a baking sheet in a single layer and “flash freeze” them for about an hour. Once they are solid, transfer them to a freezer-safe bag or container. These mini mummy meatballs freezer instructions will help you keep them for up to 2 months.
Best Way to Reheat:
The best way to bring them back to life is in the oven or air fryer. This helps the “bandages” get crispy again.
- Oven: Preheat your oven to 350°F (175°C). Place the meatballs on a baking sheet and bake for 5 to 8 minutes, or until heated through and crisp.
- Air Fryer: Reheat in the air fryer at 350°F (175°C) for 3 to 4 minutes. This method is incredibly fast and works wonders for re-crisping the dough.
I would avoid reheating them in the microwave, as it tends to make the dough soft and a bit soggy.
FAQ about Mini Mummy Meatballs
Here are some of the questions I get asked most often about this recipe. I hope these answers help you on your mummy-making journey!
1. What’s the best crescent roll dough for mummy meatballs?
While any brand of refrigerated crescent roll dough will work, I find that the “seamless dough sheets” are the easiest to use because you don’t have to spend time pinching the perforations together. However, the classic triangle-shaped crescent rolls work just fine! Just press the seams together to form a rectangle before you start slicing. The key is to slice the dough into very thin strips for that authentic mummy look.
2. Can I use homemade meatballs instead of frozen?
Absolutely! Homemade mini mummy meatballs are fantastic in this recipe. Just make sure they are fully cooked and cooled before you start wrapping them in the dough. This is a great way to use up leftover meatballs from another meal. A simple Italian-style meatball with garlic and herbs is a perfect choice.
3. The candy eyes keep falling off. How do I get them to stick?
The trick is to add the eyes right after the mummies come out of the oven. The dough and meatballs will still be very warm. Gently press the candy eyeballs into place, and the residual heat will slightly melt the back of the candy, helping it adhere to the dough. If they still won’t stick, you can use a tiny dab of honey, corn syrup, or even a bit of cream cheese as “glue.”
4. Can you make mummy meatballs ahead of time?
Yes, this is a great time saver! You can assemble the meatballs completely (wrap them in dough) and store them on a baking sheet covered with plastic wrap in the refrigerator for up to 4 hours before baking. When you are ready, just remove them from the fridge, brush with egg wash, and bake as directed. This is one of my favorite tricks for stress-free party prep.
Final Thoughts on Mini Mummy Meatballs
There’s a quiet magic that settles in my kitchen when these Mini Mummy Meatballs are in the oven. The house fills with the comforting scent of baking dough and savory herbs, a smell that has become synonymous with Halloween in our home. For a moment, the world outside fades away, and all that matters is the happy hum of the oven and the anticipation of pulling out a tray of these goofy, ghoulish little treats.
This mummy meatballs recipe is more than just a list of ingredients and instructions. It’s an invitation to play. It’s a reason to gather your loved ones, to get your hands a little messy, and to create something that is born from joy. Each unevenly wrapped mummy tells a story of a child’s earnest effort, of a shared laugh, of a memory being made.
I hope you’ll give this recipe a try. I hope you’ll embrace the imperfection and find the fun in the process. Because in the end, it’s not about serving the most flawless appetizer; it’s about serving up a moment of connection.
If you make these halloween meatballs, I would love to see them! Please leave a comment below and let me know how they turned out, or tag us on social media. And don’t forget to save this recipe to your favorite Pinterest board so you can find it every Halloween! From my kitchen to yours, I wish you a season filled with warmth, laughter, and delicious memories.