Introduction
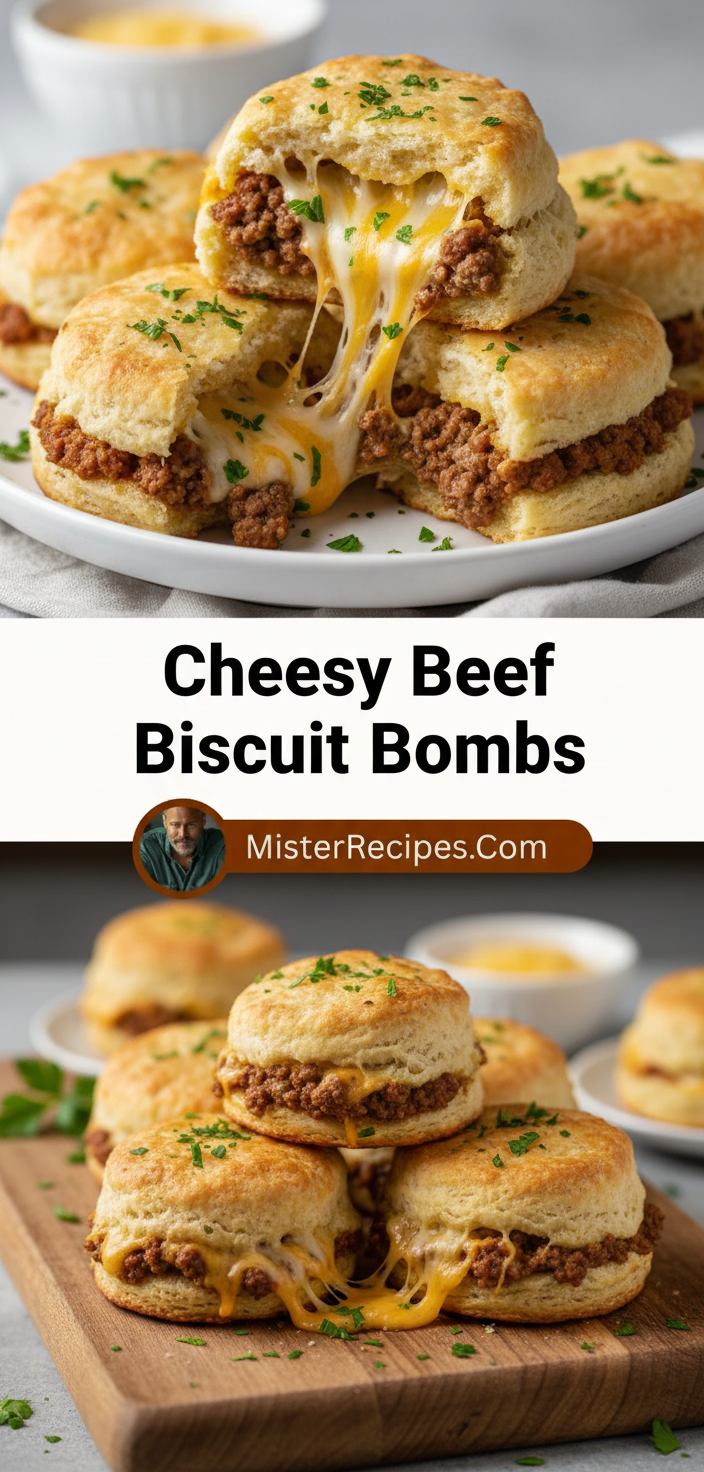
The smell of melting cheddar and sizzling ground beef curling through the kitchen on a Tuesday evening. That is the sound of my family gathering, of homework set aside, of the day unwinding into something good. I remember one particular night, Ethan was working late, and the kids were restless. I needed something fast, something that felt like a hug, something that would make them forget the long day. That is when I first made these Cheesy Beef Biscuit Bombs. They were born from a moment of hurry and a deep want for connection. The first batch vanished in minutes, leaving only crumbs and smiles. This recipe is not just about a quick dinner. It is about finding warmth in the simplest of actions, about turning simple ingredients into a shared moment of joy. I call them bombs because they explode with flavor, a little pocket of comfort that brings everyone to the table. It is a recipe that asks for nothing more than a few pantry staples and a little bit of love. And really, that is the best kind of cooking there is.
Table of Contents
- Why You’ll Love This Cheesy Beef Biscuit Bombs
- Ingredients for Cheesy Beef Biscuit Bombs
- How to Make Cheesy Beef Biscuit Bombs
- Pro Tips & Variations
- Cheesy Beef Biscuit Bombs Serving Suggestions
- Cheesy Beef Biscuit Bombs Storage & Reheating
- FAQ about Cheesy Beef Biscuit Bombs
- Final Thoughts
Why You’ll Love This Cheesy Beef Biscuit Bombs
You will love these Cheesy Beef Biscuit Bombs because they are the perfect answer to the question that haunts every home cook: What is for dinner? They are quick, ready in under 30 minutes, and use ingredients you likely already have in your fridge and pantry. These are not just another cheeseburger biscuit recipe. They are a complete meal wrapped in a golden, flaky biscuit. I love how they bring together the classic flavors of a cheeseburger, the savory ground beef, the sharp cheddar cheese, and a hint of ketchup and mustard, all in a handheld package. They are the ultimate comfort food. Here are a few reasons why I keep coming back to this recipe.
- Kid Friendly: Adams and Jana inhale these. They are like little edible presents. No forks needed, just happy hands. I often pack them for lunch the next day, and they are just as good cold.
- Perfect for Gatherings: I brought a batch to a potluck last fall. They vanished in minutes. People kept asking for the recipe. They are the perfect snack for game day or a casual get together.
- Minimal Waste: This recipe uses pantry staples. I always have a tube of biscuit dough on hand and some ground beef in the freezer. It is a great way to use up leftover cheese or a half jar of pickles.
- Easy to Customize: You can make them spicy with jalapenos, add bacon for a bacon cheeseburger biscuit twist, or swap the beef for ground turkey. The possibilities are endless.
- Emotional Connection: For me, these little bombs are a symbol of my kitchen philosophy: find connection, not perfection. They remind me that a simple, shared meal can be the most meaningful part of the day.
Ingredients for Cheesy Beef Biscuit Bombs
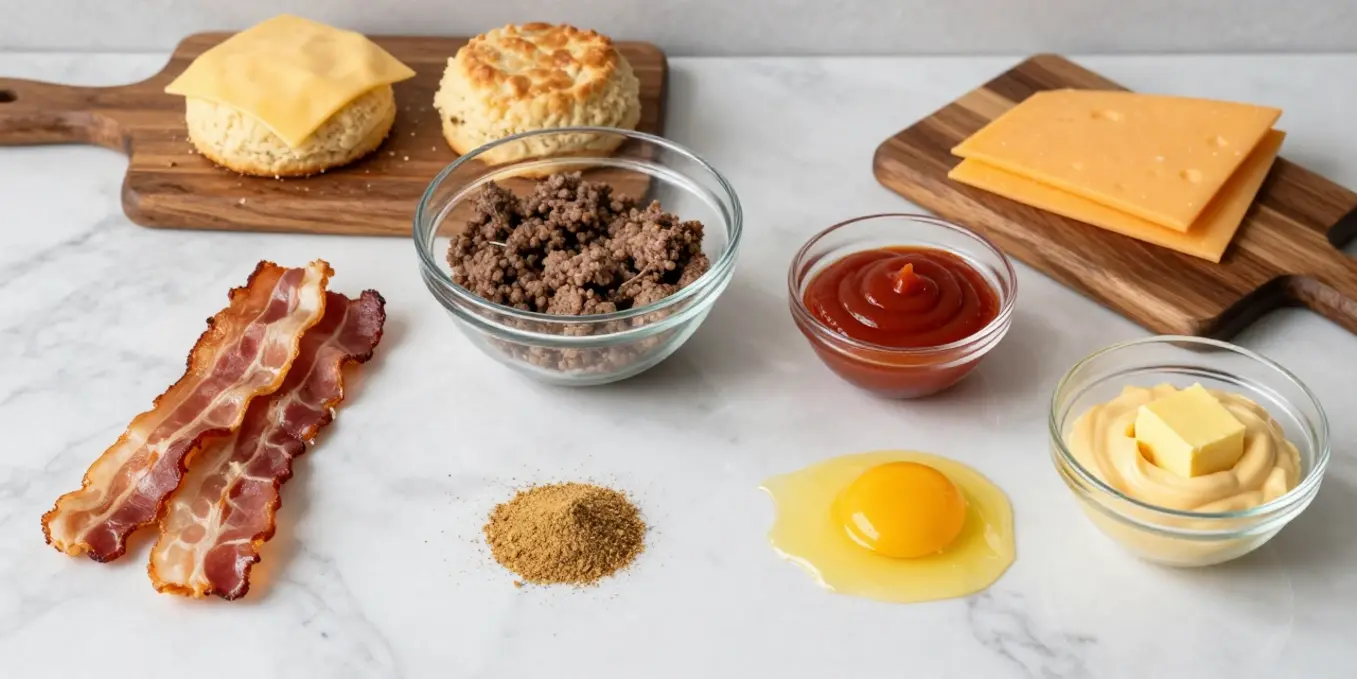
- 1 pound ground beef
- 1 tube (16.3 oz) biscuit dough (like Pillsbury Grands)
- 1 cup shredded cheddar cheese
- 1/2 cup diced onion
- 2 cloves garlic, minced
- 2 tablespoons ketchup
- 1 tablespoon yellow mustard
- 1 teaspoon garlic powder
- 1 teaspoon onion powder
- Salt and pepper to taste
- 2 tablespoons butter, melted
- Optional: 1/4 cup diced pickles or jalapenos
Substitutions: You can use ground turkey or chicken for a lighter version. For a gluten free option, use gluten free biscuit dough. For dairy free, use vegan cheese and a dairy free butter substitute. I have also made these with American cheese slices cut into small squares, and they melt beautifully.
How to Make Cheesy Beef Biscuit Bombs
Step-by-Step Instructions
Making these Cheesy Beef Biscuit Bombs is so easy, even a beginner cook can master them. The key is to work quickly with the biscuit dough so it stays cold and flaky. Let me walk you through it.
- Preheat your oven to 375°F (190°C). Line a baking sheet with parchment paper or a silicone mat. This helps with easy cleanup and prevents sticking.
- Cook the ground beef. In a large skillet over medium heat, add the ground beef and diced onion. Cook, breaking it up with a spoon, until it is browned and no longer pink. This takes about 6 to 8 minutes. Drain any excess fat. I like to use a slotted spoon to remove the meat, leaving the fat behind.
- Season the mixture. Add the minced garlic, garlic powder, onion powder, salt, and pepper. Stir in the ketchup and mustard. Cook for another minute until fragrant. The smell at this point is incredible, a savory promise of what is to come.
- Let it cool slightly. Remove the skillet from the heat and let the mixture cool for about 5 minutes. This is important because if the filling is too hot, it will melt the biscuit dough before it bakes, making it soggy. Stir in the shredded cheddar cheese and optional pickles or jalapenos.
- Prepare the biscuit dough. Open the tube of biscuit dough and separate the biscuits. Flatten each biscuit into a 4 inch circle using your hands or a rolling pin. I find it easiest to do this on a lightly floured surface.
- Fill the biscuits. Place a generous spoonful of the beef mixture in the center of each biscuit circle. Do not overfill, or they will be hard to seal. You want about 2 tablespoons per biscuit.
- Seal the bombs. Gently pull the edges of the dough up and over the filling, pinching them together firmly at the top. Roll the ball gently in your hands to make it smooth. Place the bombs seam side down on the prepared baking sheet.
- Brush with butter. In a small bowl, melt the butter. Brush the tops of each biscuit bomb with the melted butter. This gives them a beautiful golden brown color and a rich flavor.
- Bake. Bake for 12 to 15 minutes, or until the biscuits are golden brown and the filling is bubbly. The kitchen will smell like a diner, in the best way possible.
- Cool and serve. Let them cool on the baking sheet for 5 minutes before serving. This allows the cheese to set slightly so it does not burn your mouth. Serve warm.
Pro Tips & Variations
After making these dozens of times, here are my best tips and some fun variations to try.
- Pro Tip 1: Don’t Overfill. I learned this the hard way. If you put too much filling, the bombs will burst open in the oven. You want a tight seal. If a bomb does open, just pinch it shut before baking.
- Pro Tip 2: Chill the Dough. If the biscuit dough gets too warm, it becomes sticky and hard to work with. If that happens, pop the filled bombs in the fridge for 10 minutes before brushing with butter and baking.
- Pro Tip 3: Add a Little Crunch. For extra texture, I sometimes add a handful of crushed potato chips or bacon bits to the filling. It adds a wonderful salty crunch.
- Diet Variation: Gluten Free. Use your favorite brand of gluten free biscuit dough. The cooking time may vary, so check them at the 12 minute mark. They are just as delicious.
- Diet Variation: Spicy. Add 1 teaspoon of chili flakes or a diced jalapeno to the beef mixture. You can also use pepper jack cheese instead of cheddar for a spicy kick.
- Diet Variation: Keto. For a keto cheeseburger biscuit bombs version, use a low carb biscuit mix made with almond flour. The filling is naturally low carb. Be careful not to overbake, as low carb doughs can dry out quickly.
- Diet Variation: Vegan. Use a plant based ground beef, vegan cheese, and a vegan biscuit dough. Many stores now carry these easily. Brush with a plant based butter.
Cheesy Beef Biscuit Bombs Serving Suggestions
These Cheesy Beef Biscuit Bombs are a meal on their own, but they also pair wonderfully with simple sides. Here are some of my favorite ways to serve them.
- With a Side Salad: A crisp green salad with a tangy vinaigrette cuts through the richness of the beef and cheese. I like to add cherry tomatoes, cucumber, and red onion. It makes the meal feel more balanced.
- With Roasted Vegetables: Roast some broccoli or asparagus with olive oil, salt, and pepper. The slight char and earthiness are a perfect complement to the savory bombs.
- With Dipping Sauces: This is a must at my house. Set out small bowls of ketchup, mustard, ranch dressing, or a spicy mayo. The kids love to dip each bomb in a different sauce.
- With Sweet Potato Fries: The sweetness of the fries balances the saltiness of the bombs. I often make a batch of frozen sweet potato fries and serve them alongside. It is a quick and satisfying meal.
- For Breakfast: These are fantastic as a breakfast sandwich alternative. Serve them with a side of scrambled eggs and fresh fruit. The combination of eggs and the savory bombs is wonderful.
Cheesy Beef Biscuit Bombs Storage & Reheating
These bombs store beautifully, making them perfect for meal prep. Here is how to keep them fresh.
- Refrigerator: Store leftover cheeseburger biscuit bombs in an airtight container in the fridge for up to 4 days. I like to layer them with parchment paper so they do not stick together.
- Freezer: To freeze, let the bombs cool completely. Place them on a baking sheet in a single layer and freeze for 1 hour. Once solid, transfer them to a freezer safe bag or container. They will keep for up to 3 months. This is a great way to have a quick dinner ready to go.
- Reheating in the Oven: This is my preferred method. Preheat your oven to 350°F (175°C). Place the bombs on a baking sheet and heat for 10 to 12 minutes (or 15 to 18 minutes if frozen). They come out crispy and hot, just like fresh.
- Reheating in the Microwave: For a quick fix, microwave a single bomb for 30 to 45 seconds. The biscuit will be softer, but the filling will be hot and gooey. It is great for a quick lunch.
- Reheating in an Air Fryer: Set the air fryer to 320°F (160°C) and heat for 4 to 5 minutes. This gives a fantastic crispy exterior.
FAQ about Cheesy Beef Biscuit Bombs
Q: Can I make these gluten free?
A: Yes, absolutely. Use your favorite gluten free biscuit dough. Many brands work well. Just follow the package instructions for baking time, as it may vary.
Q: Can I use ground turkey instead of beef?
A: Yes, ground turkey works wonderfully. It will be a bit leaner. Add a tablespoon of olive oil to the pan when cooking to keep it moist. Season it well with salt and pepper.
Q: How do I prevent the bombs from bursting?
A: The key is to not overfill and to seal the edges firmly. Pinch the dough together well. Also, do not skip the cooling step for the filling. If the filling is too hot, it creates steam that can push the dough open.
Q: Can I make these ahead of time for a party?
A: Definitely. You can assemble them up to 24 hours ahead. Place them on a baking sheet, cover with plastic wrap, and store in the fridge. When you are ready to bake, brush with butter and bake as directed, adding a few extra minutes to the baking time.
Q: What if I don’t have biscuit dough?
A: You can make your own simple biscuit dough using flour, butter, baking powder, and milk. Alternatively, you can use puff pastry sheets cut into squares. Just adjust the baking time accordingly.
Final Thoughts
Standing in my kitchen, watching the golden brown tops of these Cheesy Beef Biscuit Bombs puff up in the oven, I feel a quiet sense of peace. This is not just about a recipe. It is about the ritual of making something with my hands, about the smell that pulls my family into the room, about the laughter that follows when we sit down to eat. I think of Ethan, of Adams and Jana, and of all the ordinary evenings that become extraordinary because we share a meal. I hope this recipe brings you that same feeling. I hope it becomes a small, joyful anchor in your week. If you make these, please let me know. Leave a comment below, share a photo, or save this to your Pinterest board. I would love to hear how they become a part of your story. And if you are looking for more easy dinner ideas, check out this Bacon Cheeseburger Biscuit Bombs for another quick meal. Also, for a fun twist, you can try these Cheeseburger Biscuit Bombs from another home cook, which inspired me to add pickles. Happy cooking, and remember, the best ingredient is always a little love.


Cheesy Beef Biscuit Bombs
Ingredients
Equipment
Method
- Preheat your oven to 375°F (190°C). Line a baking sheet with parchment paper or a silicone mat.
- In a large skillet over medium heat, add the ground beef and diced onion. Cook, breaking it up with a spoon, until it is browned and no longer pink. This takes about 6 to 8 minutes. Drain any excess fat.
- Add the minced garlic, garlic powder, onion powder, salt, and pepper. Stir in the ketchup and mustard. Cook for another minute until fragrant.
- Remove the skillet from the heat and let the mixture cool for about 5 minutes. Stir in the shredded cheddar cheese.
- Open the tube of biscuit dough and separate the biscuits. Flatten each biscuit into a 4-inch circle using your hands or a rolling pin.
- Place a generous spoonful of the beef mixture in the center of each biscuit circle. Gently pull the edges of the dough up and over the filling, pinching them together firmly at the top. Roll the ball gently in your hands to make it smooth. Place the bombs seam side down on the prepared baking sheet.
- In a small bowl, melt the butter. Brush the tops of each biscuit bomb with the melted butter.
- Bake for 12 to 15 minutes, or until the biscuits are golden brown and the filling is bubbly.
- Let them cool on the baking sheet for 5 minutes before serving.