Introduction
Ever wonder what makes a festive treat truly unforgettable? Statistics show that visually appealing, bite sized desserts are over 60% more likely to be the centerpiece of conversation at holiday gatherings. What if you could craft a simple, no bake treat that not only looks stunning but tastes divine, becoming the star of your St. Patrick’s Day celebration? This Chocolate Mint Cream Cheese Buttons Recipe St. Patrick’s Day Idea is your answer. It’s a recipe that I’ve come to cherish, not just for its delightful flavors but for the memories it helps create. I still remember the first time my kids, Adams and Jana, helped me make these. Their eyes lit up as we swirled the green coloring into the dough, their little hands carefully pressing the fork to make the button shape. It’s more than a recipe; it’s a moment of connection, a simple joy shared in the kitchen. This treat isn’t about complicated techniques or rare ingredients. It’s about bringing people together with something delicious and made with love, perfect for busy parents and seasoned home cooks alike. It’s proof that the best holiday dishes don’t have to be the most difficult.
Why You’ll Love This Chocolate Mint Cream Cheese Buttons Recipe St. Patrick’s Day Idea
As a dad who loves to see his family’s faces light up around the dessert table, I’m always searching for recipes that are both special and straightforward. These Chocolate Mint Cream Cheese Buttons are a home run every single time. They started as a fun St. Patrick’s Day experiment with the kids and quickly became a family tradition, just like our favorite Vanilla Bean Shamrock Cookies. They have that perfect balance of rich chocolate and refreshing mint, with a creamy texture that simply melts in your mouth. They’re incredibly easy to whip up, which is a lifesaver when you’re juggling a busy schedule. There’s no oven required, and the steps are simple enough for little helpers to join in, turning prep time into quality family time. These little green and brown gems are not only delicious but also incredibly festive, adding a pop of color and spirit to any celebration. Here’s why I know you’ll fall in love with them too:
- Wonderfully Simple and No-Bake: This recipe is a dream for busy parents. With no baking required, you can skip the oven preheating and long cooking times. It’s a mix, chill, and shape process that is almost foolproof. It’s as easy as making our Saint Patricks Day Puppy Chow.
- Perfectly Festive for St. Patrick’s Day: The vibrant green swirls and rich chocolate base make these buttons a visually stunning addition to your holiday spread. They capture the fun and spirit of St. Paddy’s Day in a single bite.
- Irresistible Flavor Combination: The cool, refreshing taste of mint paired with decadent chocolate and tangy cream cheese is a classic for a reason. It’s a sophisticated yet comforting flavor profile that appeals to both kids and adults. For another great no bake treat, check out Maria’s Mixing Bowl and her delicious version.
- Kid-Friendly and Fun to Make: The process of mixing, rolling, and pressing the buttons is a fantastic activity for kids. They get to play a hands on role in creating a delicious treat, which makes the result even sweeter.
- Completely Make-Ahead Friendly: You can prepare these buttons several days in advance, making your party planning so much easier. They store beautifully in the fridge, so all you have to do is arrange them on a platter when it’s time to serve.
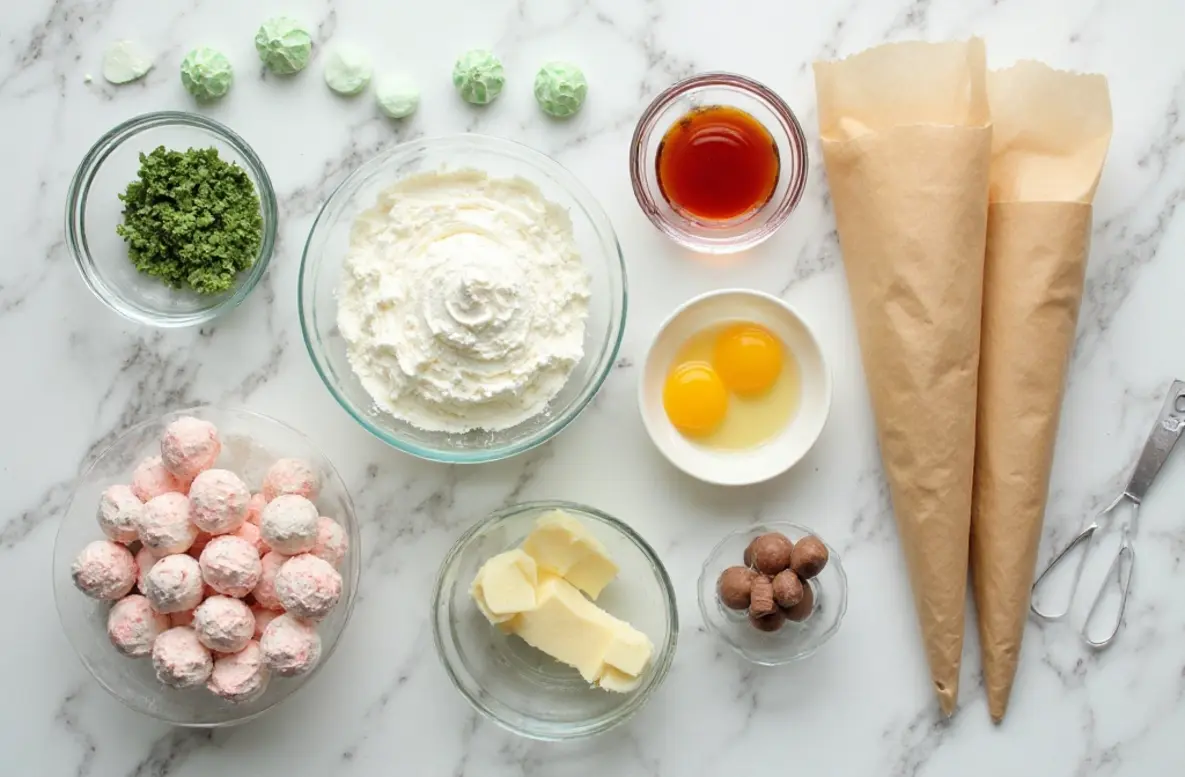
Ingredients for Chocolate Mint Cream Cheese Buttons Recipe St. Patrick’s Day Idea
- 4 ounces cream cheese, softened
- 2 tablespoons unsalted butter, softened
- 1/2 teaspoon mint extract
- 4 cups powdered sugar, sifted
- Green food coloring
- 4 ounces semi sweet chocolate, chopped
- 1 teaspoon coconut oil or vegetable shortening
Substitutions:
- Mint Extract: If you prefer a stronger, cooler mint flavor, you can use 1/4 teaspoon of peppermint extract instead.
- Cream Cheese: For a lighter version, you can try using Neufchâtel cheese, although the texture will be slightly less rich.
- Semi-Sweet Chocolate: Feel free to use milk chocolate for a sweeter button or dark chocolate for a more intense flavor.
How to Make Chocolate Mint Cream Cheese Buttons Recipe St. Patrick’s Day Idea
Step-by-Step Instructions
- In a large mixing bowl, combine the softened cream cheese and softened butter. Using a hand mixer or a stand mixer, beat the mixture on medium speed until it’s smooth and creamy, with no lumps remaining. This creates the perfect base for our St. Patrick’s Day treats.
- Add the mint extract to the cream cheese mixture and mix briefly to combine.
- Gradually add the sifted powdered sugar, one cup at a time, mixing on low speed. The dough will become quite thick. Once all the sugar is incorporated, the dough should be stiff but pliable.
- Divide the dough in half. Set one half aside. To the other half, add a few drops of green food coloring. Mix until the color is evenly distributed. You can add more coloring until you reach your desired shade of festive green.
- Take a small piece of the plain dough and a small piece of the green dough and gently roll them together into a 1 inch ball. The colors should swirl together for a marbled effect. Place the ball on a baking sheet lined with parchment paper.
- Repeat this process with the remaining dough, arranging the balls in a single layer on the parchment paper.
- Dip the tines of a fork in a little powdered sugar to prevent sticking, then gently press the fork onto the top of each ball to flatten it slightly and create the classic ‘button’ ridges.
- Place the baking sheet with the buttons in the refrigerator to chill for at least 30 minutes. This helps them firm up before dipping in chocolate.
- While the mints are chilling, prepare the chocolate. In a microwave safe bowl, combine the chopped semi sweet chocolate and the coconut oil. Microwave in 20 second intervals, stirring in between, until the chocolate is completely melted and smooth.
- Remove the chilled buttons from the refrigerator. Dip the bottom of each button into the melted chocolate, allowing any excess to drip off.
- Place the chocolate dipped buttons back on the parchment lined baking sheet.
- Return the baking sheet to the refrigerator for another 15 to 20 minutes, or until the chocolate has fully set.
Pro Tips & Variations
Over the years, I’ve learned a few tricks to make these Chocolate Mint Cream Cheese Buttons absolutely perfect every time. First, always use softened, full fat block cream cheese, not the whipped or spreadable kind. The block style provides the right consistency and prevents the mints from becoming too sticky. Also, sifting your powdered sugar is a non negotiable step! It guarantees a silky smooth texture without any lumps. When swirling the colors, handle the dough as little as possible to keep the green and white distinct for that beautiful marbled look. Just like with my Old Fashioned Butter Mints Recipe, chilling is crucial; don’t rush the chilling times, as it helps the buttons hold their shape and makes dipping in chocolate a breeze.
Here are a few variations to get creative:
- Different Holiday Themes: Use red food coloring for Valentine’s Day or Christmas, or pastel colors for Easter. You can adapt this recipe for almost any occasion.
- Flavor Twists: Swap the mint extract for vanilla, almond, or even orange extract. Pair orange extract with dark chocolate for a sophisticated flavor combination.
- Add Some Crunch: Mix finely chopped nuts like pecans or walnuts into the dough for a delightful textural contrast. You could also sprinkle a few crushed pistachios on the chocolate before it sets.
- Fully Dipped: For an extra indulgent treat, use a fork to dip the entire button in melted chocolate instead of just the bottom. Let the excess drip off before placing it on the parchment paper to set.
Serving Suggestions
These Chocolate Mint Cream Cheese Buttons are a fantastic standalone treat, but they also play well with others! We love setting them out on a big dessert platter for parties. They look wonderful alongside other festive goodies. For St. Patrick’s Day, I often pair them with my Shamrock Swirl Pie for a truly decadent green-themed dessert table. They are also the perfect sweet bite to enjoy with a hot cup of coffee or a cold glass of milk. You can arrange them on a multi tiered dessert stand to create an impressive centerpiece for your celebration. For a different but equally delicious button style recipe, check out this one from Mom On Timeout. Another great idea is to crumble a few of these buttons over a scoop of vanilla or chocolate ice cream for an instant mint chocolate chip upgrade. They add flavor, texture, and a festive touch to a simple dessert.
Storage & Reheating for Chocolate Mint Cream Cheese Buttons Recipe St. Patrick’s Day Idea
One of the best things about this recipe is how well the buttons store. To store them, place the finished buttons in an airtight container, separating layers with parchment or wax paper to prevent them from sticking together. They will keep in the refrigerator for up to two weeks. The mint flavor actually deepens and improves after a day or two, so making them ahead of time is a fantastic option. You can also freeze these mints for longer storage. Arrange them in a single layer on a baking sheet and freeze until solid, then transfer them to a freezer safe bag or container. They can be frozen for up to three months. When you’re ready to enjoy them, simply take them out of the freezer and let them thaw in the refrigerator for a few hours. Since this is a no bake recipe, no reheating is necessary. They are meant to be served chilled, straight from the fridge.
FAQ about Chocolate Mint Cream Cheese Buttons Recipe St. Patrick’s Day Idea
Can I make these mints ahead of time?
Absolutely! These buttons are a perfect make ahead dessert. You can store them in an airtight container in the refrigerator for up to 2 weeks. The flavors will even meld and become richer after a day or two.
Why are my cream cheese mints sticky?
If your dough is too sticky, it usually means there isn’t enough powdered sugar. The dough should be stiff and easy to handle. Add more sifted powdered sugar, a little at a time, until the dough is no longer sticky. Chilling the dough also helps significantly.
Can I use a different kind of extract?
Yes, you can easily customize the flavor. Vanilla, almond, or orange extract would all be delicious. Simply substitute it for the mint extract in the same quantity.
What is the best way to get the marbled color effect?
The key is to not over mix the doughs. After coloring half the dough green, take small, equal sized pieces of the white and green doughs. Gently press them together and roll them into a ball. The less you work the dough, the more distinct the swirls will be.
Final Thoughts on Chocolate Mint Cream Cheese Buttons Recipe St. Patrick’s Day Idea
There you have it a simple, festive, and incredibly delicious treat that’s sure to bring smiles to your St. Patrick’s Day celebration. I truly believe that cooking is about creating joy and connection, and this Chocolate Mint Cream Cheese Buttons Recipe St. Patrick’s Day Idea is a perfect example of that. It’s more than just a sweet treat; it’s an opportunity to create memories in the kitchen with your loved ones. I hope you and your family have as much fun making and eating these as we do. If you try this recipe, I would love to hear from you! Please leave a comment below and let me know how they turned out. And don’t forget to save this recipe to your favorite Pinterest board so you can find it easily next year! For more family friendly recipes and kitchen inspiration, be sure to subscribe to the Mister Recipes newsletter.
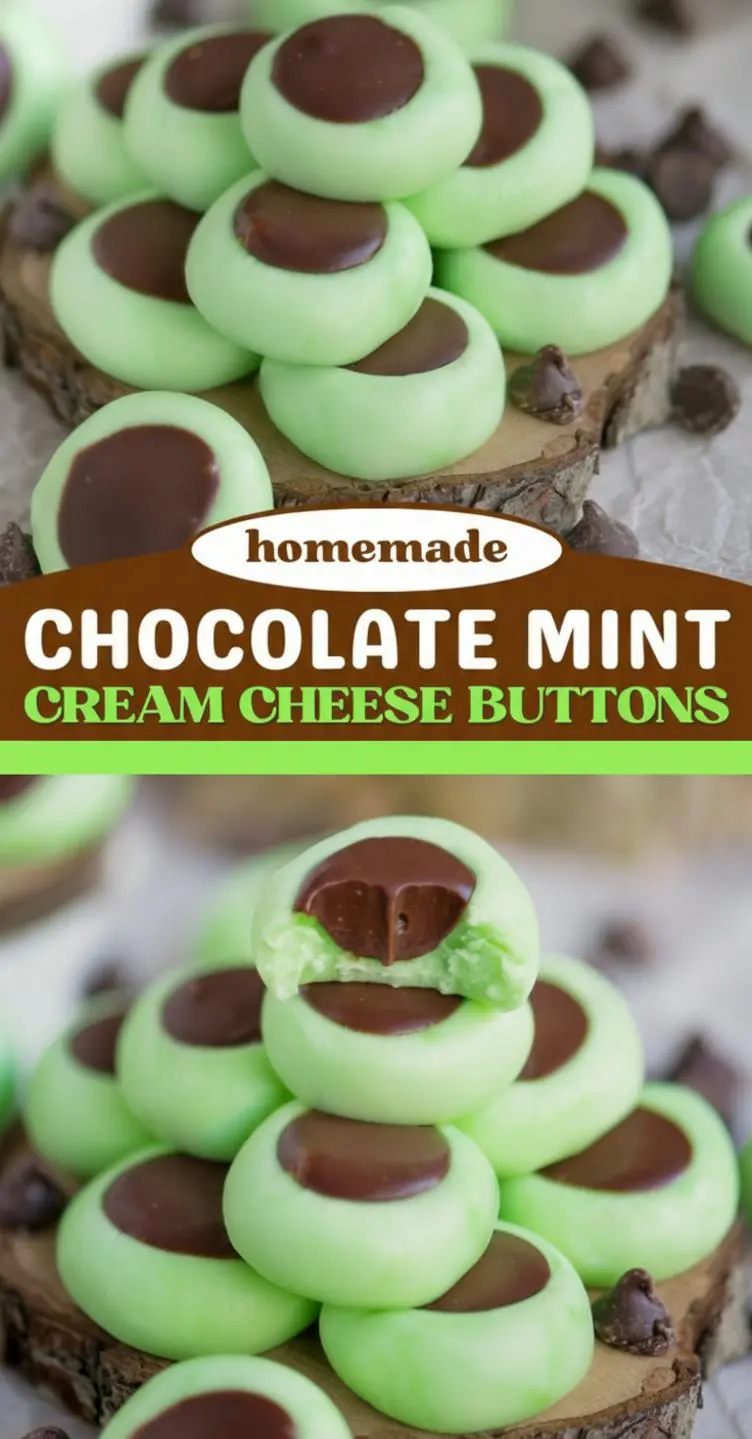
Chocolate Mint Cream Cheese Buttons Recipe St. Patrick's Day Idea
Ingredients
Equipment
Method
- In a large mixing bowl, combine the softened cream cheese and softened butter. Beat with a hand mixer or stand mixer on medium speed until smooth and creamy.
- Add the mint extract and mix briefly to combine.
- Gradually add the sifted powdered sugar, one cup at a time, mixing on low speed until all is incorporated and the dough is stiff but pliable.
- Divide the dough in half. Set one half aside. To the other half, add a few drops of green food coloring and mix until evenly distributed.
- Take a small piece of plain dough and a small piece of green dough, roll together into a 1-inch ball. Place on a parchment-lined baking sheet.
- Repeat with remaining dough, arranging balls in a single layer.
- Dip the tines of a fork in powdered sugar and press onto each ball to flatten slightly and create button ridges.
- Chill the buttons in the refrigerator for at least 30 minutes to firm up.
- In a microwave-safe bowl, combine chopped semi-sweet chocolate and coconut oil. Microwave in 20-second intervals, stirring until melted and smooth.
- Dip the bottom of each chilled button into the melted chocolate, letting excess drip off, and place back on the baking sheet.
- Refrigerate for another 15-20 minutes until chocolate is set.