
Introduction
Have you ever looked at a perfectly ripe kiwi, its vibrant green flesh and tiny black seeds, and thought, “How can I transform this into something truly magical, something that sparks joy and a little bit of playful mischief?” Well, my friend, today we’re diving into a dessert that does just that: **Kiwi Slime Pies**. It’s a dish that goes beyond just taste; it’s an experience, a memory in the making, and a playful nod to childhood wonder, all wrapped up in a creamy, tangy, and utterly delightful package.
Growing up in my Midwestern kitchen, there was always an unspoken rule: food should tell a story. Whether it was Grandma’s apple pie, tasting of crisp autumn air and quiet Sunday afternoons, or my mom’s hearty stew, packed with the comfort of a busy weeknight, each dish held a piece of our family’s heart. And for me, this **Kiwi Slime Pie Recipe** isn’t just about combining ingredients; it’s about creating a moment. It’s about the excited squeals of my children, Olivia and James, as they peek into the fridge, their eyes wide at the sight of that electric green.
This recipe is a testament to how simple ingredients, a dash of creativity, and a whole lot of love can transform an ordinary day into something extraordinary. We’re going to craft a dessert that’s not only incredibly delicious but also visually stunning—a vibrant green dream that’s perfect for holidays, celebrations, or just a Tuesday evening pick-me-up. It’s an **Easy Kiwi Slime Pie** that feels gourmet without the fuss, and I can promise you, it’s going to become a fast favorite in your home, just as it has in ours. Get ready to embrace the joy of playful cooking and create a dessert that will have everyone asking for seconds!
Why You’ll Love These Kiwi Slime Pies
There’s a certain magic in preparing a dish that brings smiles to everyone’s faces, and these **Kiwi Slime Pies** do that in spades! For me, they embody everything I cherish about cooking: simplicity, vibrant flavors, and the joy of sharing. It’s a recipe that feels like a warm hug, a bright splash of color in a grey day, and a playful wink all at once.
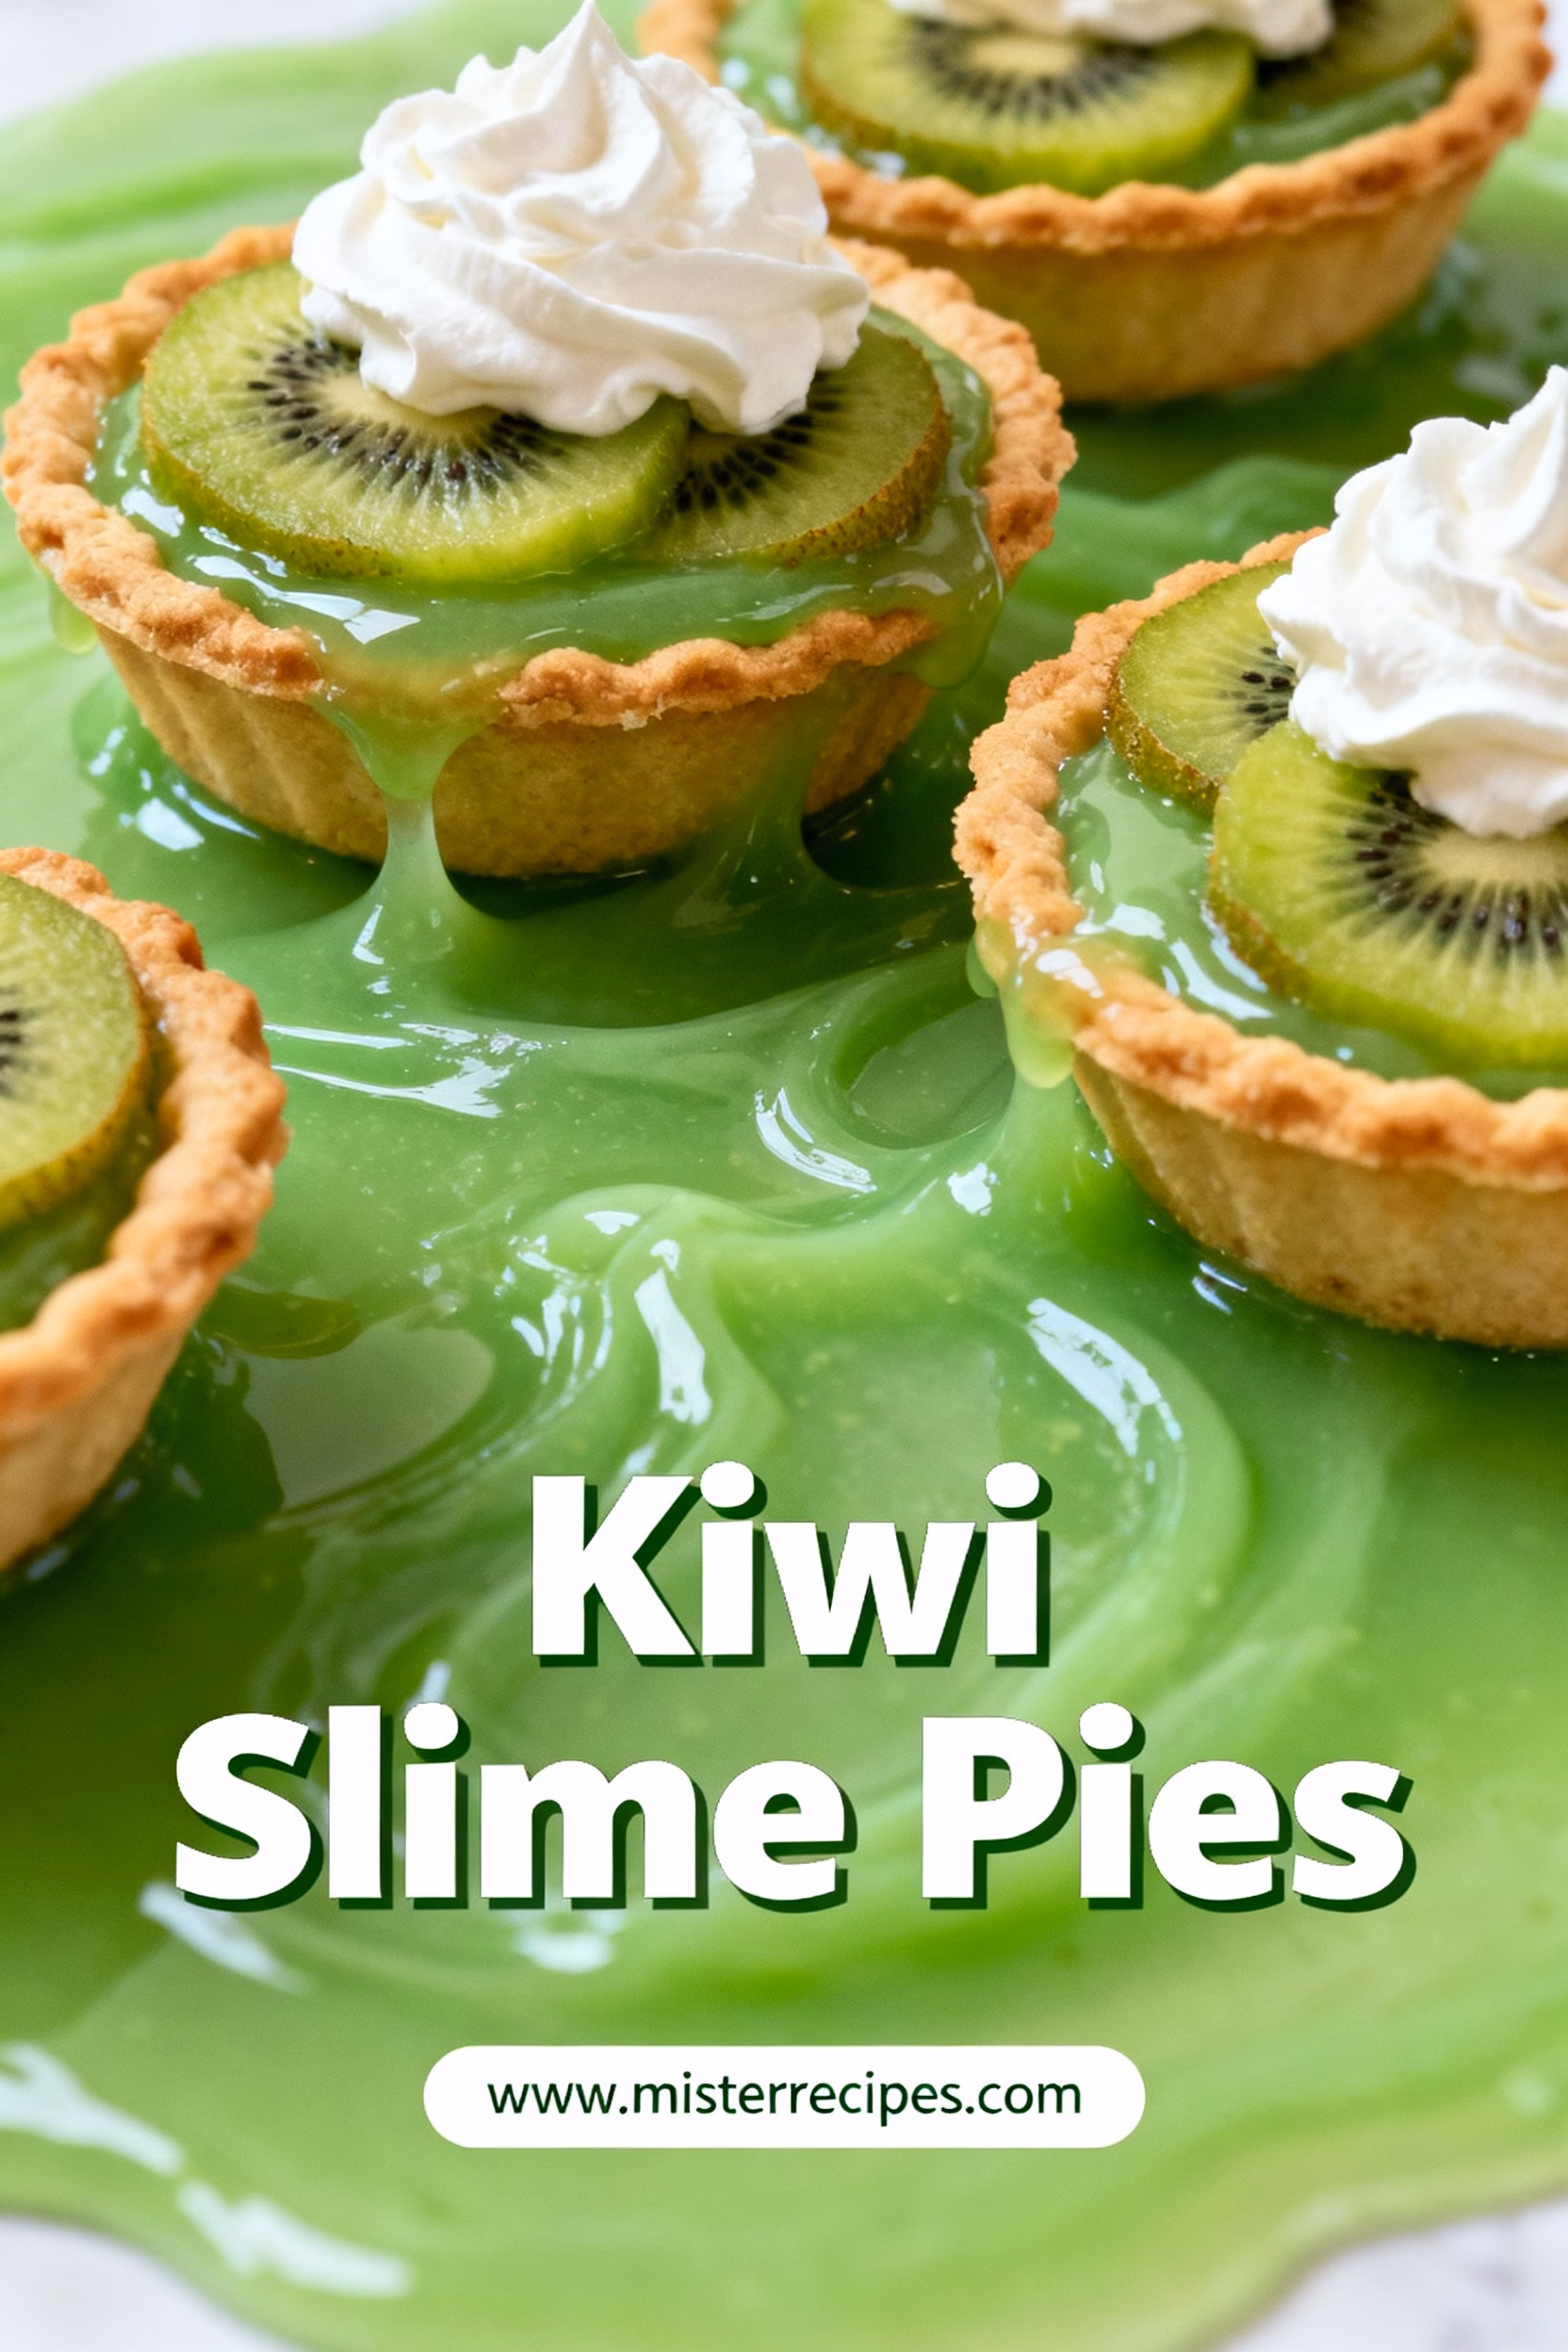
First off, let’s talk about the sheer delight of the color. That incredible, vivid green instantly catches the eye and whispers of spring gardens and mischievous leprechauns – making it perfect for Green Desserts for St. Patrick’s Day or any occasion that calls for a pop of lively color. It’s a showstopper, plain and simple, and it always elicits a gasp of delight when I bring it to the table. Olivia and James practically dance with excitement whenever they see them!
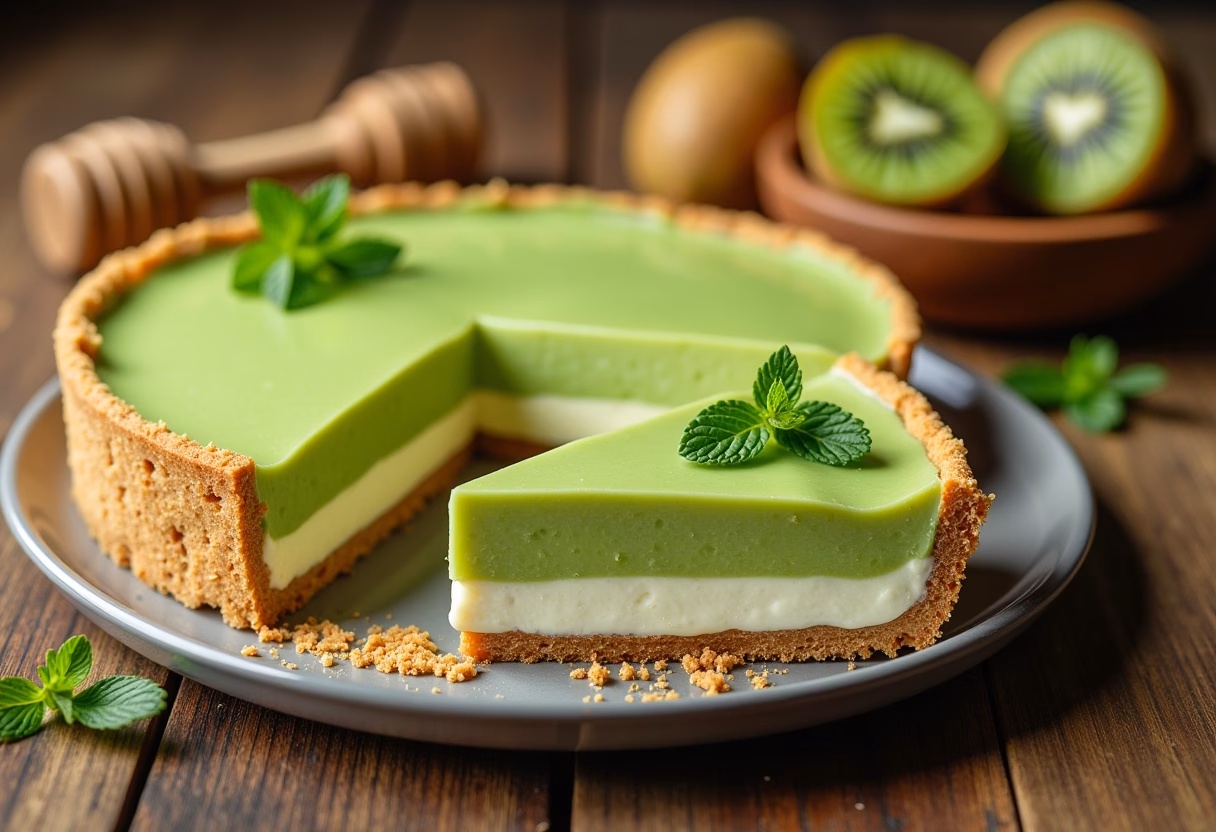
Then there’s the incredible texture. This isn’t just any pie; it’s a **Creamy Kiwi Slime Pie**, smooth and luscious, melting in your mouth with every bite. It’s that perfect balance of firm enough to hold its shape but soft enough to be utterly decadent. There’s something so comforting about a creamy dessert, a little cloud of happiness on your tongue.
And the flavor! Oh, the flavor. The tartness of fresh kiwi perfectly balances the sweetness, creating a symphony of taste that’s both refreshing and utterly satisfying. It’s a taste that transports you, perhaps to a sun-drenched orchard or a bright summer picnic. It’s not overpoweringly sweet, allowing the natural tang of the kiwi to truly shine. For those who enjoy a zesty kick, a **Kiwi Lime Slime Pie** variation can be easily achieved with a hint of lime.
But what truly makes this recipe a keeper in our home is how incredibly easy it is. This is a **No-Bake Kiwi Slime Pie**, which means less time hovering over a hot oven and more time enjoying the moments that matter. It’s the kind of recipe you can whip up on a whim for unexpected guests, or involve the whole family in, from crushing cookies for the crust to arranging the beautiful kiwi slices on top. This ease makes it a contender for **Easy No-Bake Pies** or even Summer Pie Recipes when you want something light and refreshing without turning on the oven.
And speaking of family, these pies are a huge hit with the little ones. They are definitely **Kiwi Slime Pie for Kids**, with that fun “slime” texture and vibrant color. My kids love helping with the mixing and decorating, their small hands carefully placing kiwi slices or a mountain of whipped cream topping. It’s not just a dessert; it’s an activity, a way to connect and create together in the kitchen.
It’s also surprisingly versatile. With options like a **Kiwi Slime Pie with Oreo Crust** for a chocolatey twist, or a **Vegan Kiwi Slime Pie** for those with dietary preferences, there’s a version for everyone. For those avoiding gelatin, a **Kiwi Slime Pie without Gelatin** is entirely possible with alternative thickeners, ensuring everyone can enjoy this delightful treat. You can even try a **Gluten-Free Kiwi Slime Pie** by simply swapping out the crust for a gluten-free option.
So, whether you’re looking for a dessert that’s quick, impressive, delicious, or just plain fun, these **Kiwi Slime Pies** tick all the boxes. They’re a celebration of flavor, family, and the simple joy of a truly good pie.
- **Quick and Easy:** A phenomenal no-bake dessert that comes together in a flash, perfect for busy schedules.
- **Vibrant and Fun:** The striking green color and “slime” texture make it an instant hit, especially with children and for festive occasions.
- **Creamy and Refreshing:** A luscious, smooth filling with the perfect balance of sweet and tangy kiwi flavor.
- **Family-Friendly:** A dessert everyone will adore, from little ones to grown-ups, and a great recipe to get kids involved in the kitchen.
- **Customizable:** Easily adaptable to various dietary needs and flavor preferences with simple substitutions.
Ingredients for Kiwi Slime Pies
Gathering your ingredients for these **Kiwi Slime Pies** feels like preparing for a delightful painting project, with each component contributing to a masterpiece of flavor and texture. Here’s what you’ll need:
* **For the Crust:**
* 24 Oreo cookies (about 1.5 packages) – for a classic Kiwi Slime Pie with Oreo Crust.
* 6 tablespoons unsalted butter, melted.
* *Substitution:* For a Gluten-Free Kiwi Slime Pie, use gluten-free sandwich cookies. A **Kiwi Slime Pie with Pretzel Crust** offers a delightful sweet and salty crunch while a simple graham cracker crust works beautifully as well.
* **For the “Slime” Filling:**
* 8 ounces cream cheese, softened to room temperature. Full-fat works best for that creamy texture!
* 1 cup granulated sugar.
* 1/2 teaspoon vanilla extract.
* 1/2 teaspoon almond extract (optional, but lovely!).
* 1 (8 ounce) container whipped topping (like Cool Whip), thawed.
* 1 (3 ounce) package kiwi-flavored gelatin (Jell-O brand or equivalent).
* 1 cup boiling water.
* 1 cup cold water.
* Green food coloring (optional, if you want an extra vibrant “slime” hue, though the gelatin provides a good base).
* *Substitution:* For a **Vegan Kiwi Slime Pie**, use vegan cream cheese, coconut whipped topping, and agar-agar powder instead of gelatin. To make a **Kiwi Slime Pie without Gelatin**, you can use cornstarch or arrowroot powder with a concentrated kiwi juice for thickening and flavor. For a lighter texture, consider a **Kiwi Slime Pie with Greek Yogurt** mixed into the cream cheese layer. A **Kiwi Slime Pie with Condensed Milk** can also achieve a richer, sweeter filling without gelatin.
* **For the Topping:**
* 3-4 ripe kiwis, peeled and thinly sliced, for garnish.
* Additional whipped topping or freshly made whipped cream, for serving.
* *Optional:* Shaved white chocolate, mint leaves, or a sprinkle of toasted coconut for extra flair. Check out our Kiwi Slime Pie Topping Ideas for more inspiration!
How to Make Kiwi Slime Pies
Step-by-Step Instructions
Let’s get our hands a little sticky and our hearts full, shall we? Creating these **Kiwi Slime Pies** is a delightful journey, not just a recipe. Each step is a chance to infuse a little love and patience into a dessert that will bring so much joy. Remember, good cooking, like good living, is about enjoying the process.
**1. Prepare the Crust (Our Foundation of Flavor):**
* **Crush the Cookies:** In a food processor, pulse the **Oreo cookies** until they resemble fine crumbs. If you don’t have a food processor, place the cookies in a Ziploc bag and crush them with a rolling pin. This is an excellent step for younger helpers – just be sure to supervise the enthusiastic smashing!
* **Melt the Butter:** In a small, microwave-safe bowl, melt the unsalted butter.
* **Combine and Press:** Pour the melted butter over the cookie crumbs and mix until thoroughly combined. The mixture should resemble wet sand. Press this mixture firmly and evenly into the bottom of a 9-inch pie plate. Use the back of a spoon or the bottom of a flat-bottomed glass to create a compact, smooth crust.
* **Chill:** Place the crust in the refrigerator while you prepare the filling. This helps it set and become nice and firm.
**2. Craft the Creamy Filling (The Heart of Our Pie):**
* **Soften the Cream Cheese:** Ensure your **cream cheese** is at room temperature. This is crucial for a smooth, lump-free filling. If it’s too cold, you’ll end up with stubborn little bits.
* **Cream Together:** In a large mixing bowl, using an electric mixer, beat the softened cream cheese, granulated sugar, vanilla extract, and almond extract (if using) until the mixture is light, fluffy, and completely smooth. Scrape down the sides of the bowl often to ensure everything is incorporated evenly.
* **Fold in Whipped Topping:** Gently fold in the thawed whipped topping. Do this carefully so you don’t deflate the cream cheese mixture. We want a light and airy filling! Don’t overmix; just fold until no streaks of whipped topping remain.
**3. Prepare the Kiwi Gelatin (Our Slime’s Secret):**
* **Dissolve Gelatin:** In a separate medium-sized bowl, pour the boiling water over the kiwi-flavored gelatin powder. Whisk continuously for about 2 minutes, or until the gelatin has completely dissolved. It’s important to get it fully dissolved so your “slime” sets perfectly.
* **Add Cold Water:** Stir in the cold water. At this point, you can add a few drops of green food coloring if you desire a more intense, vibrant green hue. I sometimes do this for extra pizzazz, especially when I’m making it for a special occasion.
* **Cool Slightly:** Let the gelatin mixture cool down for about 10-15 minutes, or until it’s only slightly warm to the touch, but not yet set. This step is vital—if it’s too hot, it can melt the cream cheese mixture, and if it’s too cold, it will start to set too quickly.
**4. Combine and Assemble (The Magic Happens!):**
* **Blend the “Slime”:** Slowly pour the slightly cooled gelatin mixture into the cream cheese and whipped topping mixture. Gently fold them together until the color is uniform and there are no streaks of unmixed cream cheese. This is where your filling truly transforms into that glorious “slime” texture.
* **Pour into Crust:** Retrieve your chilled **Oreo crust** from the refrigerator. Carefully pour the kiwi slime filling evenly over the crust.
* **Chill to Perfection:** Return the pie to the refrigerator and chill for at least 4-6 hours, or preferably overnight. This extended chilling time is key to ensuring the pie is perfectly set and easy to slice. Patience is a virtue, especially when a delicious pie is waiting!
**5. Garnish and Serve (The Grand Finale):**
* **Slice and Arrange Kiwi:** Once the pie is fully set, peel and thinly slice your fresh kiwis. Arrange them beautifully on top of the pie. This is your chance to get creative with your **Kiwi Slime Pie Decoration**!
* **Add Whipped Topping:** Just before serving, add a dollop or a swirl of additional whipped topping to each slice. The fresh whipped cream provides a lovely contrast to the tangy kiwi filling.
* **Enjoy!** Slice into glorious wedges and serve these delightful **Kiwi Slime Pies**. Be ready for oohs and aahs!
This step-by-step guide on **How to Make Kiwi Slime Pie** ensures that even beginner bakers can achieve a show-stopping dessert. Every ingredient and every action plays a part in creating this unique and memorable pie.
Pro Tips & Variations
Making these **Kiwi Slime Pies** is already a joy, but with a few extra tips and creative twists, you can elevate your pie from great to absolutely unforgettable. Think of these as little whispers from my kitchen, insights gained from countless batches and happy experiments.
**Pro Tips:**
* **Patience with the Cream Cheese:** I cannot stress this enough – ensure your cream cheese is truly at room temperature. If it’s cold, you’ll be fighting lumps, and your filling won’t be as silky smooth. A quick trick if you forget: unwrap the cream cheese and microwave it for 15-20 seconds on low power. But truly, setting it out for an hour or two is the best way.
* **Gentle Folding:** When incorporating the whipped topping and then the gelatin mixture, resist the urge to vigorously beat it. Gentle folding preserves the airiness and creaminess of the filling. Overmixing can lead to a denser, less pleasant texture. I always imagine mixing with the care you’d use to lull a baby to sleep!
* **The Chill Factor:** Do not rush the chilling time. Seriously. A minimum of 4 hours, and ideally overnight, allows the gelatin to fully set and the flavors to meld beautifully. If you try to cut it too soon, you’ll have a runny mess, and nobody wants that! This is a crucial **Kiwi Slime Pie Make-Ahead Tip** for perfect presentation.
* **Perfect Kiwi Slices:** For the most beautiful presentation, use a *very* sharp knife to slice your kiwis thinly and evenly. Arrange them thoughtfully. Those small details make a big difference in the visual appeal, making your **Kiwi Slime Pie Decoration** truly shine.
* **Crust Perfection:** For an extra sturdy **Oreo crust**, after pressing it into the pie plate, bake it for 8-10 minutes at 350°F (175°C) before chilling. Let it cool completely before adding the filling. This creates a deeply satisfying, crisp crust that holds up wonderfully, especially for those adventurous little hands!
**Variations (Because Experimentation is the Spice of Life!):**
* **Kiwi Lime Slime Pie:** For a burst of extra zing, substitute half of the kiwi gelatin with lime-flavored gelatin, or simply add 1-2 tablespoons of fresh lime juice to the cream cheese mixture. It gives it a delightful, pucker-worthy tang!
* **Tropical Slime Pie:** Blend in 1/2 cup of finely diced mango or pineapple into the cream cheese mixture for a tropical twist that complements the kiwi so well. Imagine sunshine in every bite! This transforms it into one of those **Unique Pie Flavors** that will have everyone talking.
* **Dairy-Free/Vegan Delight:** For a **Vegan Kiwi Slime Pie**, use a vegan Oreo crust or a crust made from crushed digestive biscuits and vegan butter. Replace the cream cheese with a dairy-free cream cheese alternative, and the whipped topping with a coconut-based whipped cream. For the gelatin, use agar-agar powder according to package directions, or a kiwi-flavored vegan jelly mix. This makes the pie accessible for everyone!
* **Gluten-Free Goodness:** Simply swap out the regular Oreo cookies for gluten-free chocolate sandwich cookies in the crust. The rest of the filling ingredients are typically gluten-free, but always double-check your gelatin packaging. This allows for a delightful **Gluten-Free Kiwi Slime Pie**.
* **Adult Slime Pie (21+):** For a grown-up version, add a tablespoon or two of a clear, fruity liqueur, like a melon or white rum, to the gelatin mixture *after* it has dissolved and cooled slightly. Just a hint to add a little sparkle to your next dinner party!
These tips and variations ensure that your **Kiwi Slime Pies** are not only delicious but also perfectly suited to your family’s tastes and any dietary needs. Don’t be afraid to experiment a little; that’s where the real magic of home cooking lies!
Serving Suggestions
Once your magnificent **Kiwi Slime Pies** are perfectly chilled and ready to impress, it’s time to think about how to best present and enjoy them. For me, serving a dessert is an art, a final flourish to a meal or a simple celebratory moment.
* **Dollop of Whipped Cream:** This is a classic for a reason! A generous dollop of freshly whipped cream or a fluffy swirl of thawed whipped topping on each slice is simply divine. The lightness and slight sweetness of the cream balance the tangy kiwi beautifully. You can be playful here, making tall peaks or delicate swoops. This is a must for the ultimate **Kiwi Slime Pie with Whipped Cream Topping**.
* **Fresh Fruit Medley:** Embrace the vibrant flavors of summer by serving your **Kiwi Slime Pies** alongside a small medley of other fresh fruits like sliced strawberries, blueberries, or raspberries. The contrasting colors and textures add another layer of enjoyment, making it feel like a truly indulgent **Fruity Slime Recipe**.
* **A Sprinkle of Toasted Coconut:** For an exotic touch, lightly toast some shredded coconut flakes in a dry pan until golden brown and sprinkle them over the whipped cream. The subtle nutty crunch and tropical flavor complement the kiwi wonderfully.
* **Chocolate Shavings:** A delicate scattering of dark or white chocolate shavings provides a sophisticated counterpoint to the sweetness and tang of the pie. The slight bitterness of dark chocolate can be a revelation! This adds another dimension to your **Kiwi Slime Pie Topping Ideas**.
* **Mint Garnish:** A few fresh mint leaves, strategically placed, not only add a pop of color but also a refreshing aroma. It’s a simple touch that elevates the entire presentation. Kiwi Lime Pie often benefits from such fresh garnishes.
These **Kiwi Slime Pie Serving Suggestions** will not only make your dessert look irresistible but will also enhance the overall eating experience, turning a simple pie into a memorable centerpiece.
Storage & Reheating (or rather, “How to Keep the Slime Perfect!”)
You’ve invested your time and love into crafting these beautiful **Kiwi Slime Pies**, so naturally, you want to keep them fresh and delicious for as long as possible. The good news is, no-bake pies are quite forgiving when it comes to storage!
**Storage Instructions:**
* **Refrigeration is Key:** Since this is a no-bake pie with dairy and gelatin, it absolutely *must* be stored in the refrigerator. Cover it tightly with plastic wrap or aluminum foil to prevent it from absorbing any odors from other foods in your fridge and to keep the crust from getting soggy.
* **How Long It Lasts:** Stored properly, your **Kiwi Slime Pie** will maintain its fresh taste and firm texture for 3-4 days in the refrigerator. After that, the crust might start to soften, and the fresh kiwi topping might lose some vibrancy, though it will still be edible.
* **Pre-cutting for Parties:** If you’re serving this pie for a party, you can pre-slice it and then store the individual slices in an airtight container in the fridge. This makes serving a breeze!
**Freezing (Yes, You Can Freeze It!):**
* **Wrap It Well:** If you want to store your pie for a longer period, it freezes beautifully! Make sure it’s fully chilled and set. Wrap the entire pie (or individual slices) tightly in several layers of plastic wrap, then an additional layer of aluminum foil. This dual layer protection prevents freezer burn.
* **How Long It Lasts:** Frozen **Kiwi Slime Pies** can be kept for up to 1 month. Beyond that, the texture might start to degrade slightly, though the flavor will likely still be good.
* **Thawing:** To enjoy a frozen pie, simply transfer it from the freezer to the refrigerator and let it thaw overnight (6-8 hours). Do not try to thaw it at room temperature, as this can affect the texture and food safety.
* **No Reheating Necessary:** Since this is a chilled dessert, there’s no reheating involved! Just thaw, garnish, and serve your delicious **Kiwi Slime Pie**. For more detailed **Kiwi Slime Pie Storage Instructions**, always refer to the specific notes for gelatin-based desserts.
Proper storage ensures that every slice of your **Kiwi Slime Pie** is as perfect as the first, allowing you to savor the joy for days to come!
FAQ about Kiwi Slime Pies
Over the years, as I’ve shared countless recipes, I’ve learned that a good conversation often starts with a few curious questions. And these **Kiwi Slime Pies** certainly spark some! Here are some common inquiries I hear, along with my gentle insights.
**Q1: Can I make this a truly vibrant green? What if my kiwi gelatin isn’t green enough?**
A: Absolutely! While the kiwi gelatin provides a lovely base color, you can enhance it to achieve that fantastic, playful “slime” look. After dissolving the gelatin and adding the cold water, simply stir in a few drops of green food coloring until you reach your desired shade. Remember, a little goes a long way! This is a simple trick for **Kiwi Slime Pie Food Coloring** to get that really eye-catching hue, perfect for No-Bake Kiwi Cheesecake inspiration too.
**Q2: I don’t have fresh kiwis. Can I still make this pie?**
A: While fresh kiwi slices really make the presentation pop and add a wonderful burst of flavor to your **Kiwi Slime Pie**, you can certainly make the pie even without them. The filling still delivers that delicious kiwi taste. If you’re set on a fruit topping, consider using canned mandarin oranges or drained crushed pineapple as an alternative, or simply garnish with extra whipped cream and perhaps some chocolate shavings.
**Q3: How can I make this pie healthier?**
A: That’s a thoughtful question! For a lighter version of your **Creamy Kiwi Slime Pie**, you can make a few substitutions. Opt for reduced-fat cream cheese and a sugar substitute for some of the granulated sugar. You could also try making a **Kiwi Slime Pie with Greek Yogurt** by incorporating strained, plain Greek yogurt into the cream cheese mixture for added protein and a tangy kick, reducing some of the cream cheese. For the crust, a simple graham cracker crust made with less butter can also lighten things up.
**Q4: My pie filling hasn’t set completely. What went wrong?**
A: This usually points to two common issues with your **Kiwi Slime Pie Troubleshooting**. Firstly, the gelatin might not have dissolved completely in the boiling water. Ensure you whisk it for at least 2 minutes until no granules remain. Secondly, and more often, the dissolved gelatin mixture might have been too warm when added to the cream cheese mixture. If it’s too hot, it can affect the setting power of the gelatin. Ensure it’s cooled to just slightly warm (lukewarm, not hot) before combining. And finally, ensure adequate chilling time! Patience is truly a virtue with gelatin-based desserts.
**Q5: Can I use real kiwi pulp in the filling for extra flavor?**
A: You can, but with a word of caution! Fresh kiwi contains an enzyme called actinidain which can prevent gelatin from setting. If you want to incorporate fresh kiwi into the filling, you’ll need to briefly cook or blanch the mashed kiwi pulp first to deactivate this enzyme, then cool it completely before adding to the mixture. Otherwise, you risk a **Kiwi Slime Pie** that won’t set. Most people find the kiwi gelatin flavor sufficient, with fresh slices on top for texture and pop! This careful consideration ensures your **Kiwi Slime Pie Ingredients** work together flawlessly.
Final Thoughts on Kiwi Slime Pies
As the last sliver of golden light fades over the pine trees outside my Bend, Oregon kitchen window, and the scent of sweet kiwi still lingers in the air, I find myself reflecting on the simple magic of these **Kiwi Slime Pies**. It’s more than just a dessert; it’s a canvas for creating memories, a little wink of playful joy tucked into our everyday lives.
For me, cooking is deeply intertwined with feeling. It’s about the quiet comfort of whisking ingredients in the silence of the morning, or the delighted laughter of Olivia and James as they watch the vibrant green filling magically transform. This **Kiwi Slime Pie Recipe** isn’t just about the steps; it’s about the feeling it evokes – a burst of sunshine on a cloudy day, a delicious reminder that joy can be found in the simplest of concoctions.
From the satisfying crunch of that **Oreo crust** to the luscious, creamy “slime” that melts in your mouth, each bite tells a story. A story of family dinners, of celebrations big and small, and of the quiet moments in the kitchen where ingredients become more than just food – they become love. It’s an **Easy Kiwi Slime Pie** that truly holds a special place in my recipe box, and I hope it will in yours, too.
I encourage you to embrace the playfulness of this dessert, to let its vibrant color and unique texture bring a smile to your face and those you share it with. Don’t chase perfection; chase connection. Because, in the end, it’s not about how flawless the pie looks, but about the joy it brings and the memories it creates.
If you try this recipe, please let me know how it brightens your day in the comments below. I love hearing your kitchen stories! And if you loved this fun and flavorful dessert, consider sharing it on Pinterest – a picture of your beautiful **Kiwi Slime Pies** might just inspire someone else to find a little magic in their kitchen. Until next time, happy cooking, and may your days be filled with sweet, creamy moments.
Kiwi Slime Pies
Ingredients
Equipment
Method
- Prepare the Crust: Crush Oreo cookies into fine crumbs using a food processor or rolling pin. Mix with melted butter until it resembles wet sand. Press firmly into the bottom of a 9-inch pie plate. Chill while preparing filling.
- Make the Filling: Beat softened cream cheese, sugar, vanilla, and almond extract until smooth and fluffy. Gently fold in whipped topping.
- Prepare the Gelatin: Dissolve kiwi gelatin in boiling water, whisking for 2 minutes. Stir in cold water and optional green food coloring. Let cool for 10-15 minutes until slightly warm.
- Combine and Assemble: Slowly fold the gelatin mixture into the cream cheese mixture until uniform. Pour into the chilled crust and refrigerate for at least 4-6 hours or overnight.
- Garnish and Serve: Once set, arrange kiwi slices on top. Add a dollop of whipped topping before serving. Slice and enjoy!