
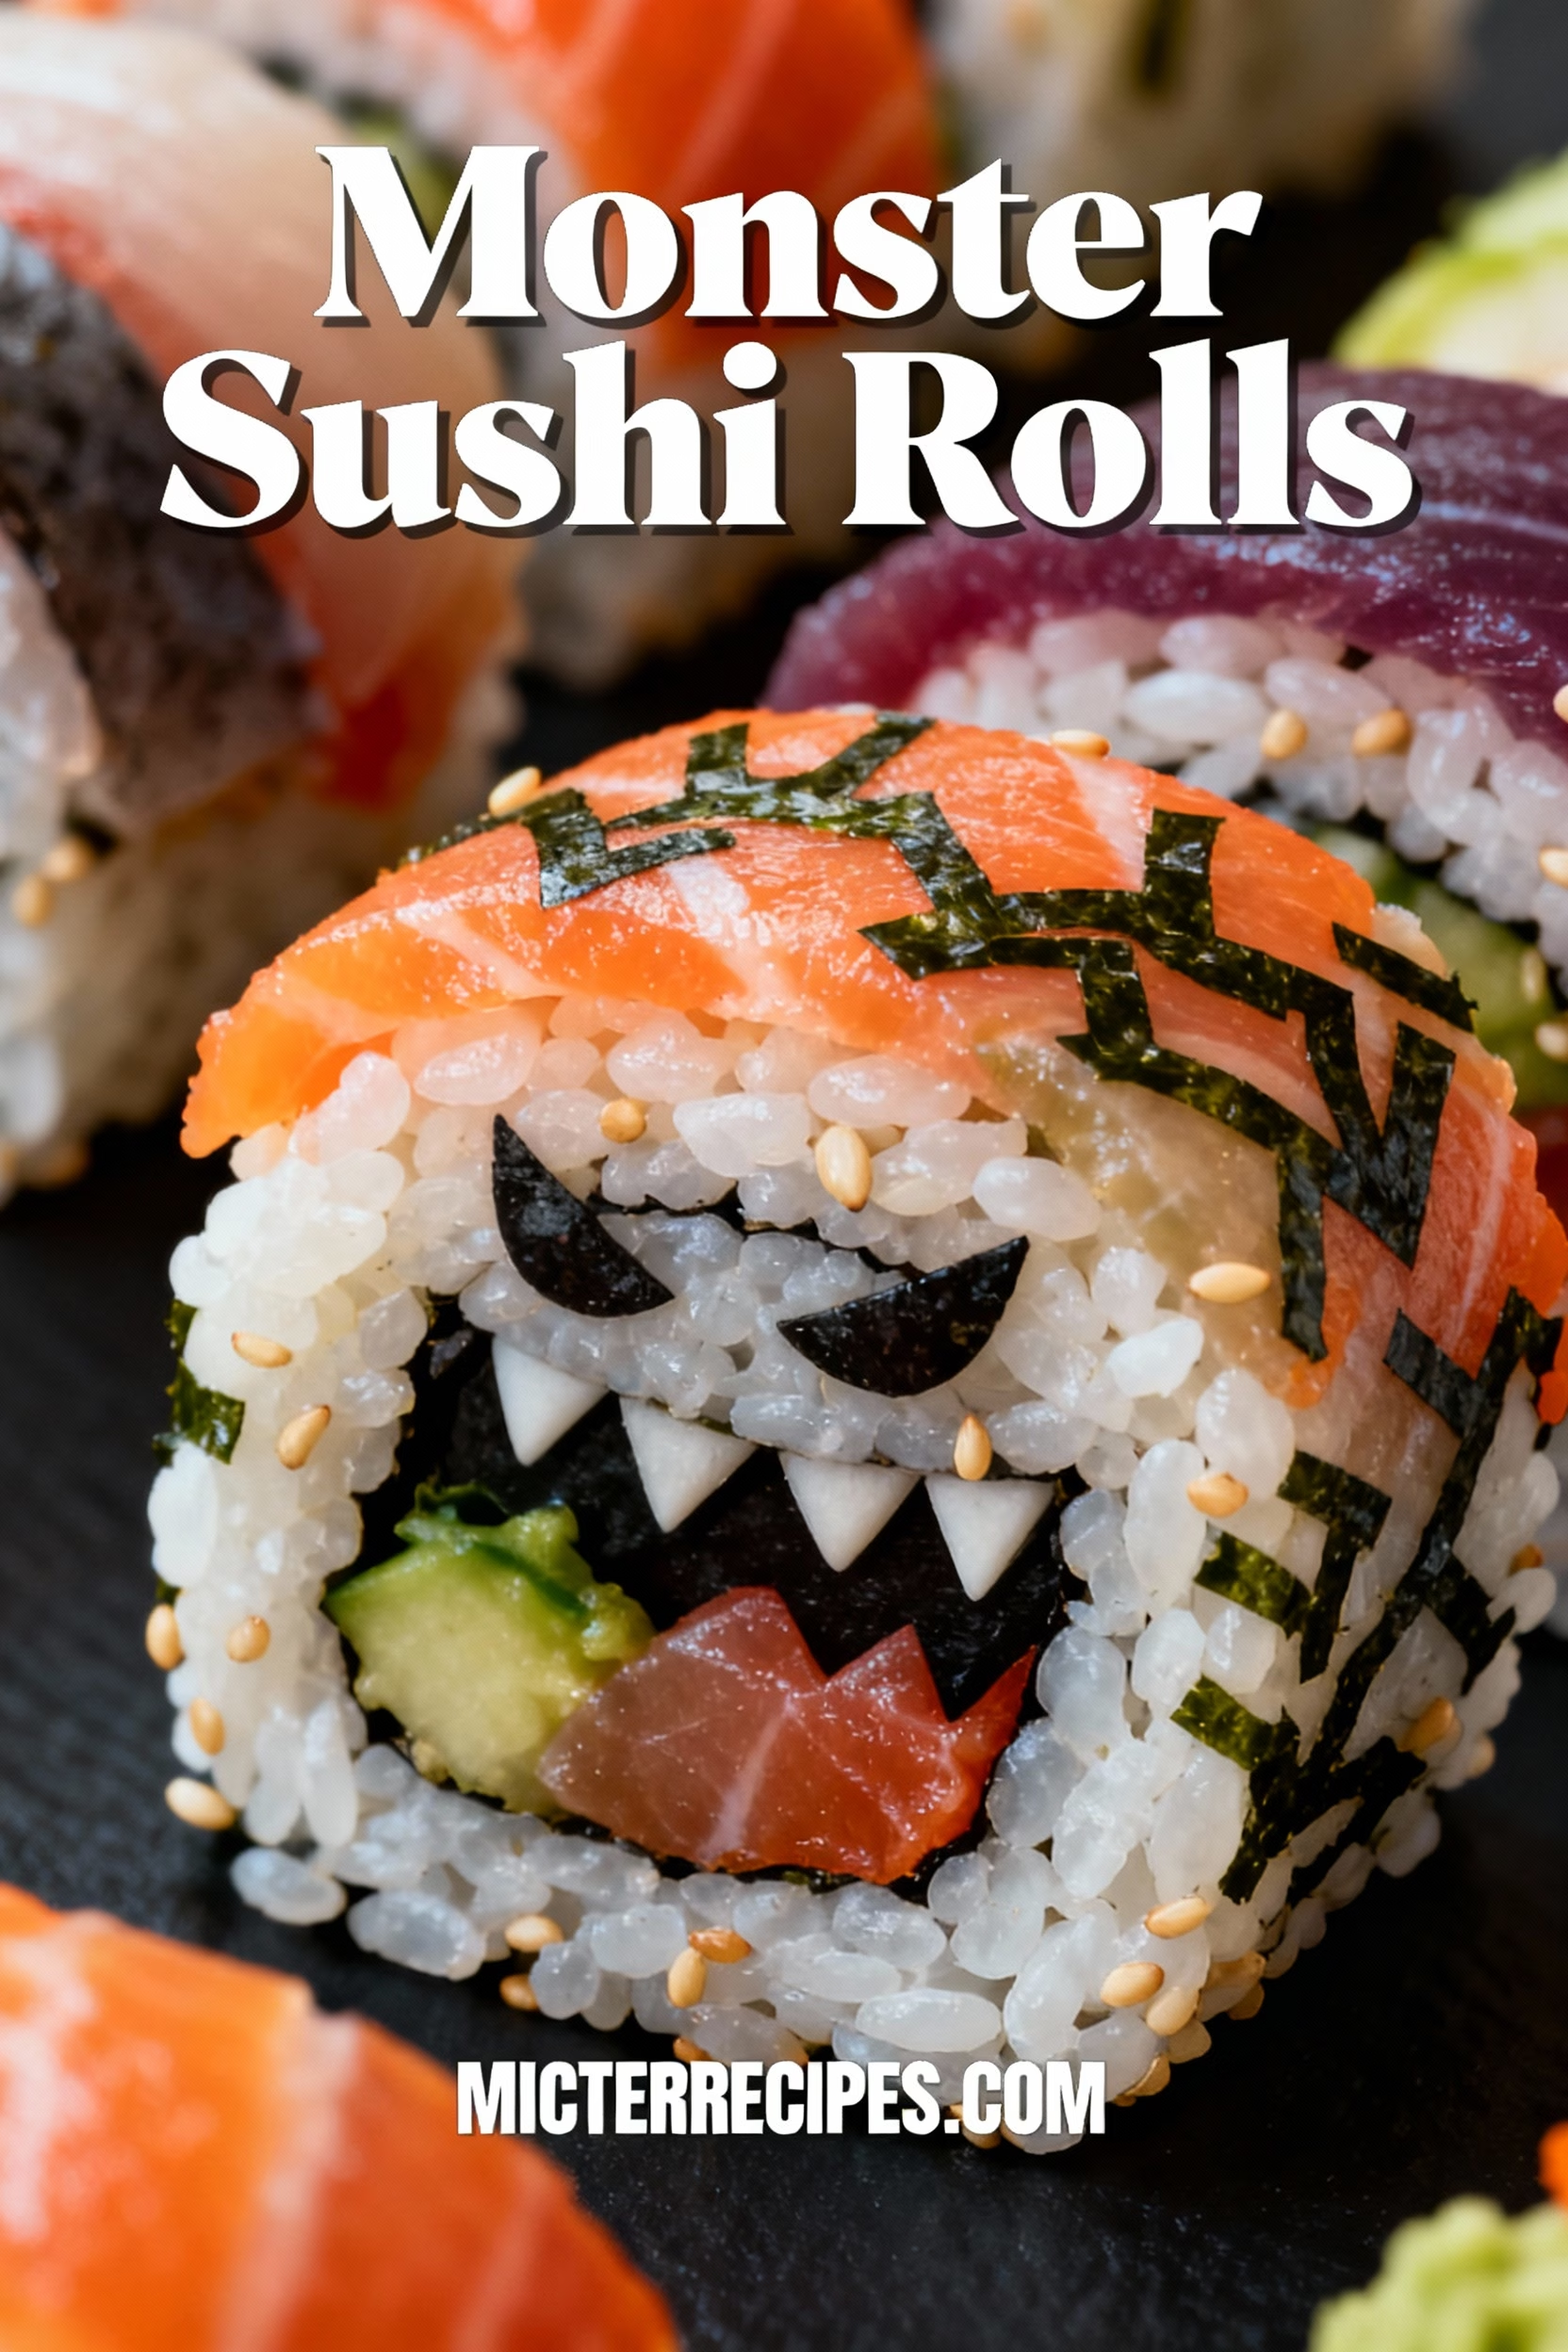
The Joy of the Unexpected: Crafting Your Own Giant Sushi Masterpiece
Have you ever looked at your dinner plate and thought, “What if this were… bigger?” It seems to be a question we’re asking more and more. There’s a playful rebellion in the culinary world, a delightful trend of taking beloved foods and supersizing them into something theatrical and communal. It’s not just about eating; it’s about creating an experience, a memory that sticks. This is exactly where the glorious, showstopping Monster Sushi Rolls come into play. I remember as a child in my grandmother’s Midwestern kitchen, we once tried to make a single, pan-sized pancake. The sheer giddy excitement of that ambitious, slightly chaotic project has stayed with me. It wasn’t about the perfection of the pancake but the shared laughter and the grandness of the attempt.
That same spirit is what I wanted to capture for my own family here in Minneapolis. When the leaves start to turn and there’s a crisp whisper in the air, my kids, Olivia and James, get an itch for creative kitchen projects. We move past the simple weekday meals and into the realm of the wonderfully absurd. We’ve made giant cookies and family-sized bowls of pasta, but nothing quite compares to the moment we unroll our first giant sushi roll. It’s a work of art that feels both impressive and deeply personal. This recipe is more than a set of instructions; it’s an invitation to be playful, to gather your loved ones, and to create something that’s as much fun to make as it is to eat. It transforms a simple meal into an event, turning your dining table into a stage for a delicious, edible spectacle. Forget delicate, single-bite pieces; we are diving headfirst into the world of epic sushi rolls that are meant to be shared, admired, and devoured with joy. It’s about taking a familiar comfort and giving it a touch of magic and scale.
Why You’ll Love This Monster Sushi Roll Recipe
There’s a special kind of magic that happens when you decide to make something truly out of the ordinary. The first time my husband, Ethan, and I attempted these Monster Sushi Rolls, the kitchen was filled with a focused silence that quickly erupted into laughter as we tried to maneuver the giant seaweed sheet. It’s now one of our favorite family traditions, a recipe we turn to when we want to make an evening feel like a celebration. These aren’t just large sushi rolls; they are an activity, a centerpiece, and a meal all in one. You’ll find that the process itself builds connection, whether you’re making it with your partner for a fun date night in, or letting the kids help pick and place the colorful fillings. It’s a recipe that encourages teamwork and a little bit of playful mess. And beyond the fun, the result is genuinely delicious, combining all the fresh, vibrant flavors of your favorite sushi into one magnificent roll. Ethan, with his photographer’s eye, always marvels at the cross section, a mosaic of colors and textures that looks as incredible as it tastes. This recipe is a departure from the everyday, a permission slip to play with your food and create something truly memorable. We’ve even made them for casual get togethers, slicing the jumbo sushi into thick, satisfying rounds that never fail to impress our friends. It’s a guaranteed conversation starter and a delicious way to bring everyone together around the table.
Here’s why I know you and your family will fall in love with these rolls:
- A Fun and Engaging Kitchen Project: This is so much more than a recipe; it’s an adventure. The process of layering the ingredients and carefully rolling the giant sheet is a fun, hands on activity for all ages. It’s perfect for a family night, a date night, or even a creative activity with friends. The sense of accomplishment when you slice into that perfect, massive roll is unbeatable.
- Completely Customizable to Your Taste: The beauty of these specialty sushi rolls is their versatility. I’ve given you our family’s favorite combination, but you can treat it as a blank canvas. Don’t like crab? Swap it for cooked shrimp, teriyaki chicken, or crispy tofu. Load it up with your favorite vegetables like bell peppers, carrots, or even sweet potato. You can make it a vegetarian monster sushi roll or add some jalapeño for a spicy monster sushi roll.
- An Absolute Showstopper for Parties: If you’re looking for a dish that will have everyone talking, this is it. Forget a standard platter of appetizers; bringing one of these oversized sushi creations to the table is an instant centerpiece. It’s perfect for birthdays, game nights, or any gathering where you want to serve something unique and impressive. If you want to create a whole spread of fun, themed food, these rolls pair wonderfully with things like Monster Burgers.
- Surprisingly Simple and Approachable: While the result looks incredibly complex, the steps are straightforward. I’ve broken down how to make monster sushi rolls into a simple, easy to follow guide. You don’t need to be a professional sushi chef to master this. With a little patience and a sense of fun, you can create a culinary masterpiece right in your own kitchen.
- Delicious and Satisfying: Beyond the novelty, this roll is packed with flavor and texture. The creamy avocado, the crisp cucumber, the savory protein, and the perfectly seasoned rice come together in every single bite. It’s a complete and satisfying meal that feels both indulgent and fresh. It’s a fun alternative to other party foods like a creamy layered dip, offering a much different but equally crowd pleasing flavor profile.
Ingredients for Monster Sushi Rolls
Gathering your ingredients for this recipe is like assembling a palette of colors and textures. Every component plays a vital role in the final masterpiece. The beauty of these rolls is their adaptability, so feel free to use this list as a starting point for your own creative sushi rolls.
- For the Sushi Rice:
- 2 cups Japanese short grain sushi rice
- 2 cups water
- ⅓ cup rice vinegar
- 2 tablespoons granulated sugar
- 1 teaspoon salt
- For the Roll Assembly:
- 4 to 5 sheets of nori (dried seaweed)
- 1 tablespoon water (for sealing the nori sheets)
- For the Fillings:
- 8 ounces imitation crab sticks (or cooked shrimp, or baked salmon)
- 1 large cucumber, julienned
- 2 medium avocados, thinly sliced
- 8 ounces cream cheese, softened and cut into strips
- 1 cup shredded carrots
- For Garnish and Serving:
- Toasted sesame seeds
- Soy sauce
- Wasabi
- Pickled ginger
- Spicy mayo (optional: ½ cup mayonnaise + 2 tbsp sriracha)
Substitutions & Notes:
* **Rice:** If you can’t find sushi rice, you can use Calrose rice as a substitute, but the texture might be slightly different.
* **Protein:** Feel free to get creative! Crispy panko chicken, teriyaki beef, or pan-fried tofu are all fantastic options.
* **Vegetarian:** To make a **vegetarian monster sushi roll**, simply omit the crab and add more vegetables like roasted sweet potato strips, marinated mushrooms, or steamed asparagus.
* **Nori:** You will be overlapping the nori sheets to create one giant sheet. A bamboo sushi mat is essential for rolling this beast! Make sure it’s a large one.
How to Make Monster Sushi Rolls
There’s a gentle rhythm to making sushi, even when it’s on a monstrous scale. It begins with the rice, the very heart of the roll. The process is a meditation of sorts, a series of simple, focused steps that build upon one another to create something truly special. Don’t rush it. Put on some music, pour yourself a cup of tea, and enjoy the calming, creative process of bringing this magnificent roll to life. We’re going to walk through this together, step by step. I promise, it’s easier than it looks, and the feeling of accomplishment when you make that first perfect slice is pure joy. This guide will show you exactly how to make monster sushi rolls that are as beautiful as they are delicious, transforming simple monster sushi roll ingredients into an unforgettable meal.
Step by Step Instructions
- Prepare the Sushi Rice: First, rinse the sushi rice in a fine mesh sieve under cold running water. Swirl the rice with your hand until the water runs clear. This step is crucial for removing excess starch and ensuring fluffy, not gummy, rice. Drain it well. Add the drained rice and 2 cups of water to your rice cooker and cook according to the manufacturer’s instructions. If cooking on the stovetop, bring the rice and water to a boil, then reduce the heat to low, cover, and simmer for 15 to 20 minutes, or until all the water is absorbed. Do not lift the lid while it simmers! Once cooked, let the rice stand, covered, for 10 minutes off the heat.
- Season the Rice: While the rice is resting, prepare the vinegar seasoning. In a small bowl, whisk together the rice vinegar, sugar, and salt until the sugar and salt have completely dissolved. You can gently warm it in the microwave for 20 seconds to help it dissolve faster. Once the rice has rested, transfer it to a large, non metallic bowl (a wooden or glass bowl is ideal). Gently pour the vinegar mixture over the hot rice. Using a rice paddle or spatula, “cut” and fold the rice, gently mixing the seasoning in without mashing the grains. You want to coat every grain. Let the rice cool to room temperature. You can speed this up by fanning the rice as you mix.
- Create the Giant Nori Sheet: This is where the “monster” part begins! Lay your large bamboo rolling mat on a clean, dry surface. Place two sheets of nori, shiny side down, side by side on the mat, overlapping them by about one inch. Dab a tiny bit of water along the overlapping edge to help them stick together, pressing gently to seal. Repeat with two more nori sheets below the first two, creating a large, four sheet rectangle. This will be the canvas for your **jumbo sushi**.
- Layer the Rice: Have a small bowl of water nearby to dip your fingers in (this is called “tezu” and prevents the rice from sticking to your hands). Wet your fingers, then scoop up a handful of the cooled sushi rice. Gently spread an even layer of rice over the entire surface of your giant nori sheet, leaving a 2 inch border at the top edge (the edge furthest from you). Be gentle; you want to spread, not smash, the rice.
- Add the Fillings: Now for the fun part! About a third of the way up from the bottom edge of the rice, begin layering your fillings in horizontal lines. Create a neat row of cream cheese strips, followed by a row of imitation crab, then the julienned cucumber and shredded carrots. Finally, add a line of sliced avocado on top. Don’t overfill, or the roll will be difficult to close. Think of it as painting stripes of color across your rice canvas.
- Roll the Monster: This step requires a little confidence! Using the edge of the bamboo mat closest to you, lift the nori and rice up and over the fillings. Tuck the edge in tightly, using your fingers to keep the fillings snug. Begin to roll the mat forward, applying gentle, even pressure to create a firm, compact cylinder. As you roll, pull the edge of the mat out so it doesn’t get rolled into your sushi. It’s like rolling up a giant yoga mat!
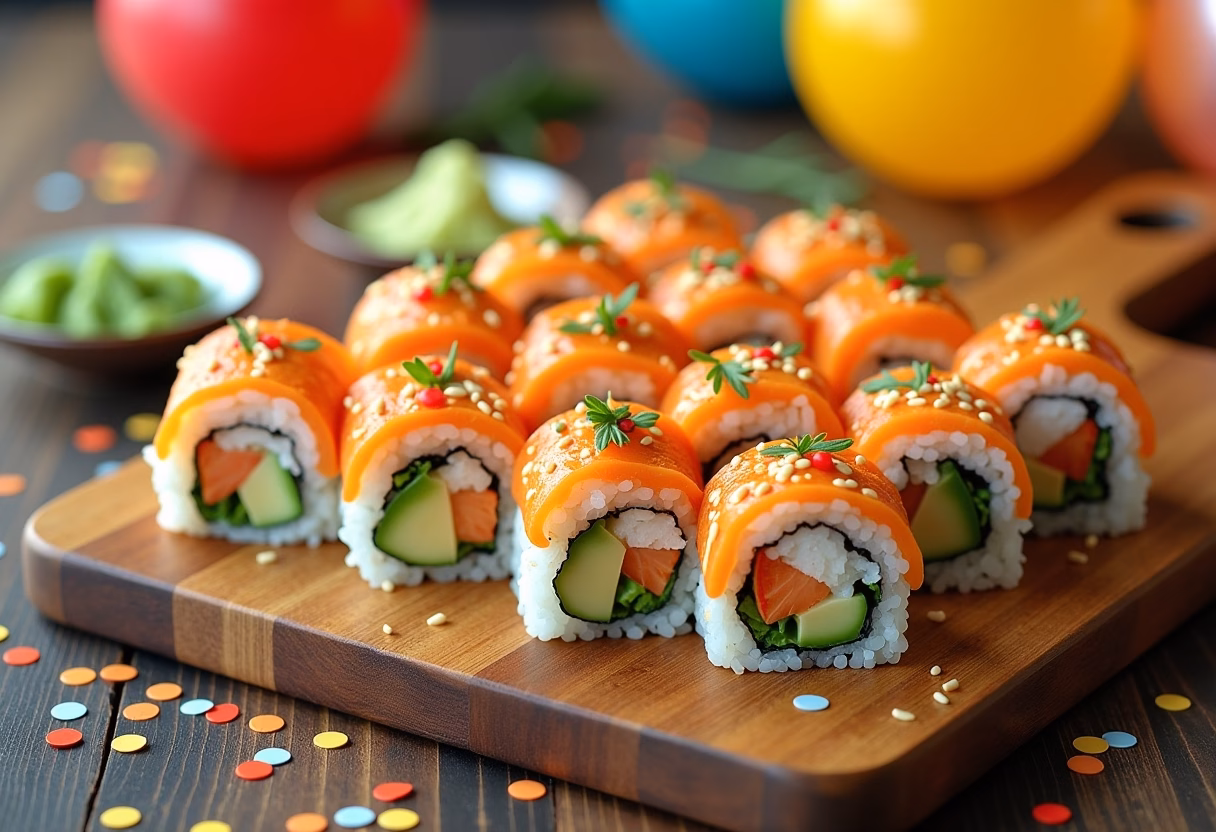
- Seal and Slice: Once you reach the 2 inch nori border you left at the top, dab a little water along the edge. This will act as glue. Complete the roll, pressing gently to seal it completely. Let the roll rest for a minute, seam side down, to ensure it’s fully sealed. Now for the grand reveal! Use a very sharp, wet knife to slice the roll into thick, 1.5 to 2 inch rounds. Wipe and re wet the knife between each cut for clean slices. Arrange your magnificent **Monster Sushi Rolls** on a platter and admire your work!
Pro Tips & Variations
Over the years, our Monster Sushi Roll nights have become a delicious science experiment. We’ve learned a few things through trial, error, and a lot of happy accidents. That kitchen chaos is often where the best ideas are born! For instance, the first time we tried a deep fried monster sushi roll, it was a wonderfully crispy, indulgent disaster that we perfected over time. My biggest tip is to embrace the process. Don’t aim for sterile perfection; aim for fun and flavor. If your roll is a little lopsided, who cares? It will still taste fantastic. Let the kids get involved; their little hands are perfect for sprinkling sesame seeds or arranging the cucumber sticks. Sometimes Olivia insists on adding things that break all the rules, like tiny bits of bell pepper for “jewels,” and honestly, those are often the best bites.
These tips will help you master the roll, and the variations will inspire you to create your own signature sushi rolls that tell a story about your own family’s tastes. Think of this as a starting point. The real magic happens when you make it your own, maybe even creating a fun, over the top roll inspired by our zombie meatloaf for a Halloween party!
- The Right Tools Make a Difference: You absolutely need a bamboo sushi rolling mat (a makisu) for this, preferably a larger one (10×10 inches or bigger). It provides the structure and tension needed to create a tight, even roll. Also, a very sharp knife is non negotiable for clean slices. I keep a tall glass of water nearby to dip the knife in before every single cut. This prevents the rice from sticking and tearing the nori.
- Don’t Squeeze the Rice: When you are spreading the rice onto the nori, be gentle. The goal is to create an even layer, not to compact it into a dense brick. Use wet fingertips and a light touch. The same goes for rolling. Apply firm, even pressure, but don’t squeeze the life out of it. You want the fillings to be snug, not smashed.
- The “Nori Glue” Trick: When you connect your nori sheets to make the giant canvas, don’t just dab water on the edge. I find it works best to lightly brush a line of water along the inch of overlap and press down firmly for a few seconds. For an even stronger bond, you can mash a few grains of cooked sushi rice along the seam to act as a natural, starchy glue. This ensures your oversized sushi holds together perfectly.
Delicious Variations to Try:
* **Spicy Tuna Monster Roll:** Mix canned, drained tuna with spicy mayo and a pinch of salt. Use this as your primary protein along with cucumber and avocado. Top the finished roll with more spicy mayo and a sprinkle of togarashi for extra heat.
* **Crispy Shrimp Tempura Roll:** This is a family favorite. Use store bought frozen shrimp tempura and bake it until crispy. Let it cool slightly before adding it to your roll. The warm, crispy shrimp against the cool, creamy avocado is an incredible texture combination. Add some eel sauce drizzled over the top for the ultimate treat.
* **Vegetarian Garden Monster Roll:** Make it a celebration of vegetables! A **vegetarian monster sushi roll** is vibrant and fresh. Use baked sweet potato strips, marinated and baked tofu, steamed asparagus, red bell pepper strips, and plenty of avocado. A drizzle of a sweet soy glaze (or teriyaki sauce) inside adds a wonderful savory element.
* **Fusion “Philly Cheesesteak” Roll:** For something truly unconventional, try a **fusion monster roll**. Use thinly sliced, cooked beef (like steak-umms or leftover roast beef), sautéed onions and bell peppers, and plenty of cream cheese. It sounds wild, but it’s one of those **unique sushi rolls** that will surprise and delight you.
Serving Suggestions
Once you’ve sliced your magnificent Monster Sushi Roll, the presentation is part of the fun. I love to arrange the thick, colorful rounds on a large wooden board or a long, simple white platter. It lets the roll be the star of the show. The moment you place it on the table is always met with wide eyes and excited murmurs. It’s a meal that inherently feels like a party. In our house, we make a ritual out of it. I set out little dipping bowls for everyone, and the kids get to help pour the soy sauce. It’s a simple act, but it makes them feel like they are part of the feast.
To round out the meal, I like to stick to simple, clean flavors that complement the richness of the roll without overwhelming it. Think of it as creating a supporting cast for your main character. You don’t need anything complicated; a few well chosen accompaniments are all it takes to elevate this from a single dish to a full, satisfying, and memorable dining experience. It’s all about balance. A warm, brothy soup, a crisp salad, or a simple steamed vegetable can provide a lovely contrast in temperature and texture. This is more than just dinner; it’s about creating a moment of connection and shared delight. Sometimes, we even pair it with other fun, shareable snacks, like our favorite monster cookies for dessert, to complete a totally fun and whimsical meal theme.
- Classic Dipping Sauces: You can’t go wrong with the holy trinity of sushi accompaniments. Set out small bowls of low sodium soy sauce (or tamari for a gluten free option), a fiery dab of wasabi, and delicate slices of pickled ginger to cleanse the palate between bites. For a creamy, spicy kick, a bowl of homemade spicy mayo is always a huge hit.
- Steamed Edamame: A bowl of warm, salted edamame is the perfect simple appetizer or side dish. It’s healthy, easy to prepare (you can buy it frozen and steam it in minutes), and the simple, nutty flavor is a perfect complement to the complex flavors in the roll.
- Simple Miso Soup: A small cup of warm miso soup is incredibly comforting and traditional. Its savory, umami-rich broth is a wonderful way to start the meal and provides a beautiful, warm contrast to the cool, fresh sushi roll. It cleanses the palate and prepares you for the main event.
- Seaweed Salad (Wakame): A bright, tangy seaweed salad adds a different texture and a burst of oceanic flavor. Dressed in a light sesame vinaigrette, its light and refreshing quality helps to cut through the richness of the cream cheese and avocado in the monster sushi roll. You can find pre made versions at most grocery stores in the international aisle.
- Crispy Gyoza or Dumplings: If you want to add another hot and savory element to your meal, a plate of pan-fried pork or vegetable gyoza is a fantastic choice. The crispy bottoms and tender filling offer a delightful textural contrast and make the meal feel even more substantial and festive.
Storage & Reheating
Tucking away leftover Monster Sushi Rolls feels like saving a little bit of joy for later. While sushi is undeniably best when fresh, you can certainly enjoy the leftovers the next day for a truly spectacular lunch.
Storage:
- Arrange the leftover slices in a single layer in an airtight container.
- To prevent them from drying out, you can lay a piece of plastic wrap directly on the surface of the cut sides before closing the lid.
- Store in the refrigerator for up to 24 hours. After that, the rice begins to harden and the textures will change significantly. I do not recommend freezing sushi.
Reheating:
- Sushi is meant to be eaten cold or at room temperature. Do not microwave it! Reheating will cook the fresh ingredients, melt the avocado and cream cheese, and completely change the texture for the worse.
- For the best experience, simply take the container out of the refrigerator about 15 to 20 minutes before you plan to eat. This allows the rice to lose some of its chill and soften up a bit, bringing the flavors back to life. It will taste much better than it does straight from the cold fridge.
FAQ about Monster Sushi Rolls
What is in a monster roll sushi exactly?
A “monster roll” is less about a specific set of ingredients and more about its size and complexity. It’s a jumbo sushi roll that typically uses multiple nori sheets to create a very large roll packed with numerous fillings. Our version features seasoned sushi rice, imitation crab, cream cheese, avocado, cucumber, and carrots. However, the exact monster sushi roll ingredients can vary widely and often include a mix of cooked proteins, fresh vegetables, and creamy elements to create a flavorful, textured bite.
Can I make this a gluten free monster sushi roll recipe?
Absolutely! It’s very easy to adapt. First, ensure you are using a gluten free soy sauce, like tamari, for serving. Second, for the filling, simply swap the imitation crab (which often contains wheat) for a naturally gluten free protein like cooked shrimp, salmon, or tuna. All the other core ingredients like rice, nori, and vegetables are naturally gluten free.
What’s the best sushi rolling mat for large rolls?
For oversized sushi like this, a standard 9.5 x 9.5 inch bamboo mat will work, but a larger one (10.5 x 10.5 inches or even 11.5 x 11.5 inches) makes the process much easier. A larger mat gives you more surface area and control when lifting and tucking the initial roll. Look for one that is sturdy and well constructed. If you only have a standard mat, you can still make it work; you’ll just need to be a bit more careful when maneuvering the large nori sheet.
Are monster sushi rolls worth it for a weeknight dinner?
While it takes a bit more time than a simple stir fry, it is absolutely worth it for a special weeknight! I’d budget about an hour from start to finish. To save time, you can cook and season the rice ahead of time and chop all your vegetables. That way, the assembly and rolling part becomes a quick, fun activity that takes only about 15 to 20 minutes. It turns a regular Tuesday dinner into a memorable family event.
Final Thoughts on Monster Sushi Rolls
There’s a quiet truth I’ve come to understand in my kitchen: some of the best memories are made when you decide to break the rules a little. These Monster Sushi Rolls are a testament to that. They are an ode to glorious imperfection and the sheer fun of creating something over the top. It’s not about chasing the pristine, delicate precision of a high end sushi bar. It’s about the joyful, slightly messy process of unrolling a giant mat with your family, the shared laughter when a piece of avocado escapes, and the collective gasp of delight when that first colorful, chunky slice is revealed. It is food that doesn’t take itself too seriously, and it invites you to do the same.
In our home, this recipe has become more than just a meal. It’s a project, a centerpiece, and a story we create together. It’s a reminder that food is a language of love, and sometimes, the best way to say “I love you” is to build a ridiculously large and delicious sushi roll to share. I hope you take this recipe and make it your own. I hope you fill it with your favorite things and gather your favorite people around the table to enjoy it. Cook for connection, cook for joy, and cook for the simple, wonderful pleasure of making something with your own two hands.
If you make these rolls, I would absolutely love to hear about it! Please leave a comment below and let me know what unique fillings you used. And don’t forget to save this recipe to your favorite Pinterest board so you can make it for your next celebration
Monster Sushi Rolls
Ingredients
Equipment
Method
- Prepare the Sushi Rice: Rinse the sushi rice in a fine mesh sieve under cold running water. Swirl the rice with your hand until the water runs clear. This step is crucial for removing excess starch and ensuring fluffy, not gummy, rice. Drain it well. Add the drained rice and 2 cups of water to your rice cooker and cook according to the manufacturer’s instructions. If cooking on the stovetop, bring the rice and water to a boil, then reduce the heat to low, cover, and simmer for 15 to 20 minutes, or until all the water is absorbed. Do not lift the lid while it simmers! Once cooked, let the rice stand, covered, for 10 minutes off the heat.
- Season the Rice: While the rice is resting, prepare the vinegar seasoning. In a small bowl, whisk together the rice vinegar, sugar, and salt until the sugar and salt have completely dissolved. You can gently warm it in the microwave for 20 seconds to help it dissolve faster. Once the rice has rested, transfer it to a large, non metallic bowl (a wooden or glass bowl is ideal). Gently pour the vinegar mixture over the hot rice. Using a rice paddle or spatula, “cut” and fold the rice, gently mixing the seasoning in without mashing the grains. You want to coat every grain. Let the rice cool to room temperature. You can speed this up by fanning the rice as you mix.
- Create the Giant Nori Sheet: This is where the “monster” part begins! Lay your large bamboo rolling mat on a clean, dry surface. Place two sheets of nori, shiny side down, side by side on the mat, overlapping them by about one inch. Dab a tiny bit of water along the overlapping edge to help them stick together, pressing gently to seal. Repeat with two more nori sheets below the first two, creating a large, four sheet rectangle. This will be the canvas for your jumbo sushi.
- Layer the Rice: Have a small bowl of water nearby to dip your fingers in (this is called “tezu” and prevents the rice from sticking to your hands). Wet your fingers, then scoop up a handful of the cooled sushi rice. Gently spread an even layer of rice over the entire surface of your giant nori sheet, leaving a 2 inch border at the top edge (the edge furthest from you). Be gentle; you want to spread, not smash, the rice.
- Add the Fillings: Now for the fun part! About a third of the way up from the bottom edge of the rice, begin layering your fillings in horizontal lines. Create a neat row of cream cheese strips, followed by a row of imitation crab, then the julienned cucumber and shredded carrots. Finally, add a line of sliced avocado on top. Don’t overfill, or the roll will be difficult to close. Think of it as painting stripes of color across your rice canvas.
- Roll the Monster: This step requires a little confidence! Using the edge of the bamboo mat closest to you, lift the nori and rice up and over the fillings. Tuck the edge in tightly, using your fingers to keep the fillings snug. Begin to roll the mat forward, applying gentle, even pressure to create a firm, compact cylinder. As you roll, pull the edge of the mat out so it doesn’t get rolled into your sushi. It’s like rolling up a giant yoga mat!
- Seal and Slice: Once you reach the 2 inch nori border you left at the top, dab a little water along the edge. This will act as glue. Complete the roll, pressing gently to seal it completely. Let the roll rest for a minute, seam side down, to ensure it’s fully sealed. Now for the grand reveal! Use a very sharp, wet knife to slice the roll into thick, 1.5 to 2 inch rounds. Wipe and re wet the knife between each cut for clean slices. Arrange your magnificent Monster Sushi Rolls on a platter and admire your work!