
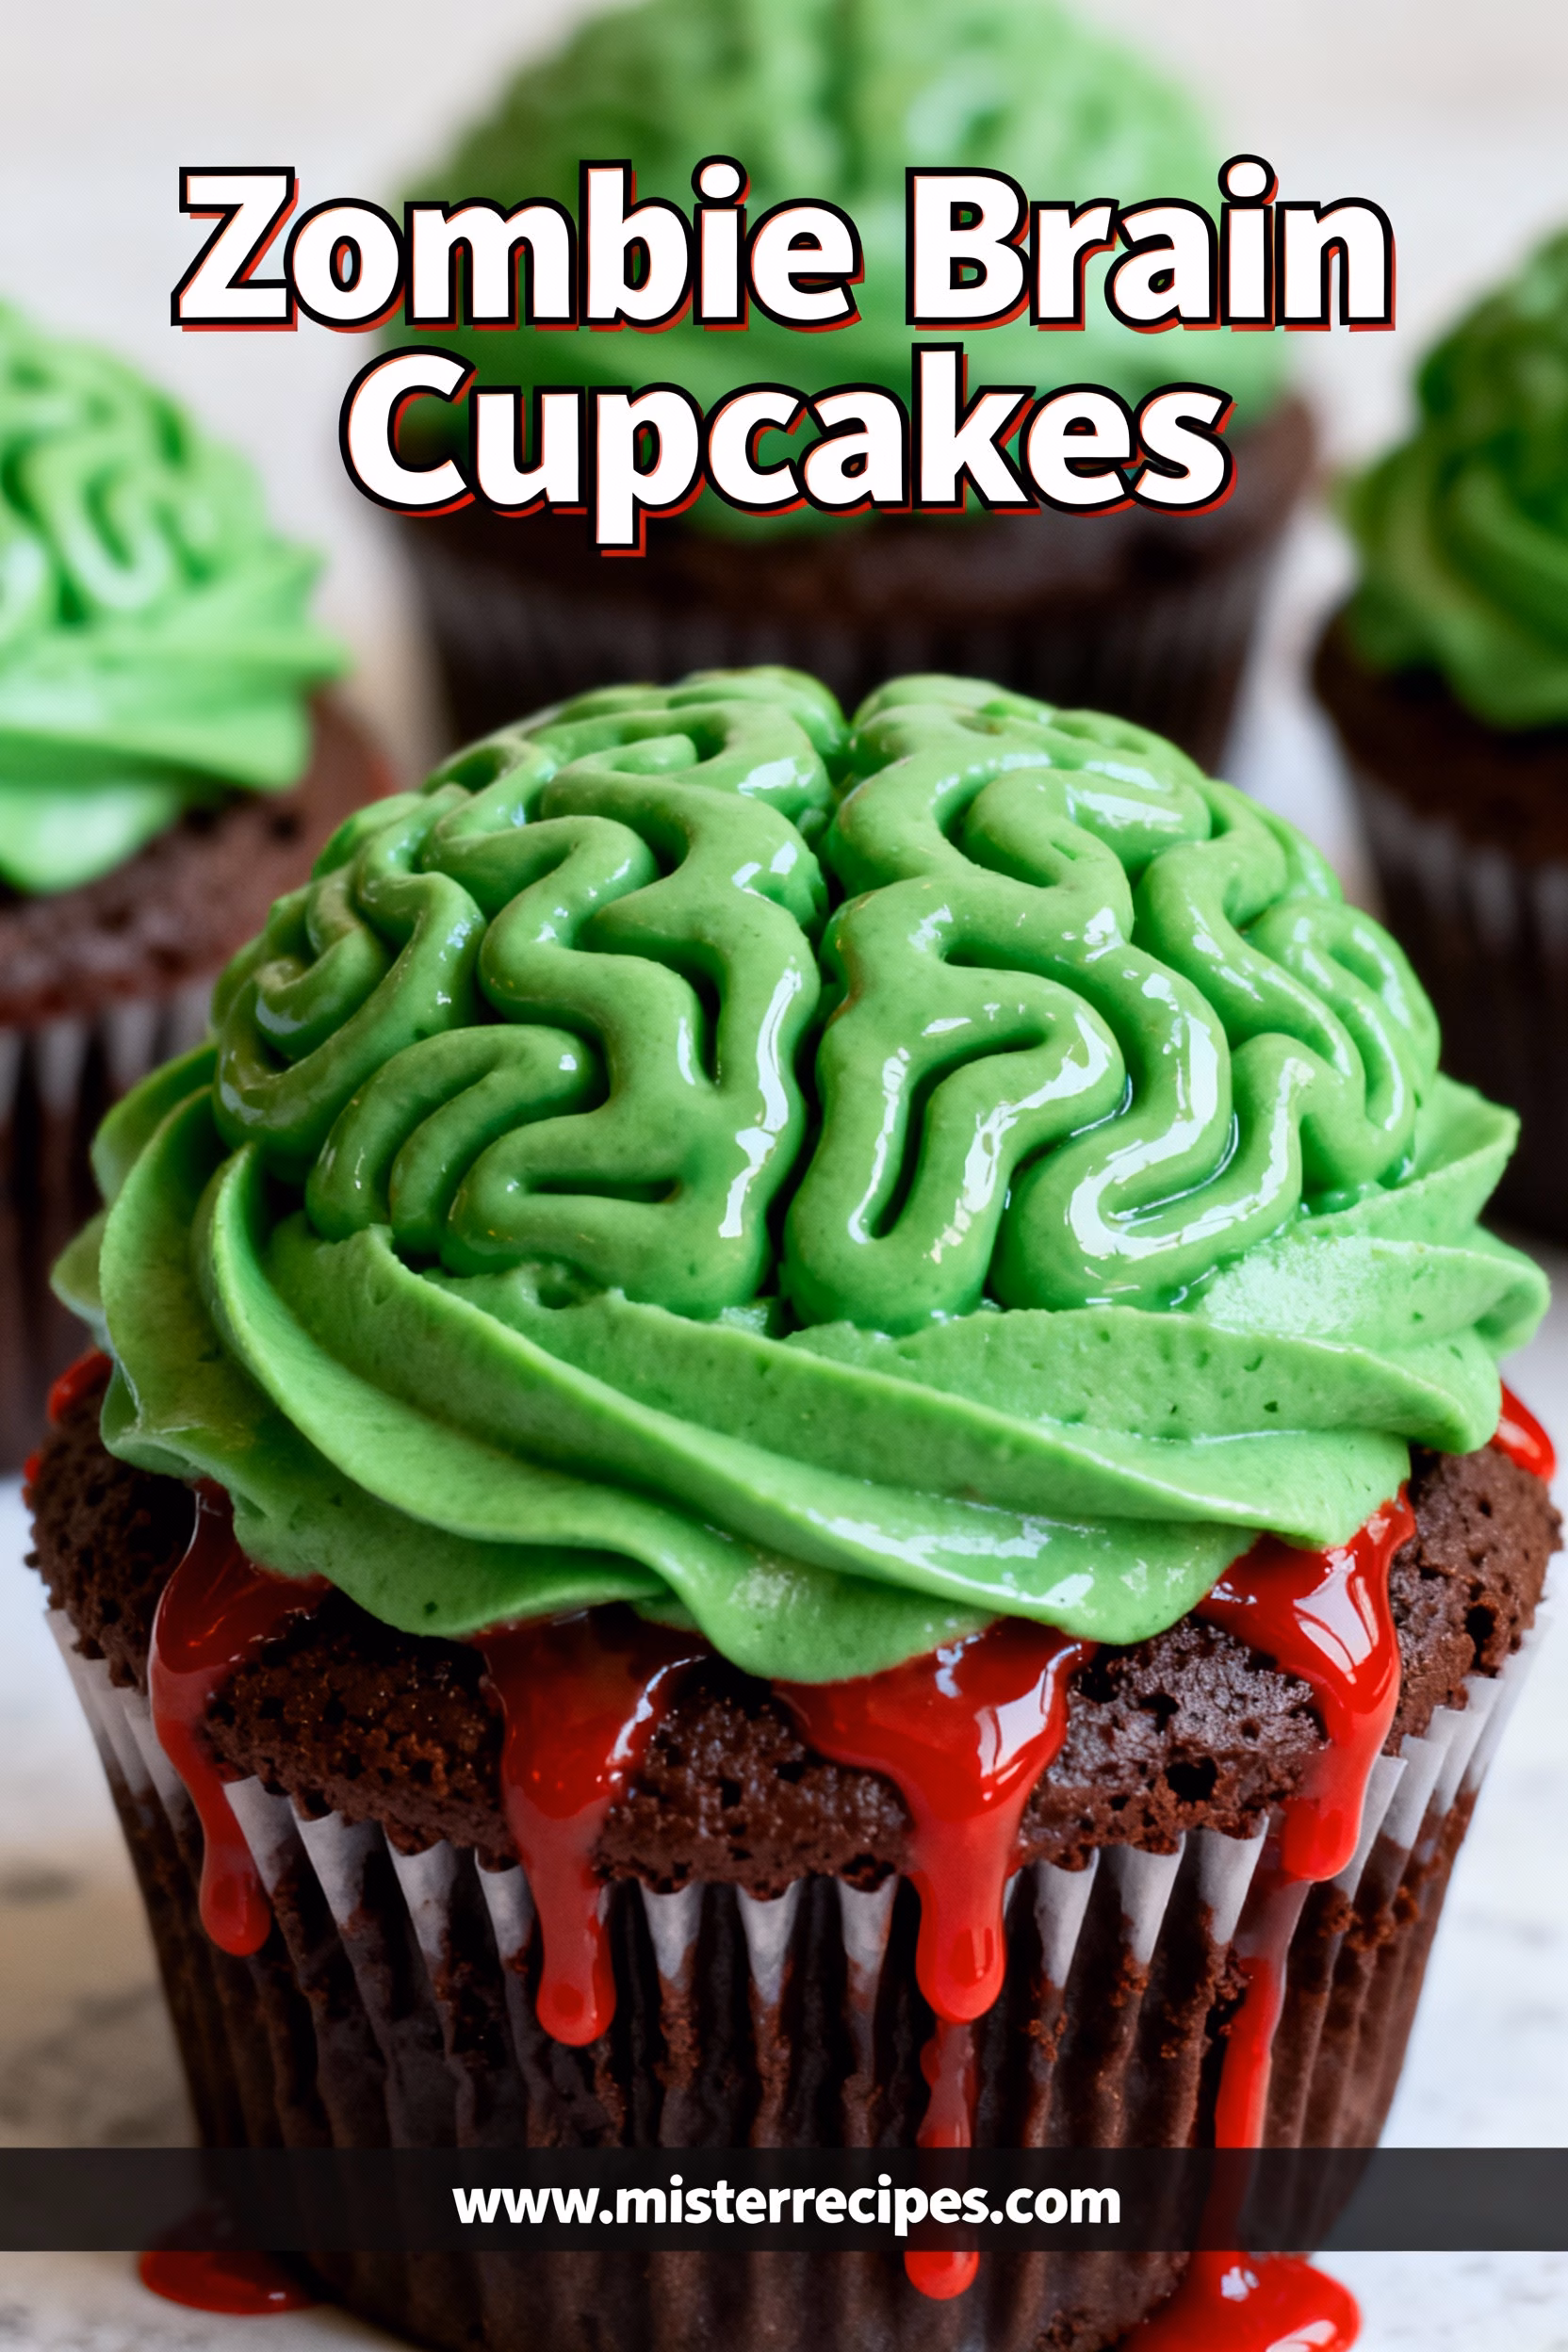
Zombie Brain Cupcakes Recipe
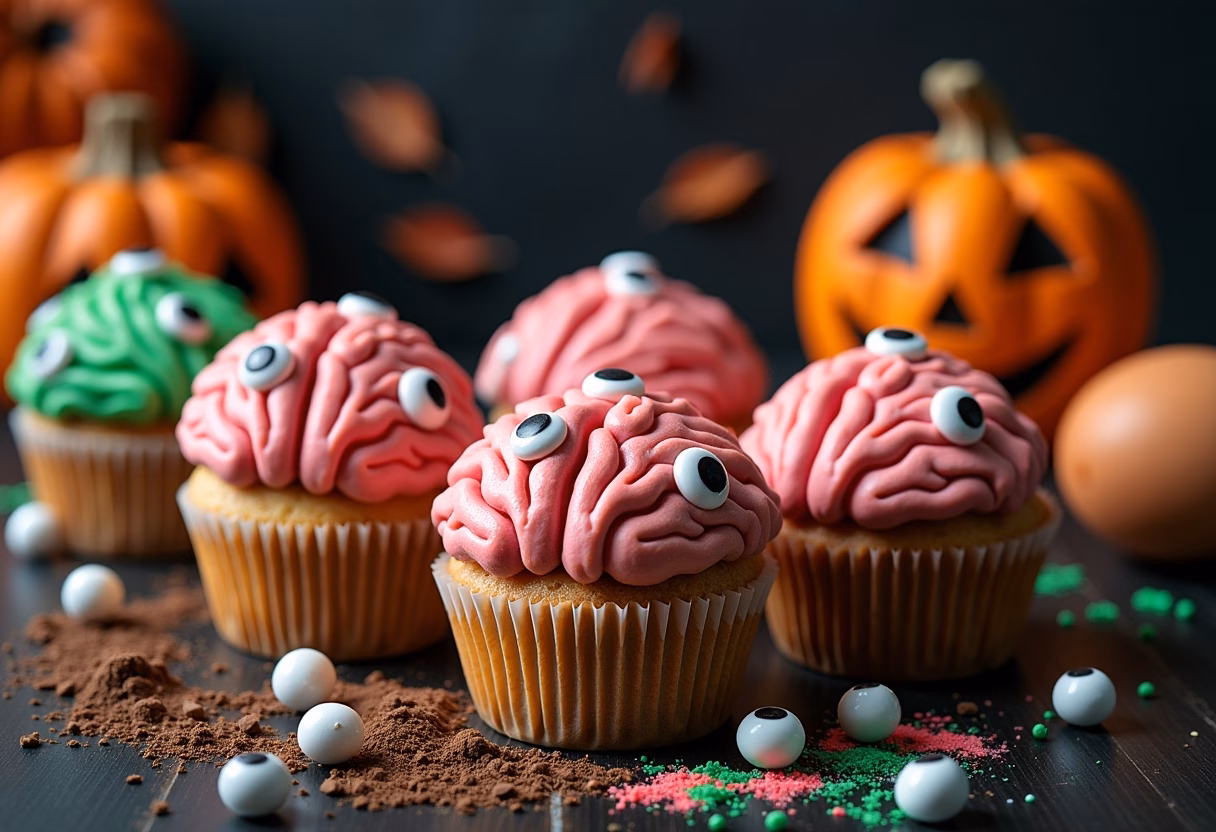
Have you noticed how Halloween dessert searches explode every October, yet the same predictable treats crowd party tables? If you want a dessert that sparks conversation, looks creepy cool, and still tastes like a bakery quality cupcake, these Zombie Brain Cupcakes are your secret weapon. Within one hour you will have tender chocolate cupcakes crowned with glossy green buttercream piped into brainy swirls that look ghoulish and delicious at the same time. Kids cheer. Adults take photos. Everyone asks for the recipe.
This recipe is designed for busy families, classrooms, and last minute party planners who still want wow factor without complicated techniques. The batter uses pantry staples and a quick whisk method that delivers moist crumb without a stand mixer. The frosting is a silky American buttercream that holds its shape, which is perfect for textured brain piping. For optional gore, a cherry or strawberry glaze seeps into the grooves for that just rose look.
If you are building a Halloween spread, link these cupcakes to a lineup of party winners like Halloween Food Ideas For Parties and kid pleasing Easy Halloween Food . The result is a table that is playful, Instagram ready, and stress free to pull together. Ready to bake brains that get big reactions without big effort This is your guide to Zombie Brain Cupcakes.
Why You Will Love These Zombie Brain Cupcakes
* Fast bake time and simple tools. No stand mixer needed. A bowl, a whisk, and a piping bag or zip top bag with the tip cut off make this recipe doable for beginners.
* Party perfect texture. Moist chocolate crumb pairs with a stable buttercream that pipes clean lines so the brain effect looks sharp even after transport.
* Customizable spook level. Keep it classroom friendly with minty green frosting or add a quick cherry glaze for a gory finish at adult parties.
* Budget friendly. Uses staple ingredients and food color. Candy eyes or sprinkles are optional.
* Make ahead friendly. Cupcakes and frosting both hold well, which frees you to prep other Halloween Themed Food .
* Proven crowd pleaser. Chocolate base plus vanilla buttercream wins over picky eaters while the look thrills Halloween fans.
Planning a larger menu Pair these cupcakes with a few shareable bites like Halloween Finger Foods and a big bowl of Spooky Snacks so guests can nibble between desserts. For classroom events, lean on classroom safe options and keep frosting colors bright and non gory. For evening parties, add a quick glaze drizzle for drama alongside themed drinks from your favorite Halloween Food Recipes collection.
These Zombie Brain Cupcakes are engineered to balance flavor, structure, and appearance. Cocoa bloom with hot coffee or hot water deepens chocolate flavor. A touch of oil keeps the crumb tender even after chilling. The frosting ratio of butter to powdered sugar is tuned to hold textured lines without tasting overly sweet. Green gel color delivers bold hues without thinning the frosting, so your brain swirls keep their shape on the drive to the party.
Ingredients for Zombie Brain Cupcakes
For the cupcakes
* All purpose flour 1 and one fourth cups
* Granulated sugar 1 cup
* Unsweetened cocoa powder 6 tablespoons
* Baking powder 1 teaspoon
* Baking soda one half teaspoon
* Fine salt one half teaspoon
* Large eggs 2 at room temperature
* Milk one half cup whole or two percent
* Vegetable oil one third cup or melted neutral butter
* Vanilla extract 2 teaspoons
* Hot brewed coffee one half cup or hot water
Frosting and decorations
- Unsalted butter 1 cup softened
- Powdered sugar 3 to 4 cups to taste and texture
- Heavy cream or milk 2 to 3 tablespoons
- Vanilla extract 1 teaspoon
- Pinch of salt
- Green gel food coloring plus a tiny dot of black to mute the shade
- Optional red glaze 2 tablespoons seedless strawberry or cherry jam thinned with 1 teaspoon warm water
- Optional candy eyes or sprinkles
Substitutions
- Use gluten free one to one baking flour if needed.
- Swap dairy free milk and vegan butter for a dairy free version.
- Replace coffee with hot water if preferred. Coffee deepens chocolate notes without adding coffee taste.
How to Make Zombie Brain Cupcakes
Step by Step Instructions
- Preheat and prep. Heat oven to 350 degrees Fahrenheit. Line a standard muffin tin with 12 paper liners. Set aside.
- Mix dry ingredients. In a large bowl whisk flour, sugar, cocoa, baking powder, baking soda, and salt until no streaks remain.
- Mix wet ingredients. In a second bowl whisk eggs, milk, oil, and vanilla until smooth.
- Combine. Pour wet ingredients into dry ingredients. Whisk until mostly combined. The batter will be thick.
- Bloom cocoa. Pour in the hot coffee or water. Whisk until smooth and shiny. Batter will be quite loose which is correct.
- Fill liners. Divide the batter evenly among 12 liners filling about two thirds full for domed tops.
- Bake. Bake 18 to 21 minutes until the tops spring back and a toothpick comes out with a few moist crumbs. Avoid overbaking for best moisture.
- Cool. Let cupcakes rest in the pan 5 minutes. Transfer to a rack to cool completely before frosting.
- Make frosting. In a large bowl beat softened butter until creamy and pale 2 to 3 minutes. Gradually add powdered sugar one cup at a time. Add a pinch of salt. Add vanilla and 2 tablespoons cream. Beat until fluffy 2 more minutes. Adjust with more sugar for thicker or a splash of cream for softer.
- Color frosting. Tint with green gel color. For a zombie shade add the tiniest dot of black to mute the neon. Mix well.
- Load piping bag. Fit a piping bag with a small round tip size 4 to 6. No tip Use a zip top bag and snip a small opening. Fill with green frosting.
- Map the brain. Pipe a straight frosting line down the center of each cupcake to mark the midline. This creates two lobes.
- Pipe squiggles. On one side of the midline pipe connected S shapes from top to bottom to mimic brain folds. Repeat on the other side. Keep the lines close so no cake shows through.
- Add gore optional. Warm jam until fluid. Use a small spoon or a brush to drip a little into the grooves. Less is more to keep lines defined.
- Decorate optional. Add candy eyes to the cupcake wrapper or board near each cupcake for a playful display.
- Set and serve. Chill 15 minutes to set lines for transport. Serve at room temperature for the best texture.
Pro Tips & Variations
Tips for perfect results
* Use room temperature eggs and milk for an even crumb and better rise.
* Do not skip the hot liquid. It blooms cocoa for deeper chocolate flavor and a glossy batter that bakes up tender.
* Aim for a toothpaste thick frosting. It should hold its shape when you lift the beater. If lines soften, add a little more powdered sugar.
* Practice on parchment. Pipe two or three brain patterns on paper to find your line width and flow, then scrape the frosting back into the bag.
* Keep colors realistic. A muted green with a hint of gray reads brainy. Add a needle tip of black or a dot of purple to tone down neon.
Fun variations
- Vanilla base. Swap the cocoa for flour and add one extra teaspoon vanilla for a classic white cupcake under green brains.
- Red velvet brains. Add 2 tablespoons cocoa plus red gel color to the batter for crimson cupcakes that match the theme.
- Mint brains. Add one half teaspoon peppermint extract to the frosting for a fresh bite that pairs well with chocolate.
- Vegan. Use plant milk, vegan butter, and flax eggs 2 tablespoons ground flax mixed with 5 tablespoons water. Let gel 10 minutes. Bake until set since vegan bakes sometimes need an extra minute.
- Gluten free. Use a one to one gluten free flour blend and let the batter rest 10 minutes before baking for better hydration and less grit.
- Kid helper edition. Skip the jam. Let kids add candy eyes and green sprinkles. Pair with friendly party bites from Halloween Candy and classroom approved Fall Snacks .
Serving Suggestions
These cupcakes star on any themed spread. Build a balanced table with sweet and savory so guests can graze.
- Savory balance. Offer a warming main from your list of Halloween Dinner Ideas to anchor the sweets. Stuffed peppers carved like jack o lanterns look festive and fill bellies.
- Party platter. Mix in crunchy bites of Halloween Finger Foods so guests can grab and go between desserts.
- Dessert trio. Plate cupcakes with orange and white layers like Fall Snacks and fun cookie projects from your favorite Halloween Themed Food .
- Drinks. Add a themed punch for a complete look. For family friendly gatherings, see a great round up of non alcoholic ideas within Halloween Food Recipes .
- Grown up twist. Create a full Spooky Dinner menu with a dramatic meatloaf centerpiece, then finish with Zombie Brain Cupcakes for a cohesive theme.
Storage & Reheating
Room temperature
* Keep frosted cupcakes in an airtight container up to 2 days at cool room temperature away from direct sun.
Refrigerator
- Store in a sealed container up to 5 days. Bring to room temperature 30 to 45 minutes before serving for the best texture.
Freezer
- Freeze unfrosted cupcakes up to 2 months. Wrap each in plastic, then in a freezer bag. Thaw at room temperature. Frost once fully thawed.
- Freeze frosting in an airtight container up to 2 months. Thaw in the fridge, then beat briefly and adjust with a teaspoon of cream if needed.
Reheating
- Cupcakes do not need reheating. If the crumb feels firm from chilling, a quick 10 minute rest at room temperature softens it.
FAQ about Zombie Brain Cupcakes
Q. Can I make Zombie Brain Cupcakes a day ahead
A. Yes. Bake and cool the cupcakes, then store covered at room temperature. Frost the day of serving or frost and chill overnight, then let them sit at room temperature before serving.
Q. How do I get the brain lines to look defined
A. Use a small round tip and thick frosting. Pipe slowly and keep the lines close. Chill the frosted cupcakes 15 minutes to set the pattern.
Q. Can I color the frosting without gel
A. Liquid color can thin frosting. If you only have liquid drops, start with a thicker frosting and add color slowly. Gel gives stronger color with less liquid.
Q. What is a good menu to serve with these for a party
A. Mix savory and sweet. Try a platter of Halloween Food Recipes , a tray of Spooky Snacks , and a main from your favorite Halloween Dinner Ideas .
Q. How can I simplify for a classroom
A. Skip the jam drizzle. Use green brains only. Add a small candy eye on the board next to each cupcake for fun without mess. Consider nut free and dye sensitive classrooms and offer an uncolored frosting option.
Final Thoughts on Zombie Brain Cupcakes
When you want a showstopper that still tastes like a classic cupcake, Zombie Brain Cupcakes deliver. The method is beginner friendly, the ingredients are pantry simple, and the brainy piping turns every batch into a party centerpiece. Save this post to your Halloween board on Pinterest so you can find it fast when October planning starts. If you try it, leave a comment with your best brain piping tips or flavor twists. I love seeing your versions, whether mint green for kids or jam glazed for maximum drama.
For more inspo, explore quick bakes like Halloween Food Recipes , classroom friendly Spooky Snacks , and easy savory bites from your go to list of Halloween Themed Food . Subscribe for fresh ideas all season so your table stays festive without stress. Then bake a batch of brains and watch them disappear.
Zombie Brain Cupcakes
Ingredients
Equipment
Method
- Preheat oven to 350°F. Line a muffin tin with 12 paper liners.
- Whisk flour, sugar, cocoa, baking powder, baking soda, and salt in a large bowl until no streaks remain.
- In a second bowl, whisk eggs, milk, oil, and vanilla until smooth.
- Pour wet ingredients into dry ingredients and whisk until mostly combined. Batter will be thick.
- Pour in hot coffee or water and whisk until smooth and shiny. Batter will be loose.
- Divide batter evenly among liners, filling two-thirds full for domed tops.
- Bake 18 to 21 minutes until tops spring back and a toothpick comes out with a few moist crumbs. Avoid overbaking.
- Cool cupcakes in pan 5 minutes, transfer to rack to cool completely.
- Beat softened butter until creamy and pale, gradually add powdered sugar, salt, vanilla, and cream. Beat until fluffy. Adjust sugar or cream to desired thickness.
- Tint frosting with green gel color and a tiny dot of black for a muted zombie shade. Mix well.
- Fill piping bag fitted with a small round tip (size 4-6) or use a zip-top bag with a small snip.
- Pipe a straight frosting line down the center of each cupcake to create two lobes.
- On each side of the midline pipe connected S shapes from top to bottom to mimic brain folds, keeping lines close.
- Optionally, warm jam and drip into grooves for a gore effect, using less glaze to keep lines defined.
- Optionally, add candy eyes near cupcakes for playful decoration.
- Chill 15 minutes to set frosting lines for transport. Serve at room temperature.
1 thought on “Easy Spooky Zombie Brain Cupcakes Recipe for Halloween”
Comments are closed.