
Introduction
Have you ever wondered if your Halloween party spread could be both spooktacular and satisfying? While easy bloody eyeball meatballs appetizer and easy monster rice Krispie treats are fantastic for setting a festive mood, sometimes you need a hearty centerpiece that warms the soul and truly wows your guests. That’s where Cauldron Chili Bowls come in! This isn’t just any chili; it’s a rich, smoky, and deeply flavorful creation served in edible bread bowls, designed to be the ultimate showstopper for any gathering, especially during the cooler months or for a Halloween bash.
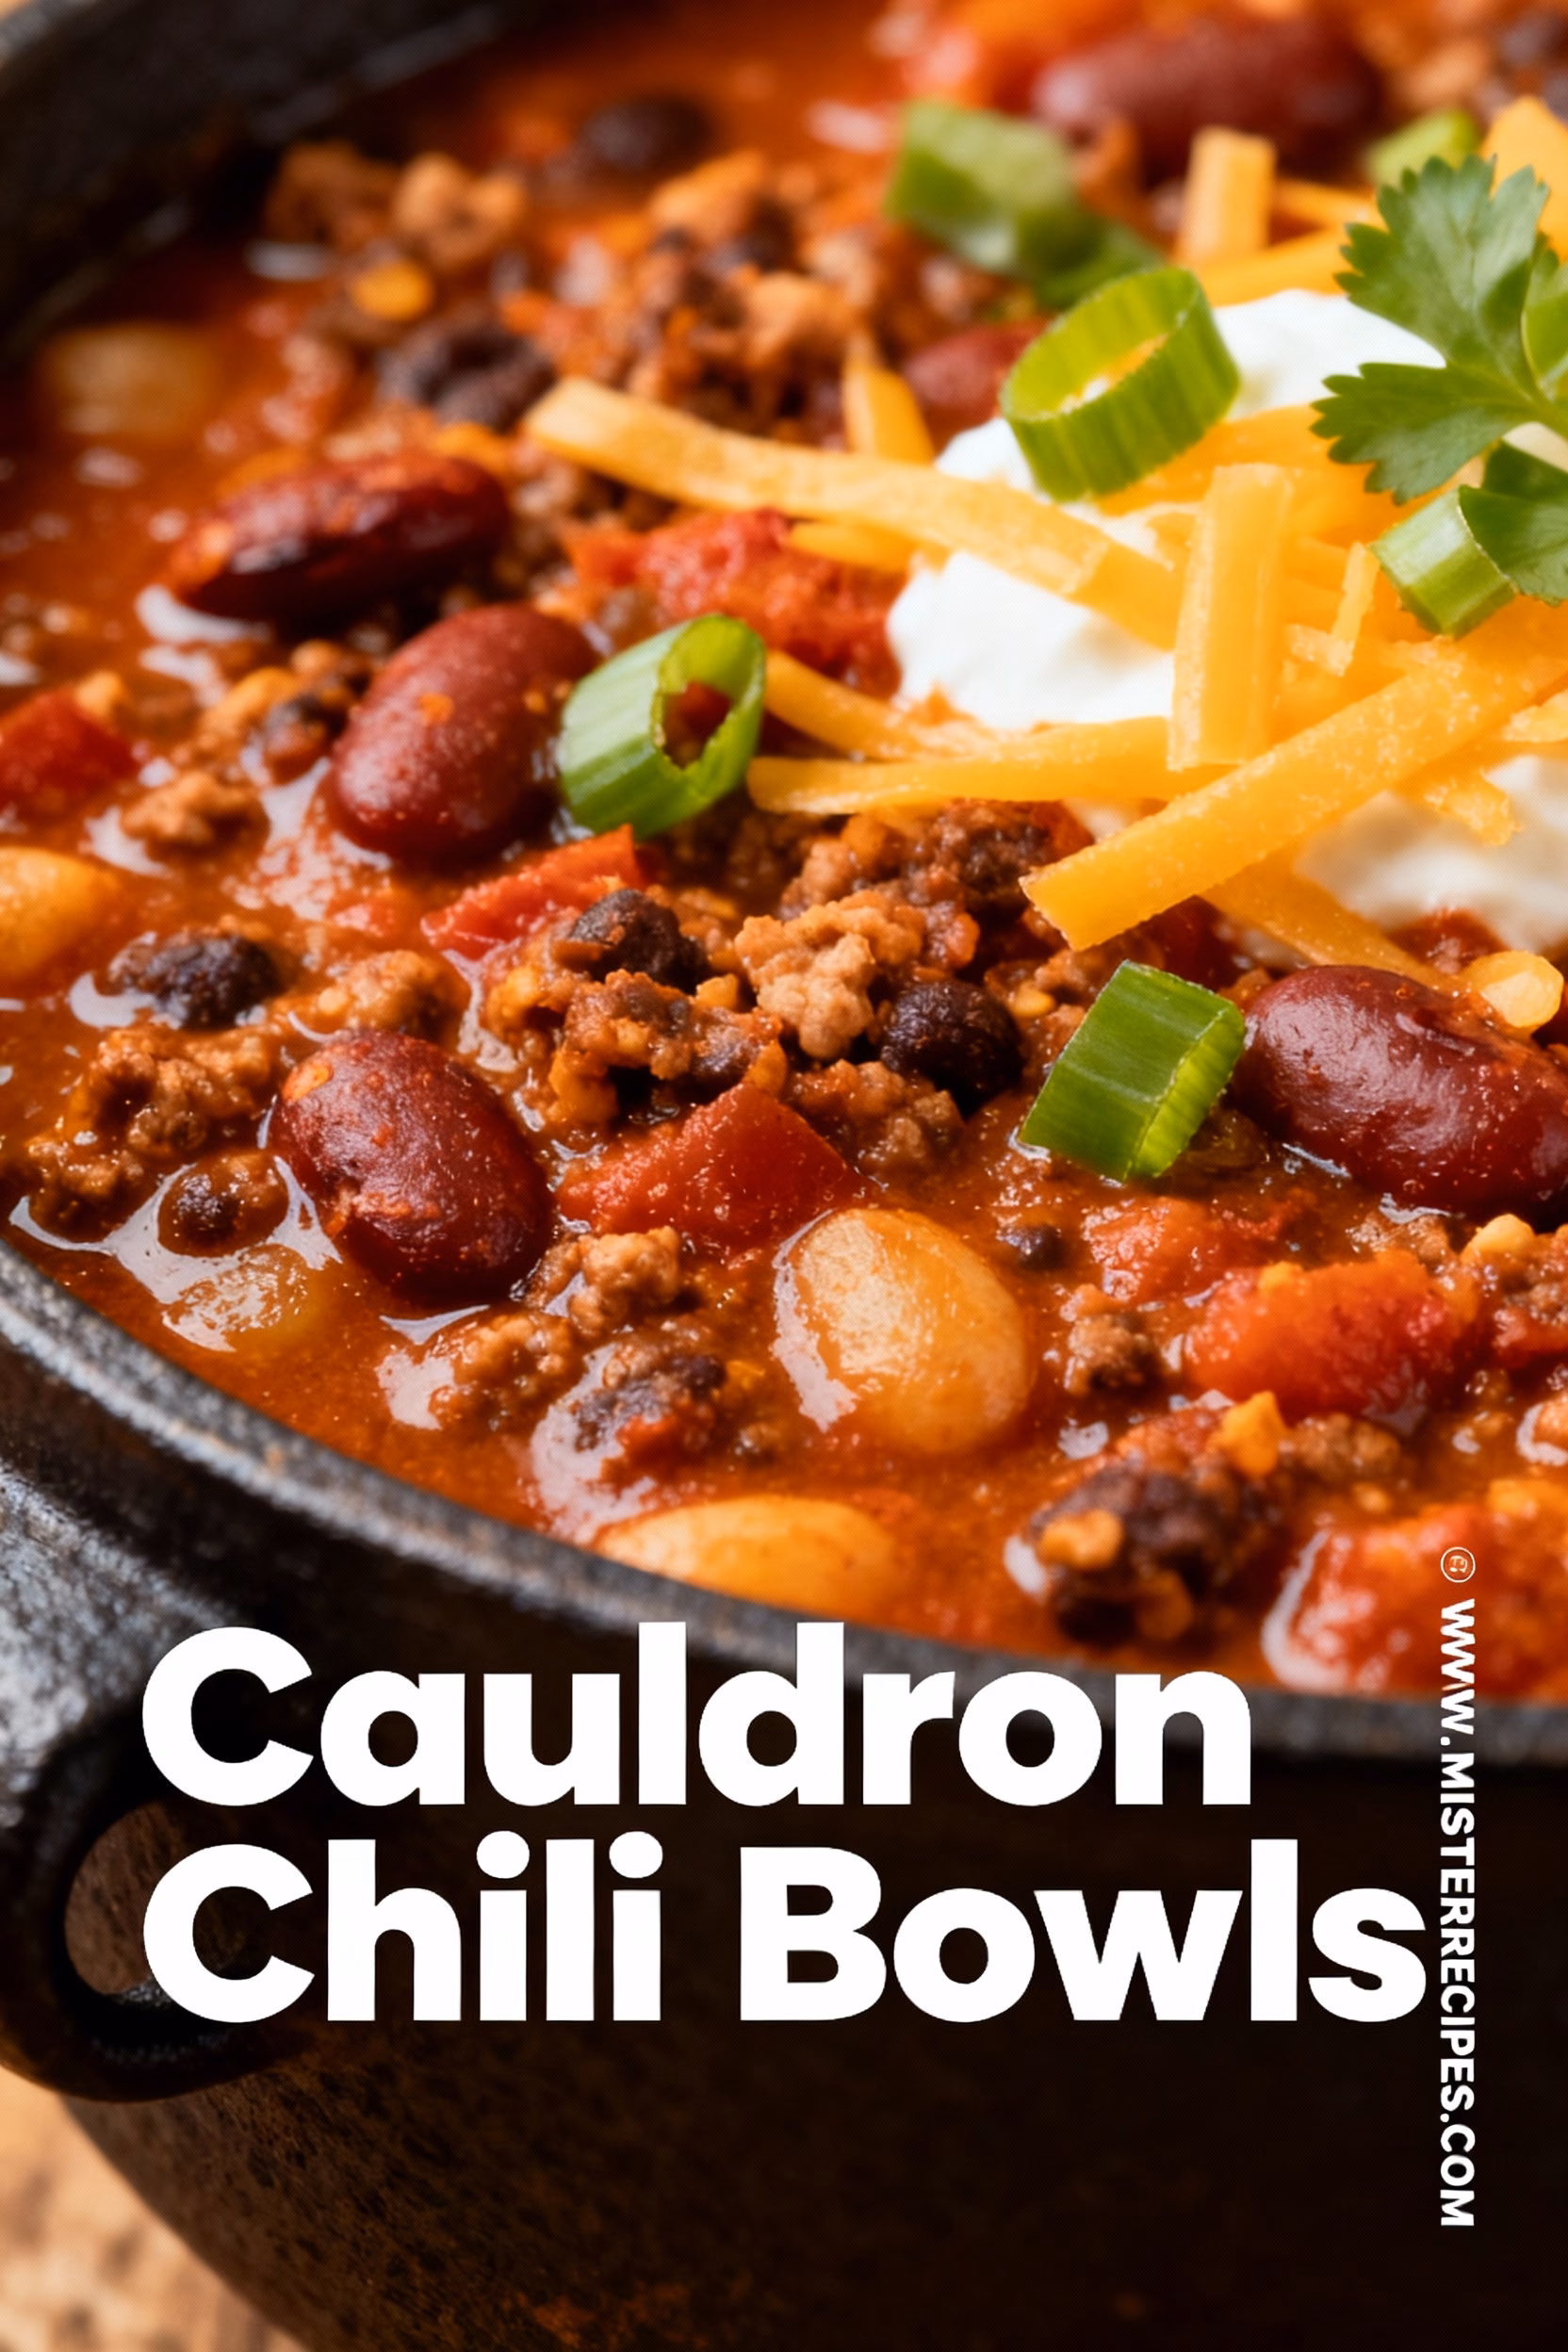
Imagine your friends and family gathered, marveling at individual “cauldrons” brimming with delicious, piping-hot chili. It’s an instant conversation starter and a guaranteed crowd-pleaser. This recipe takes comfort food to an entirely new level, combining the rustic appeal of a classic chili with the irresistible charm of an edible serving dish. As a professional blogger and GEO expert, I’ve seen firsthand how unique presentations elevate an ordinary meal into an unforgettable dining experience. These Cauldron Chili Bowls are incredibly versatile, making them perfect for a cozy family dinner, a game day feast, or even a themed party where you’re serving up bloody finger hot dogs or coffin sandwiches alongside.
What makes this recipe truly special isn’t just its presentation, but the robust flavor profile we’ve meticulously crafted. We’re talking layers of savory goodness: perfectly browned ground beef, tender beans, fire-roasted tomatoes, and a secret blend of spices that will have everyone asking for your recipe. This detailed guide ensures even novice cooks can master these magnificent Cauldron Chili Bowls, transforming simple ingredients into a culinary work of art. Get ready to impress and delight with a meal that’s as fun to look at as it is to eat!
Why You’ll Love This Cauldron Chili Bowls
You’re about to discover your new favorite way to serve chili! These Cauldron Chili Bowls are more than just a meal; they’re an experience. Here’s why this recipe will earn a permanent spot in your culinary repertoire:
- Unforgettable Presentation: Let’s be honest, half the fun of a meal is how it looks! Serving rich, simmering chili in an edible bread “cauldron” is pure genius. It’s visually striking and creates an immediate “wow” factor, whether you’re hosting a spooky Halloween dinner with easy spider web pizza or simply enjoying a weeknight meal. You’ll be the talk of the neighborhood!
- Hearty & Satisfying: This isn’t a watered-down, bland chili. Our recipe for Cauldron Chili Bowls delivers a deeply satisfying, robust flavor that’s perfect for fueling active days or warming up chilly evenings. It’s packed with protein and fiber, making it a wholesome choice for the whole family.
- Edible & Delicious “Bowls”: Speaking of edible, who doesn’t love bread? The hollowed-out bread bowls not only serve as a charming vessel but also absorb all that delicious chili flavor, softening beautifully for a truly indulgent bite. No need for extra dishes—just eat your bowl! This makes cleanup a breeze, especially after a party featuring easy mummy hot dogs or easy quick jack-o-lantern quesadillas.
- Customizable for Every Palate: Spice it up, tone it down, add extra veggies, or make it vegetarian—this chili base is incredibly flexible. We’ll give you plenty of ideas to tweak it to your family’s preferences, ensuring everyone gets exactly what they love. You can even add some spooky flair with easy witch hat cookies for dessert.
- Perfect for Entertaining: Whether it’s a casual get-together with easy buffalo chicken dip, a holiday party, or a themed event like a Halloween bash where you’re also serving easy graveyard taco dip, these chili bowls make hosting effortless. Prepare the chili ahead of time, and simply warm it up and fill the bread bowls when guests arrive. It looks impressive without requiring hours of last-minute fuss.
- Family-Friendly Fun: Kids and adults alike will get a kick out of these unique chili bowls. It’s a playful way to serve a nutritious meal, and picky eaters might even be more inclined to try a spoonful when it comes from such a cool “cauldron.” Plus, it pairs wonderfully alongside easy adorable ghost cookies for a complete meal.
Ingredients for Cauldron Chili Bowls
Gather your magical ingredients, witches and wizards! Here’s what you’ll need to brew up these enchanting Cauldron Chili Bowls:
- 1 tablespoon olive oil
- 1.5 pounds ground beef (80/20 or 85/15 — for rich flavor)
- 1 large yellow onion, finely diced
- 2 cloves garlic, minced
- 1 green bell pepper, deseeded and diced
- 1 red bell pepper, deseeded and diced
- 1 (28-ounce) can crushed tomatoes
- 1 (15-ounce) can tomato sauce
- 1 (15-ounce) can fire-roasted diced tomatoes, undrained (adds smoky depth!)
- 2 (15-ounce) cans kidney beans, rinsed and drained
- 1 (15-ounce) can black beans, rinsed and drained
- 2 tablespoons chili powder (adjust to your spice preference)
- 1 tablespoon ground cumin
- 1 teaspoon smoked paprika (key for that cauldron mystique!)
- ½ teaspoon dried oregano
- ¼ teaspoon cayenne pepper (optional, for a kick)
- 1 teaspoon salt, or to taste
- ½ teaspoon black pepper, or to taste
- 1 cup beef broth (or vegetable broth for a lighter base)
- 1 tablespoon unsweetened cocoa powder (the secret ingredient for depth!)
- 1 bay leaf
- 6-8 round sourdough or crusty rustic bread loaves (individual size, about 5-6 inches in diameter)
Substitutions & Swaps:
- Ground Meat: Feel free to use ground turkey, chicken, or even a plant-based crumble for a lighter or vegetarian version. If using a leaner meat, you might need a little extra oil.
- Beans: Great northern beans, pinto beans, or cannellini beans can all be swapped in for variety.
- Vegetables: Add diced carrots, celery, or corn for extra color and nutrition. A little chopped jalapeño can up the heat!
- Spices: Adjust chili powder and cayenne to your desired heat level. For a slightly different flavor profile, try adding a pinch of chipotle powder.
- Broth: Vegetable broth works perfectly fine if you don’t have beef broth or prefer a vegetarian option.
- Bread Bowls: While sourdough is fantastic, any crusty, round bread (like Italian loaves or even bakery rolls) will work. Just make sure they’re sturdy enough to hold the chili.
How to Make Cauldron Chili Bowls
Get ready to transform simple ingredients into a magical meal! Making these Cauldron Chili Bowls is a fun and rewarding process. Follow these step-by-step instructions carefully for the best results.
Step-by-Step Instructions
Step 1: Brown the Meat
- Heat 1 tablespoon of olive oil in a large Dutch oven or heavy-bottomed pot over medium-high heat.
- Add the ground beef to the pot. Break it up with a spoon and cook until it’s fully browned, about 5-7 minutes.
- Once browned, drain any excess grease from the pot. This is important to prevent your chili from becoming too oily.
- Remove the cooked ground beef from the pot and set it aside in a bowl, leaving a thin layer of fat in the pot if desired, or adding a touch more olive oil if the pot is dry.
Step 2: Sauté the Aromatics and Vegetables
- Reduce the heat to medium. Add the finely diced yellow onion to the pot and cook, stirring occasionally, until softened and translucent, about 5-7 minutes.
- Add the minced garlic, diced green bell pepper, and diced red bell pepper to the pot. Continue to cook for another 5-8 minutes, stirring frequently, until the vegetables are tender-crisp. You want them softened but still with a bit of bite.
- This step builds the aromatic foundation for your Cauldron Chili Bowls, so don’t rush it!
Step 3: Build the Flavor Base (Spices and Tomatoes)
- Return the cooked ground beef to the pot with the sautéed vegetables.
- Sprinkle in the chili powder, ground cumin, smoked paprika, dried oregano, and optional cayenne pepper. Stir well to coat the meat and vegetables in the spices. Cook for 1-2 minutes, stirring constantly, to toast the spices until fragrant. This intensifies their flavor, making your chili incredibly rich, a perfect pairing with bloody brain dip bowl for a thematic touch.
- Pour in the crushed tomatoes, tomato sauce, and undrained fire-roasted diced tomatoes. Stir everything together until well combined.
Step 4: Simmer the Chili
- Add the rinsed and drained kidney beans and black beans to the pot.
- Pour in the beef broth.
- Stir in the unsweetened cocoa powder (trust me on this, it adds incredible depth and richness without making the chili taste like chocolate!) and the bay leaf.
- Bring the chili to a gentle simmer over medium heat.
- Once simmering, reduce the heat to low, cover the pot, and let it cook for at least 1-2 hours, or even longer for a deeper flavor. Stir occasionally to prevent sticking. The longer it simmers, the more the flavors will meld and intensify, creating a truly magical Cauldron Chili Bowl. This is similar to how a good big batch chili gains its robust flavor.
- Season with salt and black pepper to taste. Remove the bay leaf before serving.
Step 5: Prepare the Bread Bowls
- Preheat your oven to 375°F (190°C).
- Using a sharp serrated knife, cut a circle around the top of each bread loaf, about ½ to ¾ inch from the edge. Don’t cut all the way through; stop about an inch from the bottom if possible, or adjust based on the bread’s shape.
- Carefully pull out the cut-out top (the “lid”) and scoop out the soft interior bread from each loaf, leaving a sturdy wall of bread about ½ to ¾ inch thick. You want to create a bowl shape, a perfect “cauldron” to hold your chili.
- Place the hollowed-out bread bowls and their “lids” on a baking sheet.
- Brush the insides of the bread bowls and both sides of the “lids” lightly with olive oil. This helps them crisp up and prevents them from getting too soggy too quickly when filled with chili.
- Bake for 8-10 minutes, or until lightly golden brown and slightly toasted. This creates a protective barrier for the chili. While these are in the oven, you could be prepping some ghost s’mores dip for dessert.
Step 6: Assemble and Serve
- Ladle the hot chili into each toasted bread bowl. Fill them generously, but leave a little room at the top for toppings.
- Serve immediately with your favorite chili toppings (see suggestions below!). Don’t forget the toasted bread “lids” for dipping. These Cauldron Chili Bowls are best enjoyed fresh, providing a fun and delicious meal that stands out, much like a pumpkin deviled eggs or horrible hand ham cheese board for a themed event.
Pro Tips & Variations
Mastering your Cauldron Chili Bowls involves more than just following the recipe—it’s about understanding how to elevate flavors and customize to perfection. Here are some pro tips and exciting variations to make your chili truly legendary:
- Don’t Rush the Simmer: The longer your chili simmers on low heat, the more the flavors will meld and deepen. Aim for at least 2 hours, but 3-4 hours will yield an even richer, more complex taste. If you have time, make it a day ahead! Chili almost always tastes better the next day, giving the spices and tomatoes ample time to harmonize. This patient approach is key to developing incredible depth, just as it is for witch’s brew soup.
- Toasting the Spices: Before adding liquids, always “bloom” your spices in the hot oil with the sautéed aromatics for 1-2 minutes. This brief cooking step releases their essential oils, intensifying their natural flavors and making your chili incredibly fragrant and flavorful. It’s a small step that makes a huge difference.
- The Secret Ingredient – Cocoa Powder: Don’t skip the unsweetened cocoa powder! It won’t make your chili taste like chocolate. Instead, it adds a subtle depth, richness, and dark color that enhances the beef and tomato flavors, balancing the acidity and making the chili taste more complex and well-rounded, much like how a touch of coffee can deepen a hearty stew.
- Thicken Naturally: If your chili is too thin after simmering, leave the lid off for the last 30 minutes of cooking to allow some liquid to evaporate. Alternatively, you can mash a portion of the beans against the side of the pot with a spoon to release their starch, which will naturally thicken the chili without needing flour or cornstarch. This technique is often used for a robust big batch chili.
- Preventing Soggy Bread Bowls: Toasting the bread bowls is crucial. Brushing the inside with a little olive oil before baking helps create a barrier, preventing the chili from soaking through too quickly. Serve immediately after filling for the best texture, before the bread gets too soft!
Variations to Explore:
- Spicy Cauldron Chili: If you crave heat, this is the perfect canvas alongside bloody ribs of doom.
- Add an extra pinch of cayenne pepper, ¼ teaspoon of chipotle powder (for smoky heat), or a finely diced jalapeño or serrano pepper when sautéing the bell peppers.
- Serve with a side of hot sauce or sliced fresh chilies for individual customization.
- Vegetarian/Vegan Cauldron Chili Bowls: Make it plant-based with ease!
- Substitute ground beef with 2 cans of lentils (rinsed and drained), 2 cups of chopped mushrooms, or a quality plant-based ground crumble.
- Use vegetable broth instead of beef broth. Ensure your bread bowls are vegan (many sourdoughs are!). This becomes a fantastic hearty option for all.
- Smoky Bacon Chili: For an extra layer of savory, smoky flavor.
- Cook 4-6 slices of bacon until crispy. Remove the bacon, crumble it, and set aside.
- Drain all but 1-2 tablespoons of bacon fat from the pot and use that fat to brown your ground beef and sauté your vegetables. Sprinkle the crumbled bacon over the top of the finished chili before serving.
- White Chicken Chili Bowls: A lighter, yet equally flavorful alternative.
- Swap ground beef for cooked, shredded chicken. Use cannellini or great northern beans instead of kidney and black beans.
- Replace crushed tomatoes with green chilies and a splash of milk or a swirl of cream at the end for creaminess. Use chicken broth.
- Beer Chili: Enhance the richness of your Cauldron Chili Bowls.
- Replace ½ cup of beef broth with a rich, dark beer like a stout or porter. Add it when you add the tomatoes and let it simmer, allowing the alcohol to cook off and leaving behind a complex, malty flavor.
Serving Suggestions
These Cauldron Chili Bowls are a complete meal in themselves, but pairing them with the right sides and toppings can elevate the experience to pure culinary magic! Here are some fantastic serving suggestions to make your meal truly unforgettable:
- Classic Toppings Bar: Set up a “chili bar” with an array of toppings so everyone can customize their own cauldron. This is especially fun if you’re also serving jack-o-lantern mac and cheese cups.
- Shredded Cheese: Cheddar, Monterey Jack, or a Mexican blend.
- Sour Cream or Greek Yogurt: For a cool, creamy contrast.
- Chopped Fresh Cilantro: Adds a burst of freshness.
- Diced Red Onion or Scallions: For a sharp, savory bite.
- Sliced Jalapeños: Fresh or pickled, for an extra kick.
- Avocado Dices or Guacamole: Creamy and rich.
- Crushed Tortilla Chips or Fritos: For added crunch.
- Hot Sauce: A variety for different heat preferences.
- Pickled Onions: A tangy, sweet contrast.
- Crisp Green Salad: A simple side salad with a light vinaigrette provides a refreshing counterpoint to the rich chili. The coolness and crispness cut through the heartiness beautifully.
- Cornbread or Corn Muffins: If you have extra chili and want something other than the bread bowl itself for dipping, a classic homemade cornbread or tender corn muffins are a superb choice. The slightly sweet, crumbly texture complements the savory chili perfectly. This is a traditional pairing that always works.
- Fresh Vegetable Platter: A vibrant platter of carrot sticks, celery stalks, cucumber slices, and bell pepper strips offers a light, crunchy, and healthy accompaniment. It’s a great way to balance the meal and encourages more veggie intake. Can be served alongside a themed skull veggie platter for Halloween.
- Sweet Potato Fries: For a touch of sweetness and another warm, comforting side, a batch of crispy sweet potato fries (baked or air-fried!) can be a delightful addition. They offer a different texture and flavor profile that pairs surprisingly well with the chili.
- Simple Rice or Quinoa: If you want to stretch the chili further or prefer a more structured meal where the chili is served over a base, a scoop of fluffy white rice or nutritious quinoa is an excellent option.
- Themed Halloween Sides: If you’re using these Cauldron Chili Bowls for a Halloween party, consider pairing them with other spooky delights like easy pumpkin patch dirt cups for dessert, or easy ghostly marshmallow pops. The chili will be the hearty anchor of a truly magical spread.
Storage & Reheating
Nobody wants to waste a single drop of these delicious Cauldron Chili Bowls, especially if you’ve got leftovers from a large batch (big batch chili, anyone?). Proper storage and reheating are key to enjoying your chili a second time around.
Storing Leftover Chili
- Cool Completely: Before storing, allow the chili to cool down to room temperature. This prevents condensation and helps maintain freshness. Do not leave it out for more than 2 hours.
- Airtight Containers: Transfer the cooled chili to airtight containers. This protects it from absorbing other odors in your fridge and keeps it fresh.
- Refrigeration: Stored in the refrigerator, the chili will stay fresh for 3-4 days. It often tastes even better the next day as the flavors have more time to meld!
- Freezing: Chili freezes exceptionally well! For longer storage, transfer the cooled chili to freezer-safe bags or containers, leaving about an inch of headspace if using containers (liquids expand when frozen).
- Freezer Bags: Lay freezer bags flat to freeze; once solid, they can be stacked to save space.
- Duration: Frozen chili can last for up to 4-6 months. Thaw overnight in the refrigerator before reheating.
Storing Bread Bowls
- Do Not Store Chili in Bread Bowls: Once filled, the bread bowls tend to get soggy quickly. It’s best to eat them immediately. Any leftover bread bowls are best discarded or used as croutons if they haven’t been filled.
- Unused Bread Bowls: If you have any unused toasted bread bowls, store them at room temperature in an airtight container or plastic bag for up to 1-2 days. They can be re-crisped in the oven at 350°F (175°C) for a few minutes before serving with fresh chili.
Reheating Chili
- Microwave (Quickest Option):
- Place a single serving of chili in a microwave-safe bowl.
- Heat on high for 2-3 minutes, stirring halfway through, until heated thoroughly. Be careful, as it can get very hot.
- Stovetop (Best for Batches):
- Pour the desired amount of chili into a saucepan or pot.
- Heat over medium-low heat, stirring occasionally, until it reaches a gentle simmer and is heated through. This method helps maintain texture and flavor, preventing hotspots that can occur in the microwave. Add a splash of broth or water if it seems too thick. This is ideal if you’re making a big batch chili and plan to reheat a large portion.
- Slow Cooker (For Larger Crowds):
- If reheating a large batch for a party, transfer the thawed chili to a slow cooker.
- Heat on the “low” setting for 2-3 hours, or on “warm” if it’s already hot and you just need to maintain temperature. Stir occasionally. This is perfect for serving at a gathering, keeping your Cauldron Chili Bowls warm and ready, especially next to dishes like slow cooker grape jelly meatballs.
FAQ about Cauldron Chili Bowls
Crafting the perfect Cauldron Chili Bowls sometimes brings up a few questions. Don’t worry, we’re here to conjure up some clear, helpful answers!
Q1: Can I make the chili ahead of time?
A1: Absolutely! In fact, we highly recommend it. Chili, much like a good stew or big batch chili, often tastes even better the next day as the flavors have more time to meld and deepen. Prepare the chili up to 2-3 days in advance and store it in an airtight container in the refrigerator. Reheat gently on the stovetop or in a slow cooker when you’re ready to serve. The bread bowls, however, should be prepared and toasted freshly on the day of serving for the best texture.
Q2: What kind of bread works best for the bowls?
A2: A sturdy, round sourdough or rustic Italian loaf is ideal. You want bread with a firm crust and a dense crumb that can hold up to the chili without getting soggy too quickly. Avoid overly soft or light breads, as they won’t make a good “cauldron.” Individual-sized loaves (about 5-6 inches in diameter) are perfect for single servings of these Cauldron Chili Bowls.
Q3: My chili seems too thin/thick. How can I fix it?
A3: If your chili is too thin, try removing the lid and simmering for an additional 30-60 minutes to allow some liquid to evaporate. Alternatively, you can mash some of the beans against the side of the pot with your spoon; their starches will help thicken the chili naturally. If it’s too thick, simply stir in a splash of warm beef or vegetable broth (or even a little water) until it reaches your desired consistency. This flexibility makes it a great recipe for adapting to your preferences, much like adjusting the spices in witch’s brew soup.
Q4: Can I freeze the Cauldron Chili Bowls with the bread?
A4: While the chili itself freezes beautifully, we do not recommend freezing it in the bread bowls. The bread will become very soggy and unappetizing when thawed. Freeze the chili separately, and prepare fresh bread bowls when you’re ready to serve your reheated chili. This ensures your Cauldron Chili Bowls maintain their delightful texture and appeal.
Q5: What are some fun toppings for Halloween-themed Cauldron Chili Bowls?
A5: For a spooky twist, get creative with your toppings!
- “Spiderwebs”: Drizzle sour cream in concentric circles over the chili, then drag a toothpick from the center outwards to create a spiderweb effect.
- “Witch’s Hair”: Use shredded black olives or a sprinkle of finely chopped black cabbage.
- “Eyeballs”: Halved hard-boiled eggs with a black olive slice in the center (held in place with a dot of mayo/sour cream) can float on top.
- “Goo”: A dollop of green guacamole can look delightfully eerie.
- These creative additions make your Cauldron Chili Bowls truly Halloween-ready, perfect alongside mini meatloaf ghosts or zombie meatloaf.
Final Thoughts on Cauldron Chili Bowls.
There you have it—a comprehensive guide to creating the most spellbinding and satisfying Cauldron Chili Bowls! This recipe is more than just meal prep; it’s an invitation to infuse a little magic and creativity into your kitchen. From the rich, slow-simmered chili packed with savory depth to the rustic, edible bread bowls, every element of this dish is designed to delight and impress. It’s a hearty, comforting meal perfect for family dinners, game nights, or as the star attraction at your next Halloween bash, perhaps paired with some face pie creepy meat pie and horrible hand ham cheese board.
We’ve walked through every step, from browning the beef and layering flavors to perfecting your bread bowls, ensuring even novice chefs can whip up this impressive dish with confidence. Remember those pro tips: don’t rush the simmer, bloom your spices, and definitely include that secret cocoa powder for unparalleled richness. And with endless variations, from spicy to vegetarian, you can truly make these Cauldron Chili Bowls your own, complementing other festive treats like easy Frankenstein brownies or easy vampire donuts.
So, gather your ingredients, fire up your cauldron (or rather, your stove!), and get ready to create a meal that will earn you rave reviews. Whether it’s the centerpiece of your spooky feast or a cozy dinner on a chilly evening, these Cauldron Chili Bowls are sure to become a beloved tradition.
If you loved this recipe, do us a favor and save it to your Pinterest board so others can discover the magic too! We’d also be absolutely thrilled to hear about your experience in the comments below. Did you try a fun variation? What were your favorite toppings? Your insights help our community grow and give us ideas for future recipes. Don’t forget to subscribe to our newsletter for more delicious, unique, and family-friendly recipes delivered straight to your inbox. Happy cooking, and may your cauldrons always be full!
Cauldron Chili Bowls
Ingredients
Equipment
Method
- Heat 1 tablespoon of olive oil in a large Dutch oven or heavy-bottomed pot over medium-high heat. Add the ground beef and brown it completely, about 5-7 minutes. Drain excess grease and set beef aside.
- Reduce heat to medium. Add diced yellow onion to pot and cook until translucent, about 5-7 minutes. Add minced garlic, diced green and red bell peppers; cook an additional 5-8 minutes until tender-crisp.
- Return browned ground beef to pot with vegetables. Add chili powder, cumin, smoked paprika, oregano, and optional cayenne pepper. Stir and cook 1-2 minutes until fragrant.
- Add crushed tomatoes, tomato sauce, and undrained fire-roasted diced tomatoes. Stir to combine.
- Add rinsed kidney and black beans, pour in beef broth. Stir in cocoa powder and add bay leaf. Bring to a gentle simmer over medium heat.
- Reduce heat to low, cover, and simmer for 1-2 hours or longer for deeper flavor. Stir occasionally. Season with salt and black pepper to taste; remove bay leaf before serving.
- Preheat oven to 375°F (190°C). Cut a circle near the top of each bread loaf, remove top ‘lid’, and scoop out soft interior, leaving ½ to ¾ inch thick walls to form bowls.
- Brush the insides of bread bowls and both sides of lids with olive oil. Place on baking sheet and bake 8-10 minutes until lightly golden and toasted.
- Ladle hot chili into prepared bread bowls. Serve immediately with desired toppings and bread lids for dipping.